
Building an inventory tool using DronaHQ and HarperDB
In this article, we will create an inventory tool using the DronaHQ Studio platform having database integration with HarperDB using REST API connector.
The inventory tool application will possess operational functionalities for effectively managing and observing the products within its HarperDB inventory.
HarperDB is a NoSQL database with SQL semantics. With flexible user-defined APIs, simple HTTP/s interface, and a high-performance single-model data store that accommodates both NoSQL and SQL workloads, HarperDB scales with your application from proof of concept to production. Install and manage on your hardware, or have them host it with HarperDB Cloud.
Prerequisite
- You should have an account on DronaHQ with Studio Login.
- You should know how to configure the REST API connector. You can learn more about configuring REST API with various authentication methods from here.
- You should have some knowledge of SQL/NoSQL language and queries.
Rest assured, everything will be covered in this article.
Setting Up: HarperDB
A HarperDB account is required. One can create a free account from here.
HarperDB offers three main ways to access the service, namely:
- HaperDB Studio: It is a web-based graphical user interface that allows users to create and manage HarperDB instances right from the interface. It also has several tools and features to aid the management process. You can find more info about this feature here.
- HarperDB Local Instance: This option allows users to install HarperDB locally on their computers. There are options to install HaperDB using docker, WSL, on Windows, or even on Linux OS. To find out more about this, click here.
- HarperDB Cloud: The cloud option allows you to access and use HarperDB from your application remotely without having a server running locally on your machine. Using this option, you can create a database instance online and use an API to communicate with the database. To find out more about this option, you can check here.
Users can manage their local or cloud instances through the studio if they choose.
Once you log in to the HarperDB account, you will land on its `studio` page.

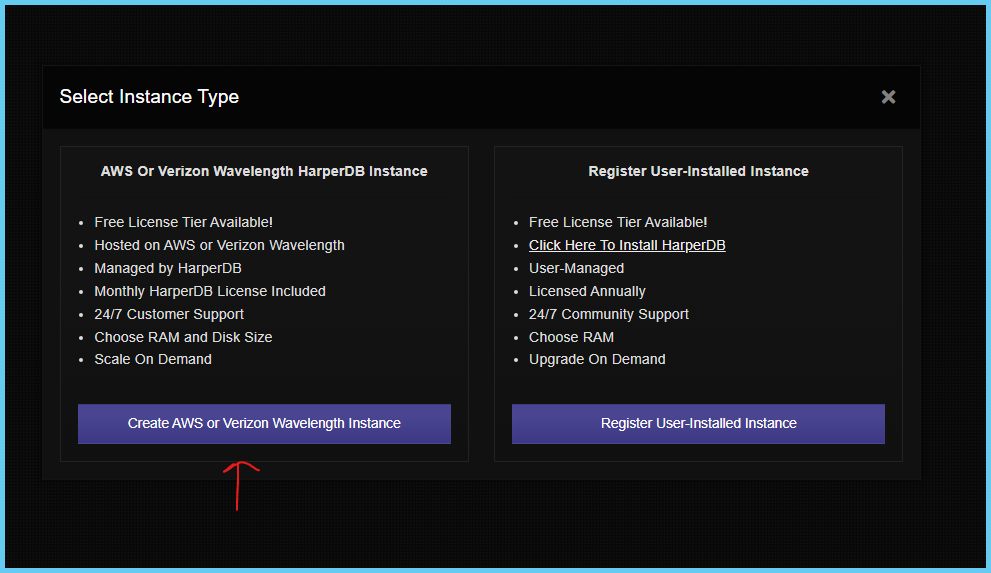
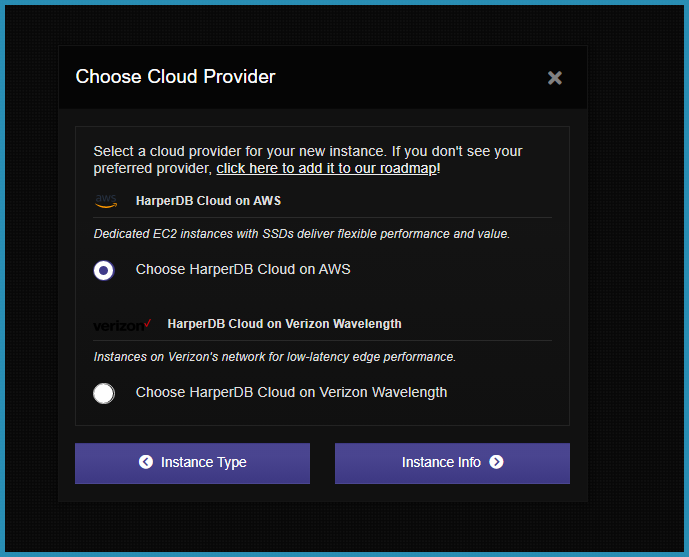
Before starting with anything, we need to create HarperDB cloud instance. Choose AWS or Verizon Wavelength HarperDB. It is a free Harper cloud hosting service.
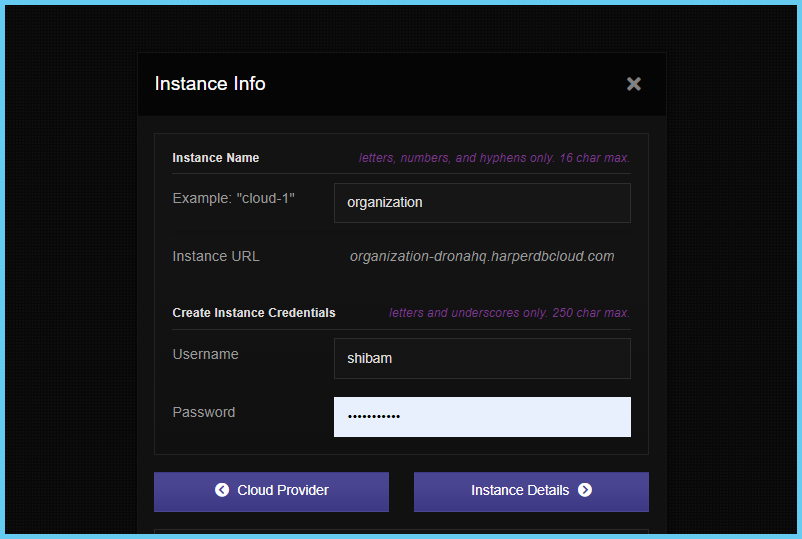
Click on Instance Info.
Provide the necessary details and make sure to keep your username and password of the database.
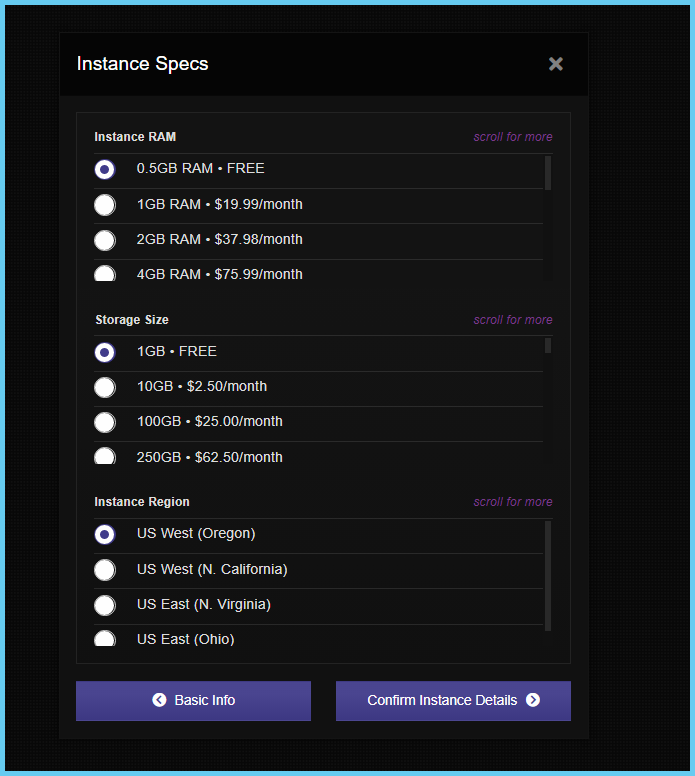
Confirm instance details.
It will show you an overview of all the options that you have chosen. Click on the button to agree to the terms and submit the form.
You should now see that it has begun creating your database instance on its cloud system.
You should now see that it has begun the process to create your database instance on its cloud system.
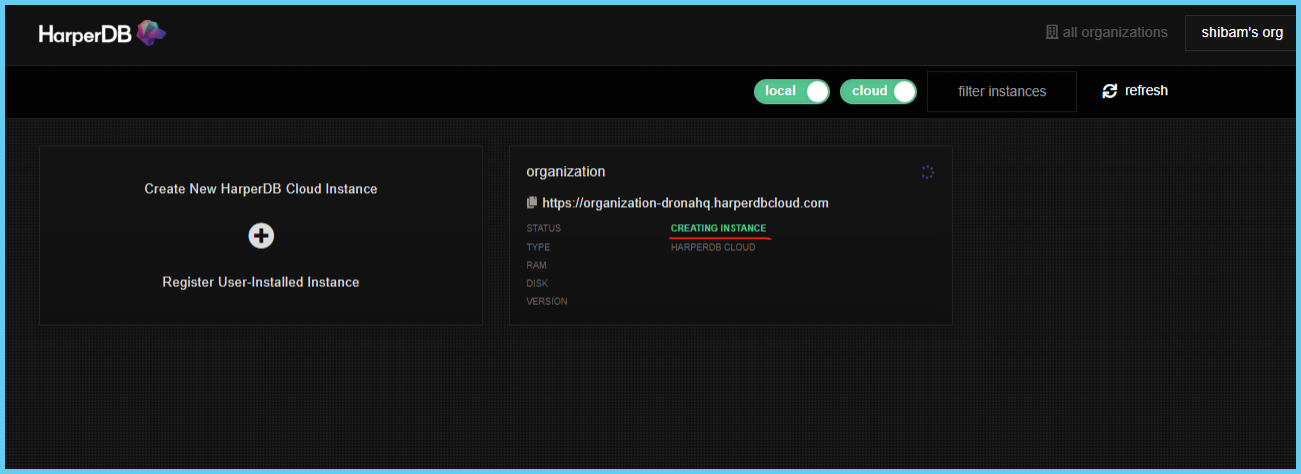
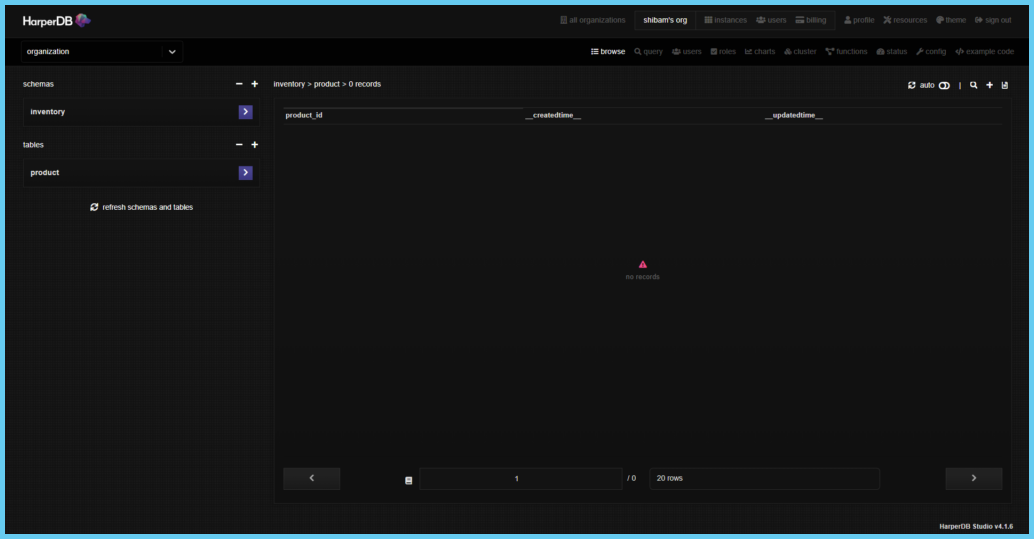
Creating an instance will take a few seconds. Once it’s done, we need to add a table and data to our database. Click on your instance. It will take you to a page where you can add tables and data.
On the left-hand side, we need to provide a name for our new schema. Let it be `inventory`.

Now, add a table name `product` with hash attr. Of `product_id`. The hash attribute is analogous to “Primary Keys” in relational databases and is a unique identifier for every entry in the Products table we just created.
Adding data: HarperDB
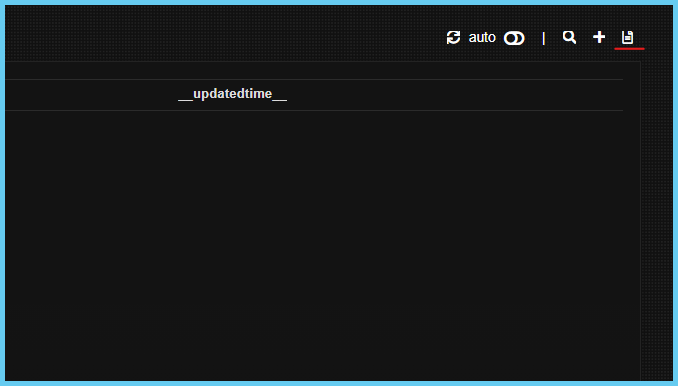
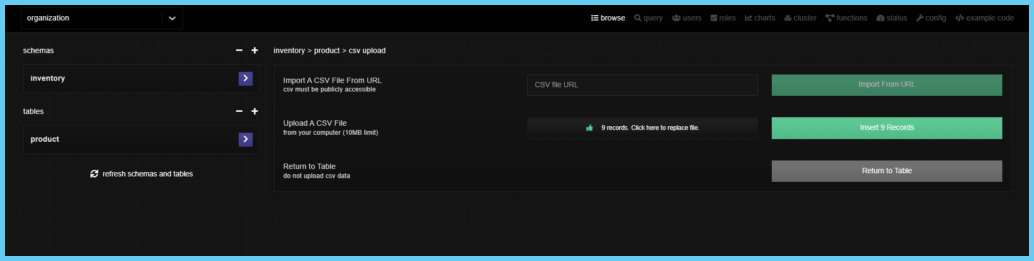
Now to add data, on the top right-hand side, we will use the option of uploading CSV.
Once we click on it, we get various options to import our CSV file. I have a `CSV file` ready for the database of inventory.
Click on Insert Records.
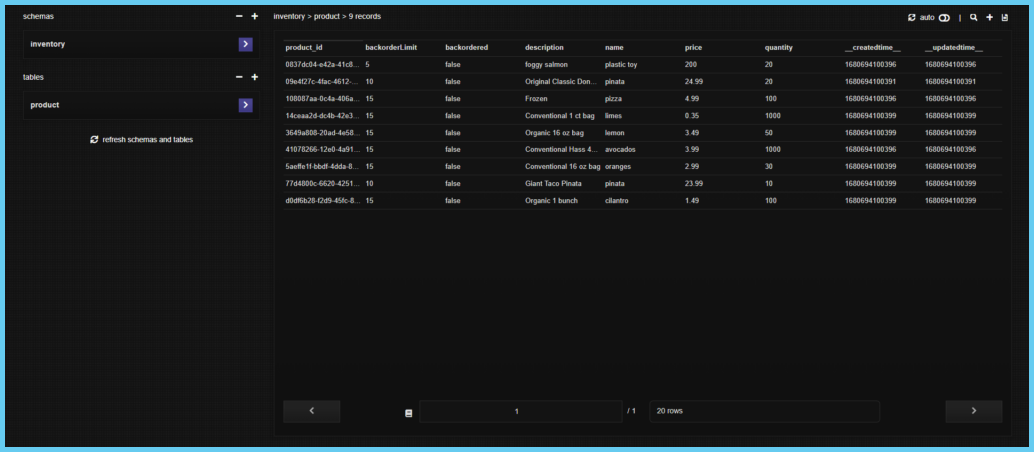
Your table will look something like this:
Building Inventory tool with DronaHQ
Now that we have data in our HarperDB instance table, next, we will build our product-managing microapp using DronaHQ Studio.
Create a new app, this should bring you to the development environment like the one shown below:

Configuring REST API connector: HarperDB
First, we need to set up the connection of the Studio with HarperDB by configuring the REST API connector. The HarperDB has a basic auth REST API configuration, you can read more about Configuring REST API – Basic Auth from our community article.
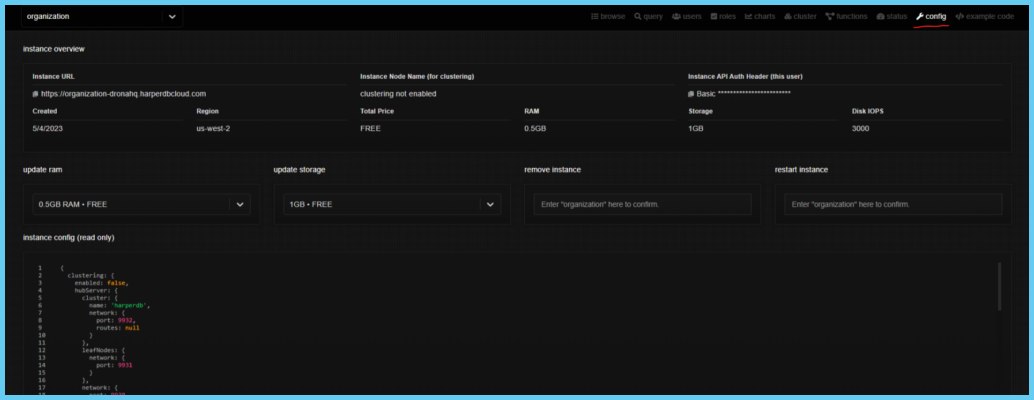
We can get our HarperDB API/Instance URL and header authorization key in the config section of the cloud instance dashboard.
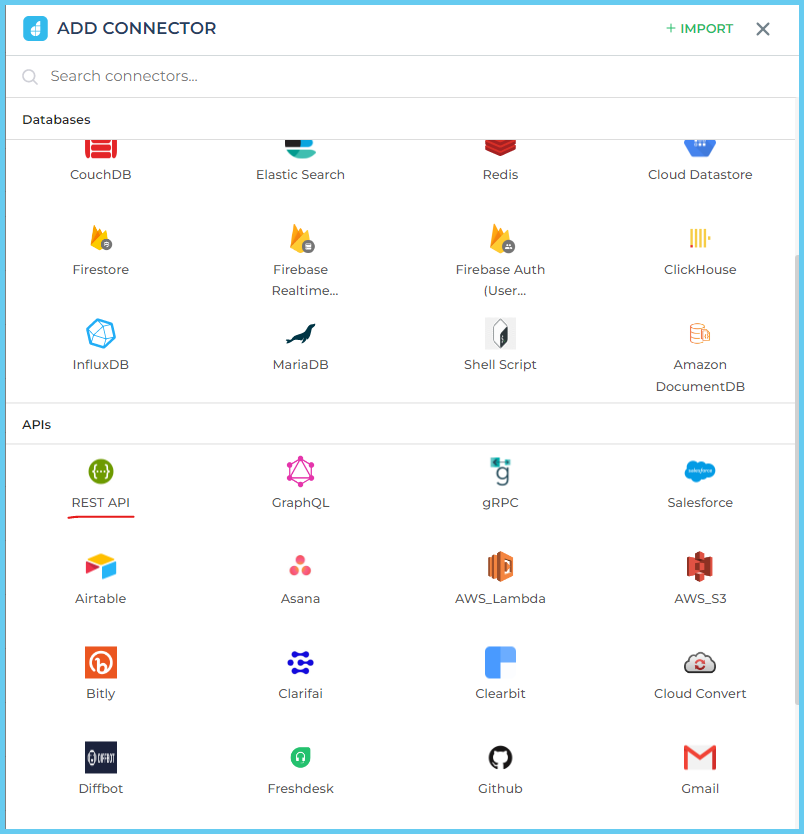
Add a connector of REST API.
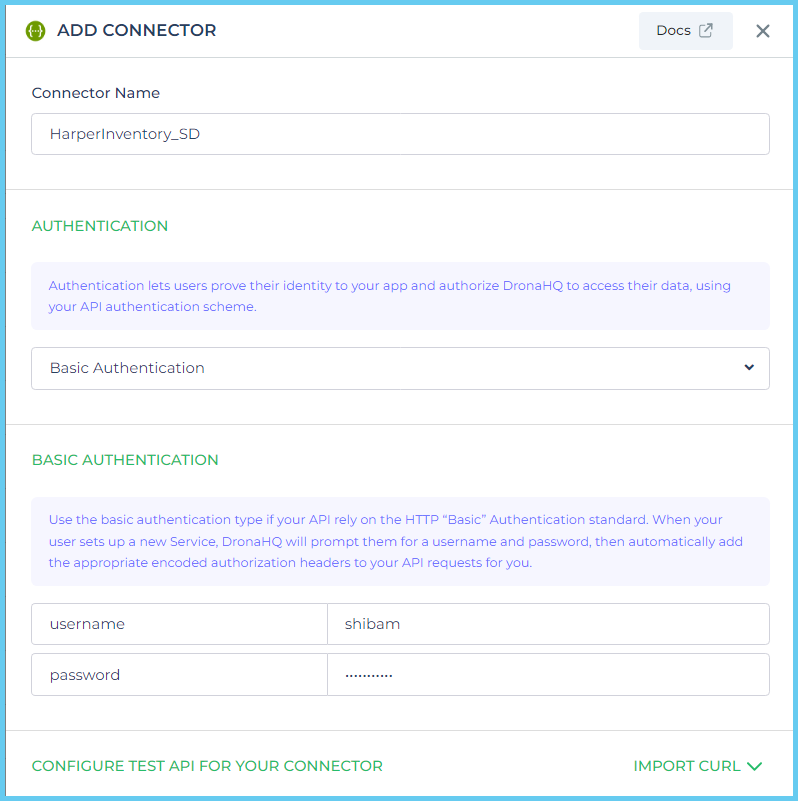
Select the authentication type as `Basic Authentication`. Provide the necessary details such as the connector name, username, and password. The username and password are the same as we have created for our HarperDB instance
.
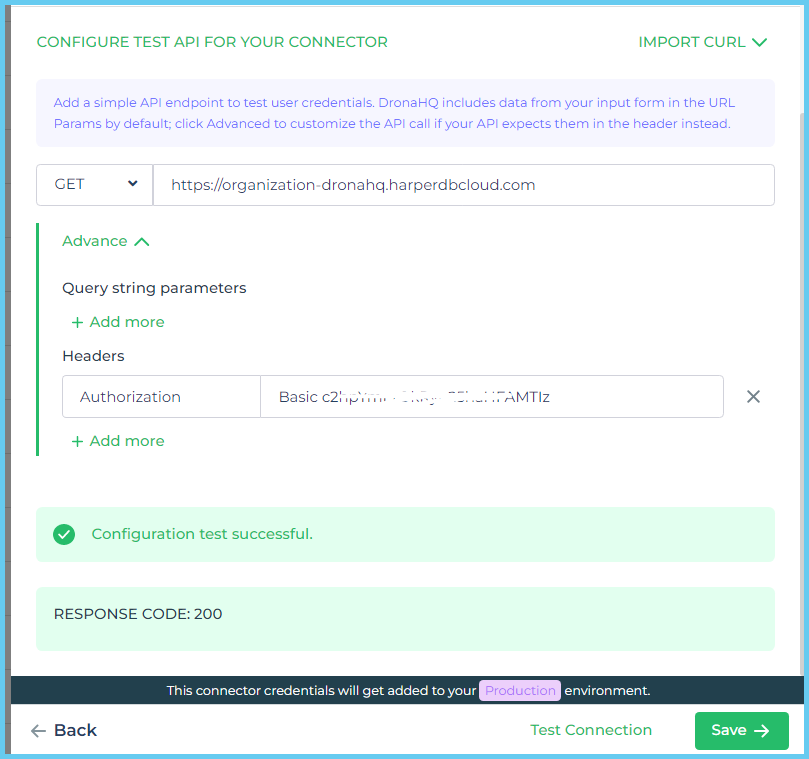
Paste the Instance URL and provide a header.
The value of Authorization in the headers is usually of the format: `Basic <Instance API Auth key>`.
Do Test Connection & Save.
Fetching Inventory Details
We will now add a sub-API to our configured HarperDB REST API connector to fetch the data from the database. Find your connector from the connectors list and click on +ADD API.

Enter the API name. Select the method as `POST`. Notice that even though we are retrieving data, instead of `GET` we are using the `POST` method.
Here we have provided the sub-API name as `getData`.Click on Advance, and select content type as `RAW`.
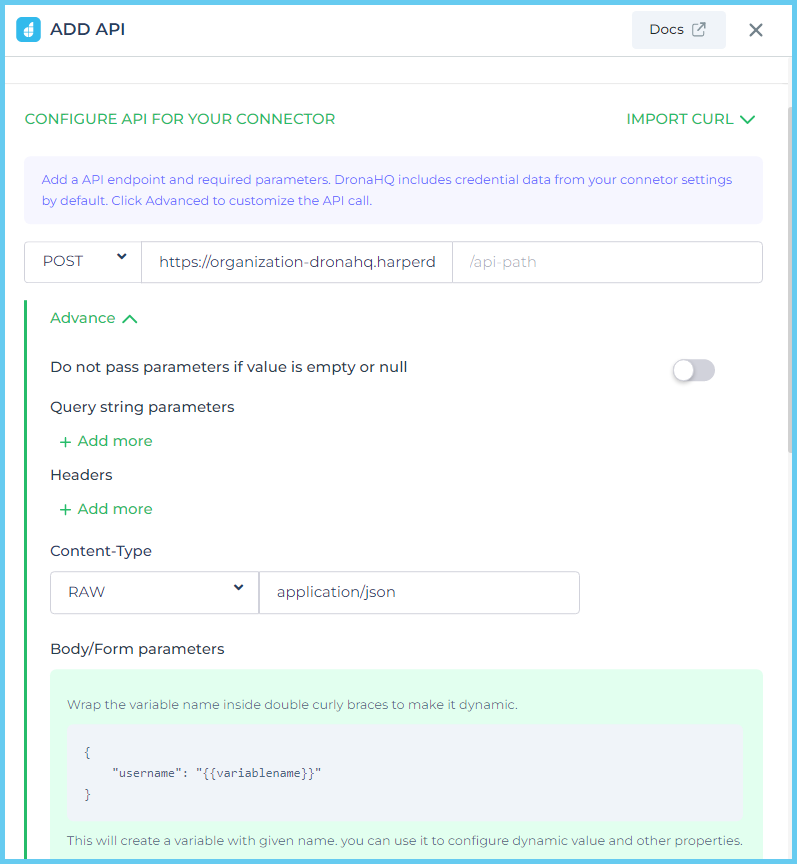
Under the Body/Form parameter section, we will write a query as part of the request body to fetch all the products from the Product table in our database using SQL query. Irrespective of not being a relational database, HarperDB can read SQL queries and interact with them as though it were a relational database.
{
“operation”: “sql”,
“sql”: “SELECT product_id, name, description, price, quantity, backorderLimit, backordered FROM inventory.product”
}
Here, we have made the operation type a “SQL” query and have written the SQL to query for all the data in the “product” table located under our earlier created “inventory” schema.
Click on Test API & Save.
Your sub-API to fetch data will be added.

Displaying Data
Now, let’s go to our studio builder view and drop a table grid control, to view our products. Go to the data bind section of the table grid control and select the connector.
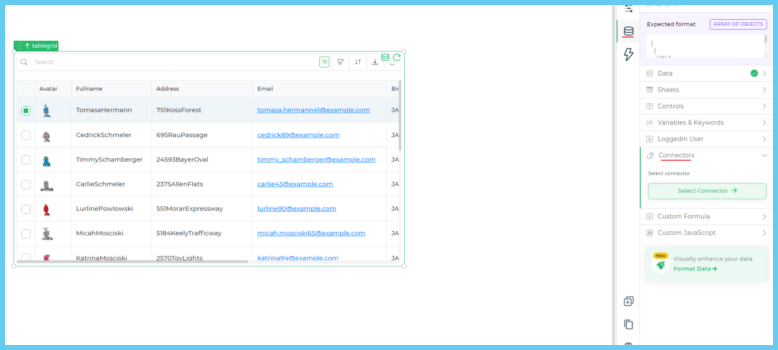
Simply select your HarperDb connector with the `getData` sub-API.
Make sure that the keys of columns are selected to bind to the control. Do a Test & Finish.

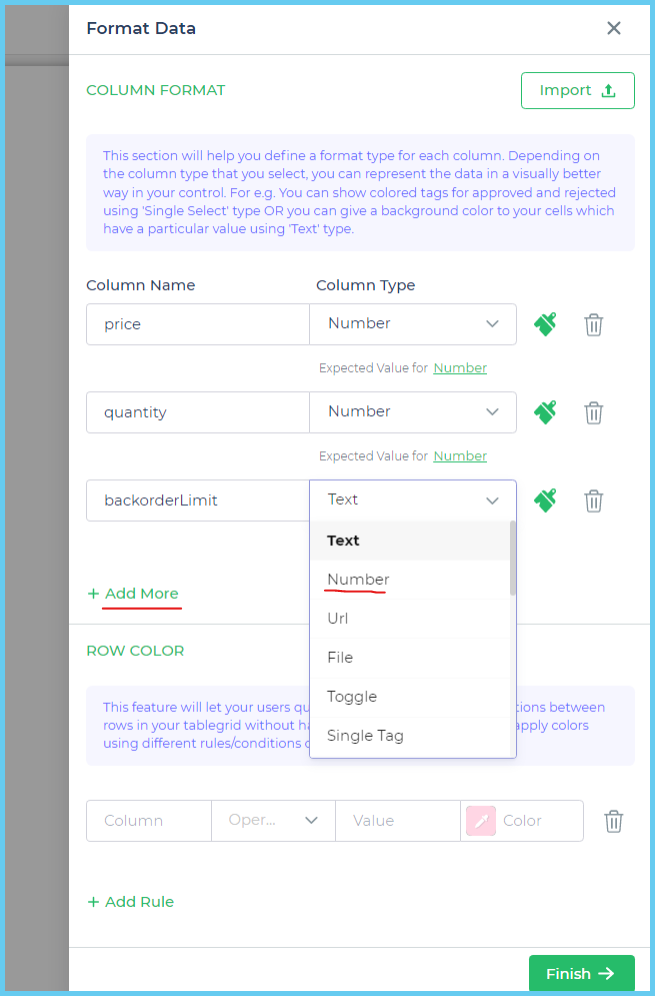
You can view the data from the database being populated in the table grid control. You can provide data formatting to the table grid columns. For instance, we can set the data type to the `number` of `Price`, `Quantity`, and `BackorderLimit` columns with the help of Format Data.

Add the column name and data type respectively to it. Click Finish.
Submitting Inventory Details via Form
Next, the task for this inventory tool is to save new entries in our HarperDB. To send the data, we need to add another sub-API.
Find your connector from the connecter list and click on +ADD API.

Enter the API name. Select the method as `POST`.
Here we have provided the sub-API name as `sendData`.Click on Advance, and select content type as `RAW`.
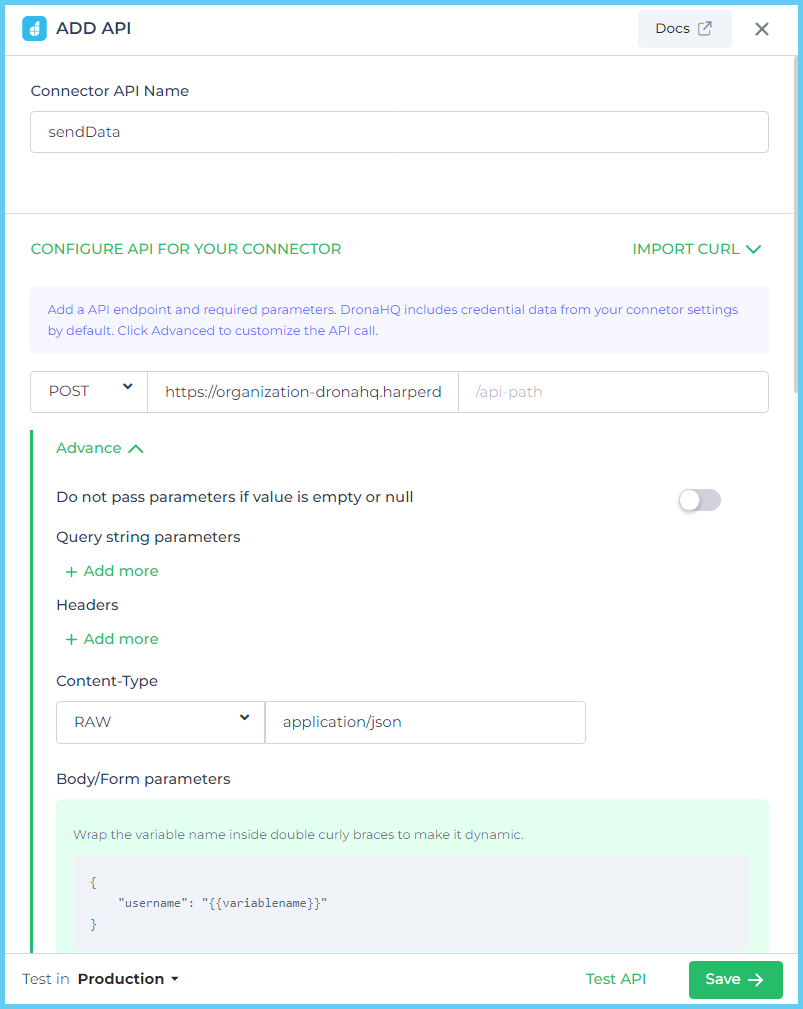
Under the Body/Form parameter section, we will write a query as part of the request body to send data of a product to the Product table in our database using SQL query.
Query:
{
“operation”: “insert”,
“schema”: “inventory”,
“table”: “product”,
“records”: [
{
“name”: “{{name}}”,
“description”: “{{description}}”,
“price”: “{{price}}”,
“quantity”: “{{quantity}}”,
“backorderLimit”: “{{backorderLimit}}”,
“backordered”: “{{backordered}}”
}
]
}
Here, we have made the operation type as an `insert` query with schema and table details.
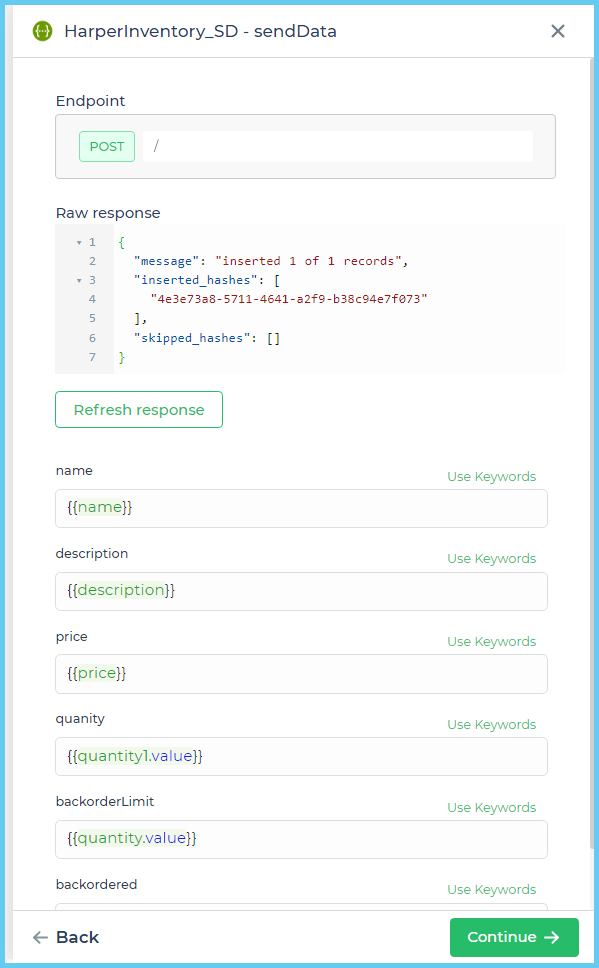
Then the SQL query is provided inside `records`. The value of all the attributes is written as variables. This will help us to send data dynamically from our app.
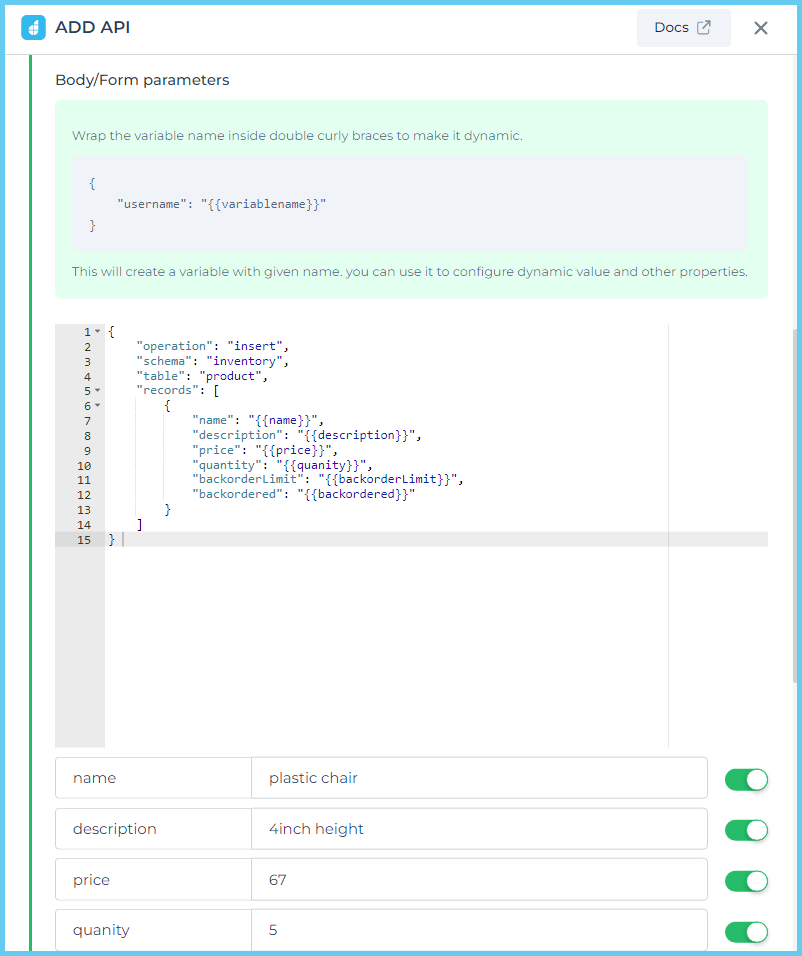
In the above image, we are providing records of the product table using the variables.
Click on Test API & Save.
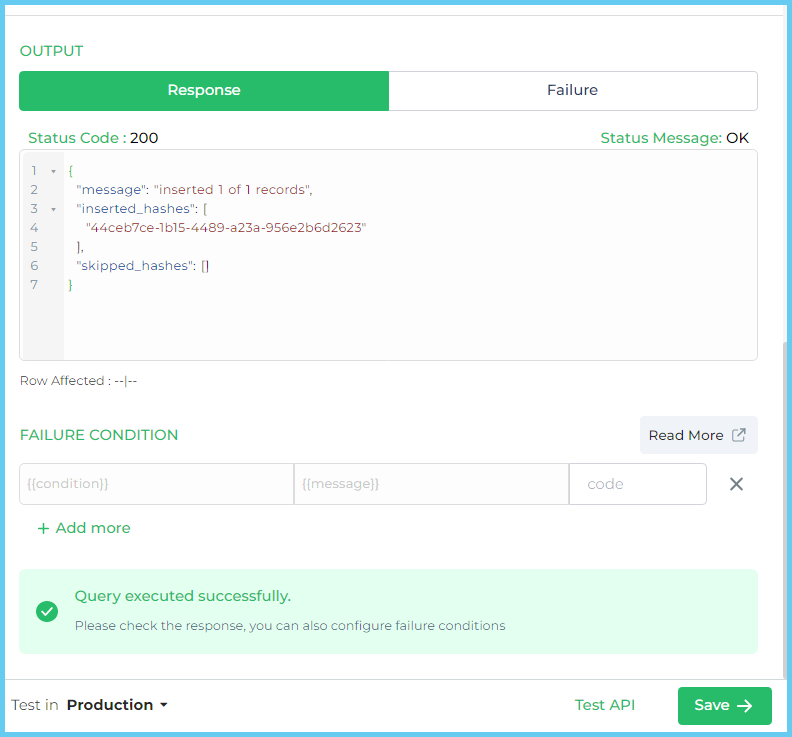
Your sub-API to update data will be added.

Submitting Data via Form
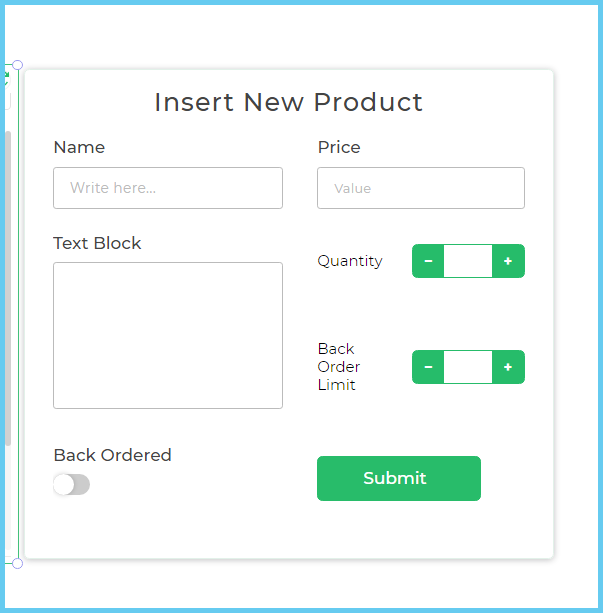
To take input details from the user in our microapp, we will create a form template. This form will take input regarding product details from the user and on-click of submit button, the data will be inserted in the `product` table of HarperDB instance using the `sendData` sub-API from the action builder.
In the below image, we have created a form template. We can see that for the `back ordered` column, we are using the `toggle` control values are Boolean, and that corresponds to the toggle control, which can represent both states as true or false.
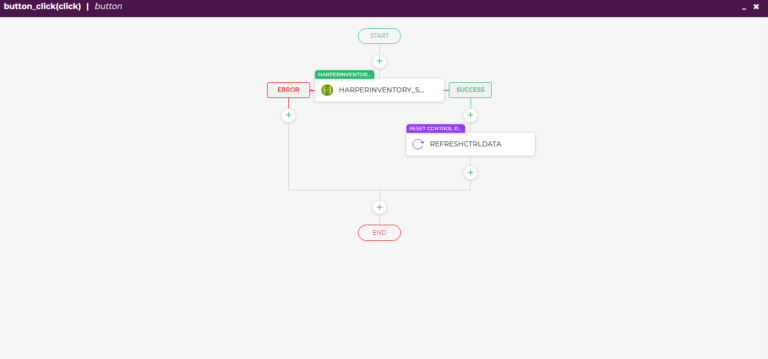
Now let’s bind actions to the `submit` button.
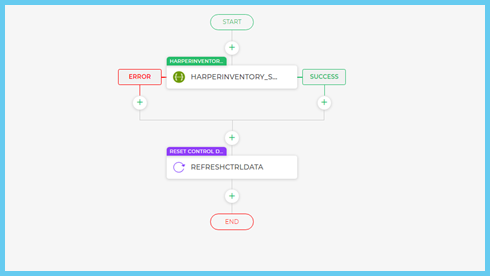
Select the HarperDB connector from the Server-Side action list and select the `sendData` query.Bind the controls by using their keywords in the variable sections.
Click Continue > Finish. I am also adding an action of `reset control data` to reset the table grid control on the success of the action with the `sendData` API call to get the refreshed response of the products.
Preview the app and insert details of a new product and hit `Submit`.
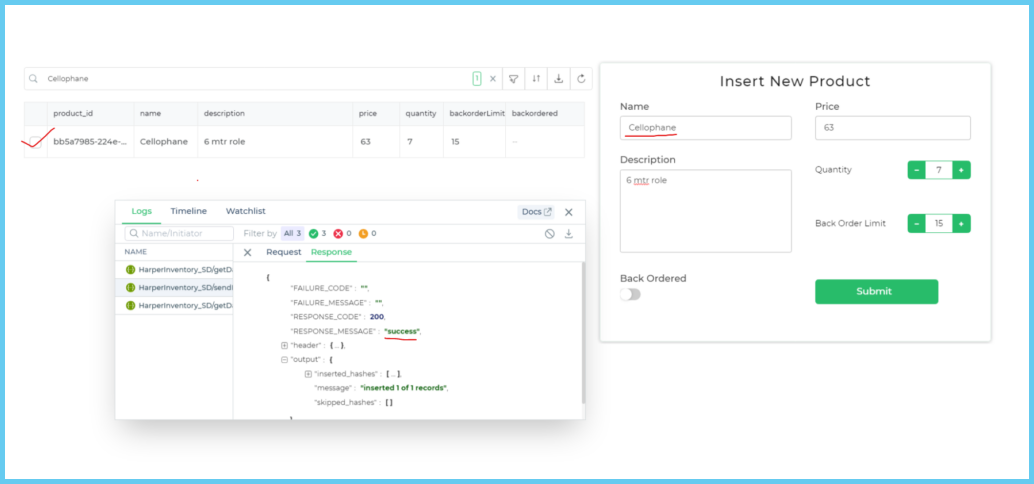
> You can view the logs of API calls from our Logs feature. In the above image, we can see that the API call of `sendData` was successful.
Edit inventory details via table grid
Next, the task for this inventory tool is to update entries in our HarperDB. To update the data, we need to add another sub-API.
Find your connector from the connecter list and click on +ADD API.

Enter the API name. Select the method as `POST`.
Here we have provided the sub-API name as `updateData`.Click on Advance, and select content type as `RAW`.

Under the Body/Form parameter section, we will write a query as part of the request body to send updated data of a product to the Product table in our database using SQL query.
Query:
{
“operation”: “update”,
“schema”: “inventory”,
“table”: “product”,
“records”: [
{
“product_id”: “{{proID}}”,
“name”: “{{name}}”,
“description”: “{{description}}”,
“price”: “{{price}}”,
“quantity”: “{{quantity}}”,
“backorderLimit”: “{{backorderLimit}}”,
“backordered”: “{{backordered}}”
}
]
}
Here, we have made the operation type as an `update` query with schema and table details.
Then the SQL query is provided inside `records`. The value of all the attributes is written as variables. This will help us to send the updated data dynamically from our app.
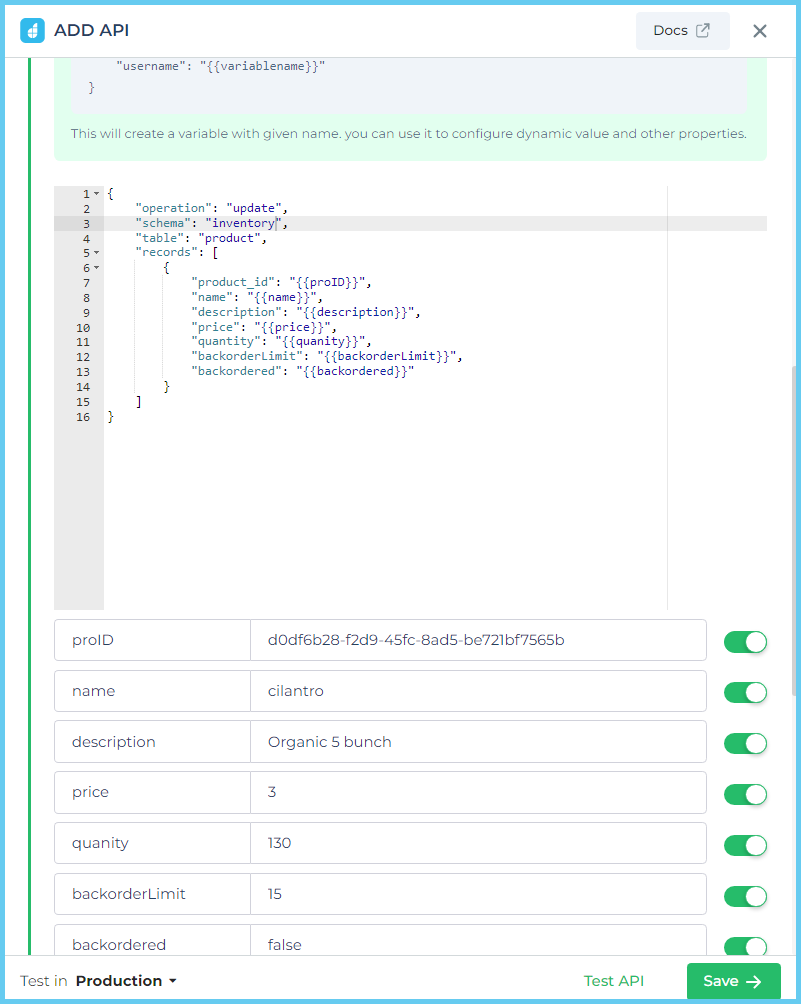
In the above image, we are updating records of cilantro using the variables.
Click on Test API & Save.
Your sub-API to update data will be added.

Edit data using table grid property
To update the data, we will use the edit columns property of table grid control. Simply go to your table grid control and in the property section, select the columns you want to make editable.
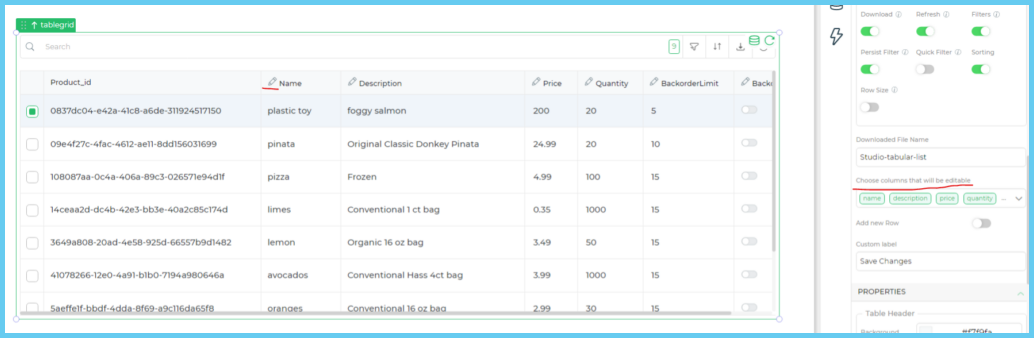
You will notice the edit sign on the top of each selected column. Select every column except the ID.
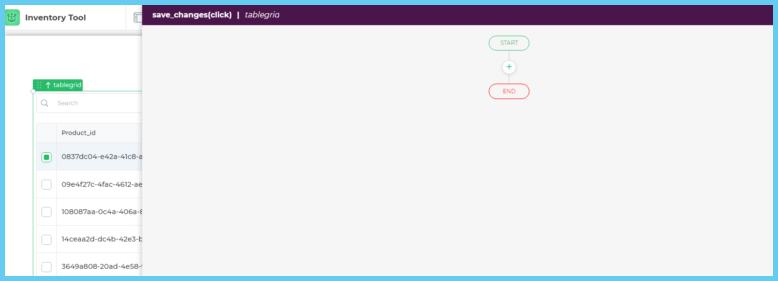
Next, go to the table grid > events > save changes. This will open an action builder, through which we will trigger an event on Save Changes to execute an action of API call to update the database.
Since there can be multiple rows with updated changes, we will use a client-side action of the iterate task to loop through each change.
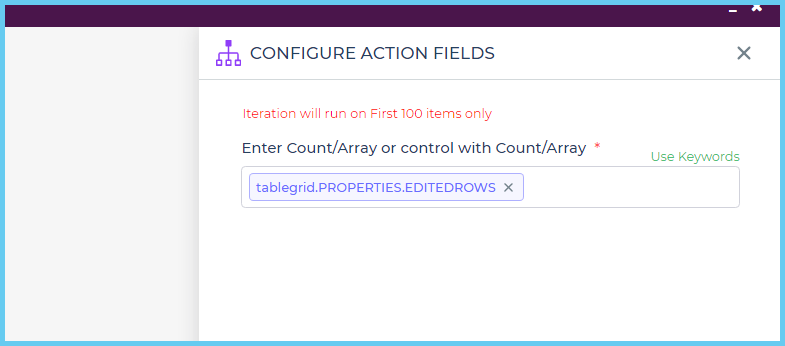
We will iterate with the help of `tablegrid.PROPERTIES.EDITEDROWS` property.
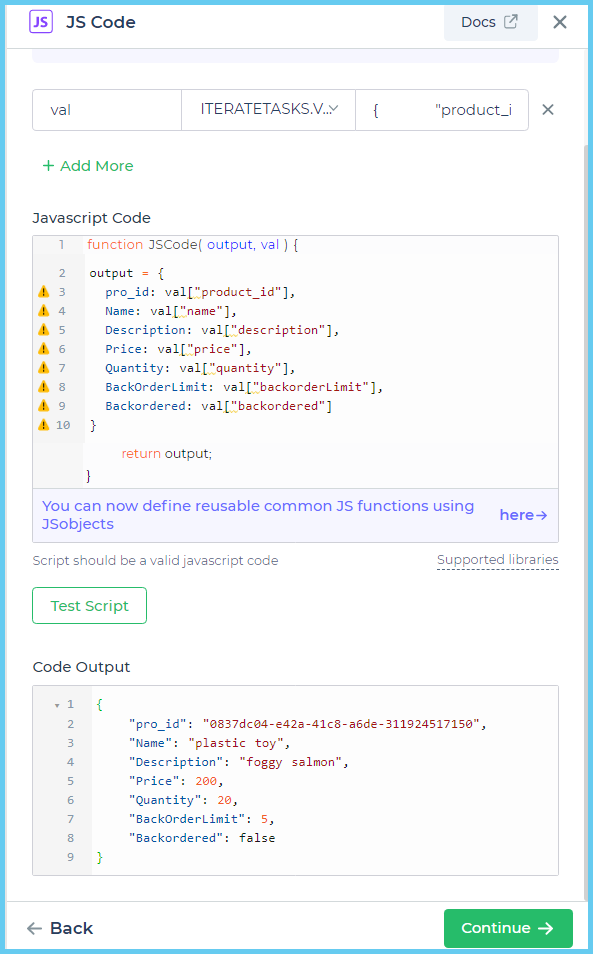
Next, we have to save each of the properties in different output variables so that we can use it later to bind as keywords in our update query request of the connector.
Under the JS Code editor add the client-side action of the configured connector, selecting the update query.
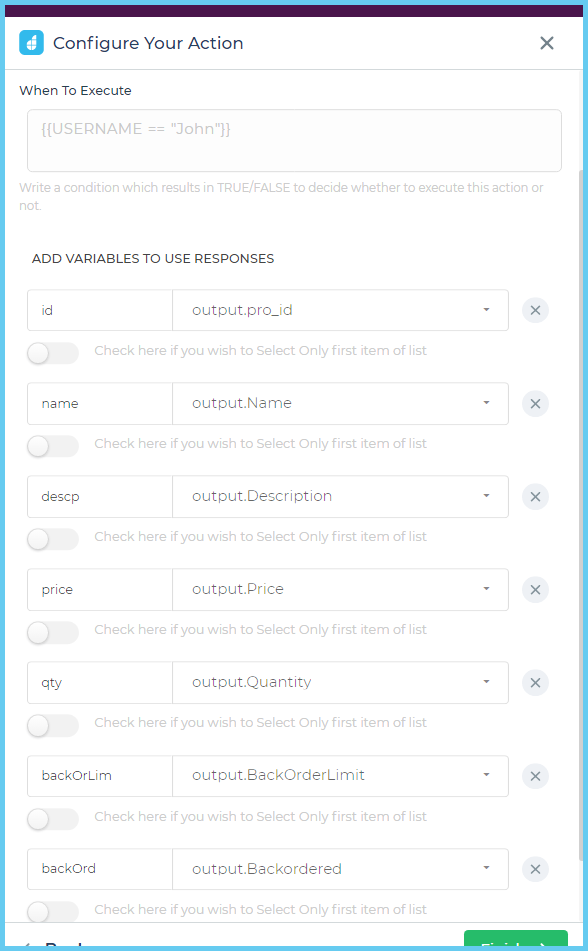
Now, bind the query variables with their appropriate keywords saved in variables from the previous JS Code editor.
Click Continue then Finish.
NOTE: Make sure to add a refresh control action from the On-Screen Actions to view the updated data after saving the changes in the table grid.
Preview the App.
Table Grid before update-
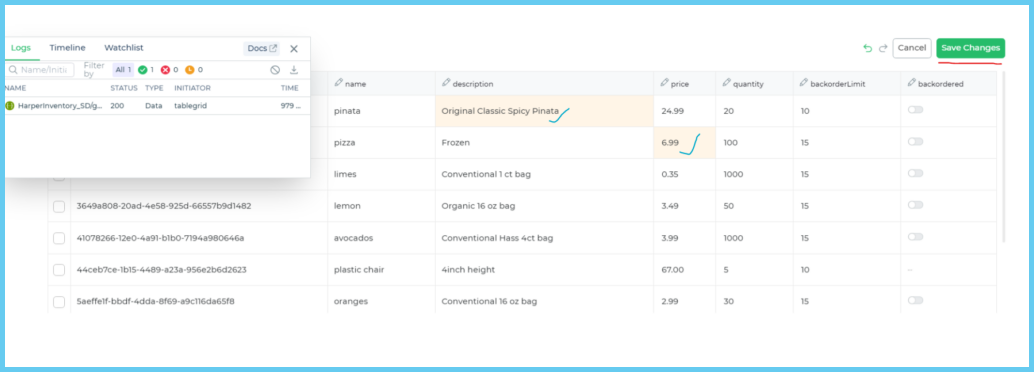
Table Grid after update-
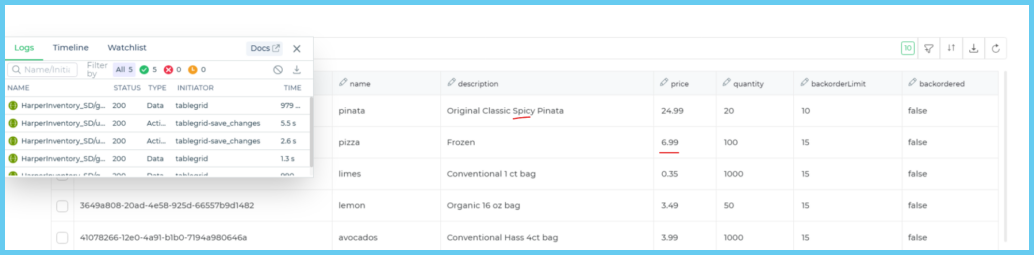
> You can view the logs of API calls from our Logs feature. In the above image, we can see that the API call of `updateData` was successful.
Deleting products from inventory tool
Finally, our last task for the inventory tool would be Deleting the data. To delete the data, we need to add another sub-API.
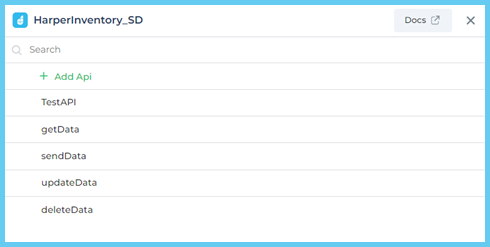
Find your connector from the connect list and click on +ADD API.

Enter the API name. Select the method as `POST`.
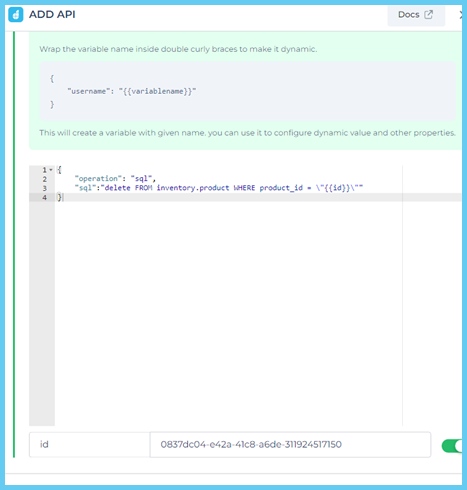
Here we have provided the sub-API name as `deleteData`.Click on Advance, and select content type as `RAW`.
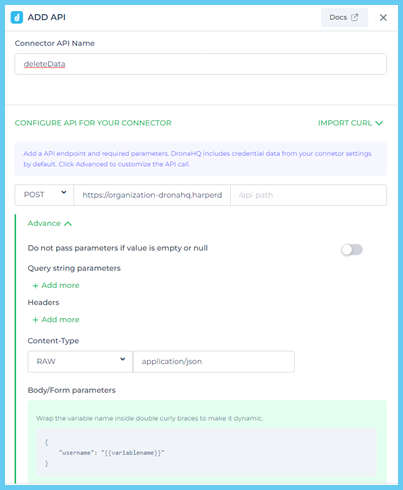
Query:
{
“operation”: “sql”,
“sql”:”delete FROM inventory.product WHERE product_id = \”{{id}}\””
}
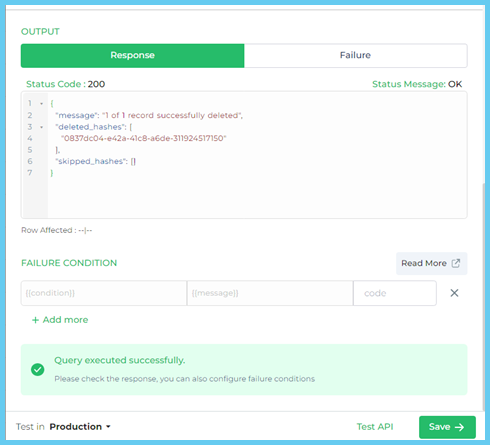
Here, we have made the operation type as a `delete` query with schema and table details.
The operation type “SQL” query and have written the SQL to query to delete the data in the “product” table located under our earlier created “inventory” schema with respect to the provided `product_id`.

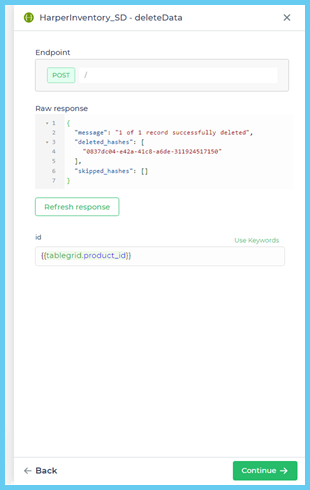
In the above image, we are providing product id using the variables.
Click on Test API & Save.

Your sub-API to delete data will be added.
Delete data using the table grid property
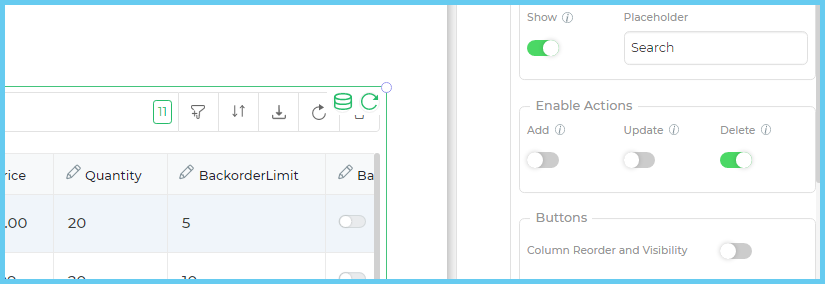
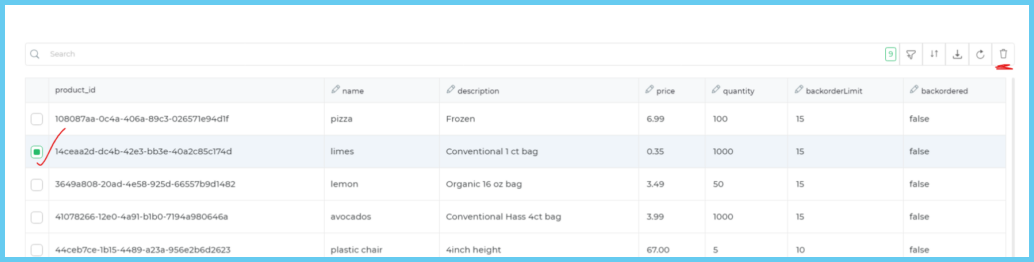
To delete records using Table Grid control, toggle the `Delete` to ON from the properties. This will give us a nice and clean button of delete(TrashCan) with which we will bind the action to delete.
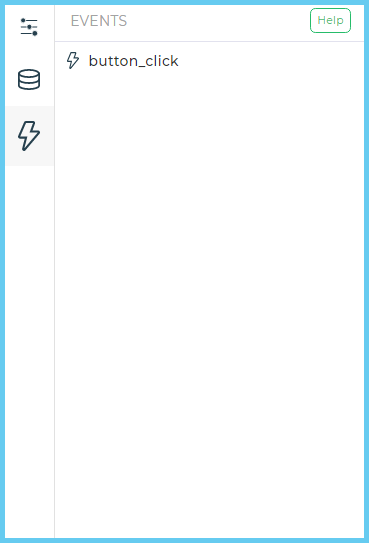
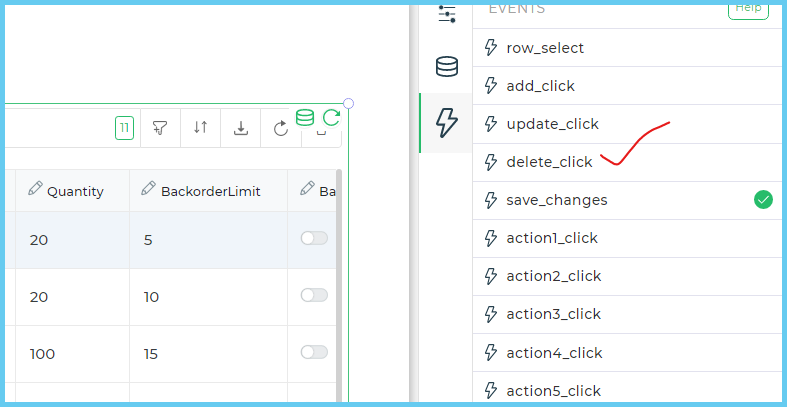
Go to the Events of the Table Grid control then select `delete_click`, an action builder will open.
Select the HarperDB Configured connector with `deleteData` sub-API from the server-side action list.
Bind the keyword of product ID to send it via API call.
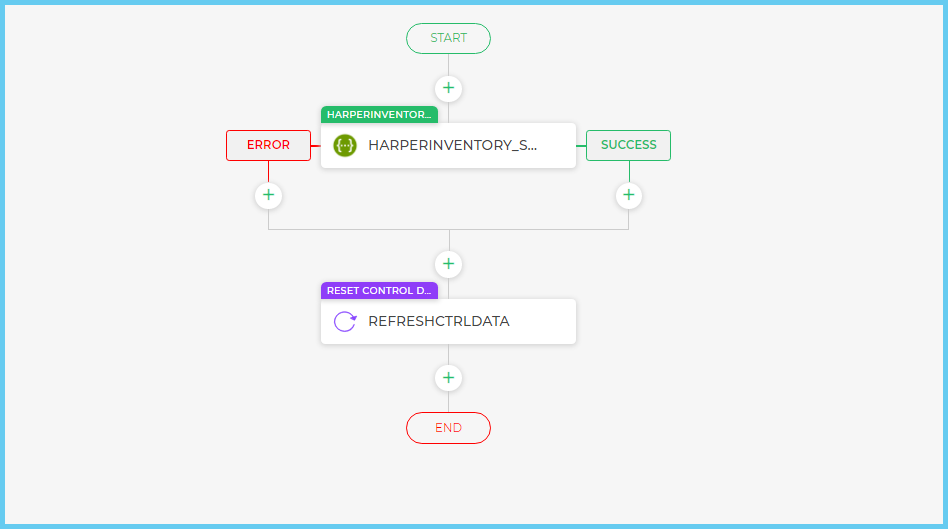
Click Continue then Finish.
NOTE: Make sure to add a refresh control action from the On-Screen Actions to view the updated data after saving the changes in the table grid.
Preview your app and try out the delete functionality.
Building better inventory tools: Unleashing the potential of DronaHQ and HarperDB
Use HarperDB as the database backend to store and manage inventory data. Create tables to store information about products, stock levels, orders, transactions, and any other relevant data fields. HarperDB’s flexibility and real-time capabilities will enable efficient data storage and retrieval.
Utilize DronaHQ’s low code development platform to build the user interface and application logic for your inventory management tool. With DronaHQ’s visual development environment, you can create custom forms, tables, and workflows tailored to your specific inventory management requirements.
Establish a connection between DronaHQ and HarperDB to enable seamless data synchronization and real-time updates. Use DronaHQ’s integration capabilities to fetch data from HarperDB and display it in the application interface. Any changes made in the inventory management tool can be stored back in HarperDB for data consistency.
Leverage the features of both platforms to enhance your inventory management tool. For example, you can incorporate barcode scanning functionality, automated stock alerts, order tracking, reporting and analytics, user access controls, and more using DronaHQ’s capabilities.
By combining the strengths of HarperDB and DronaHQ, you can develop a robust and efficient inventory management tool that meets your specific requirements, providing real-time data management, streamlined workflows, and an intuitive user interface.
Build your own internal tools. Get started here!
Related Articles