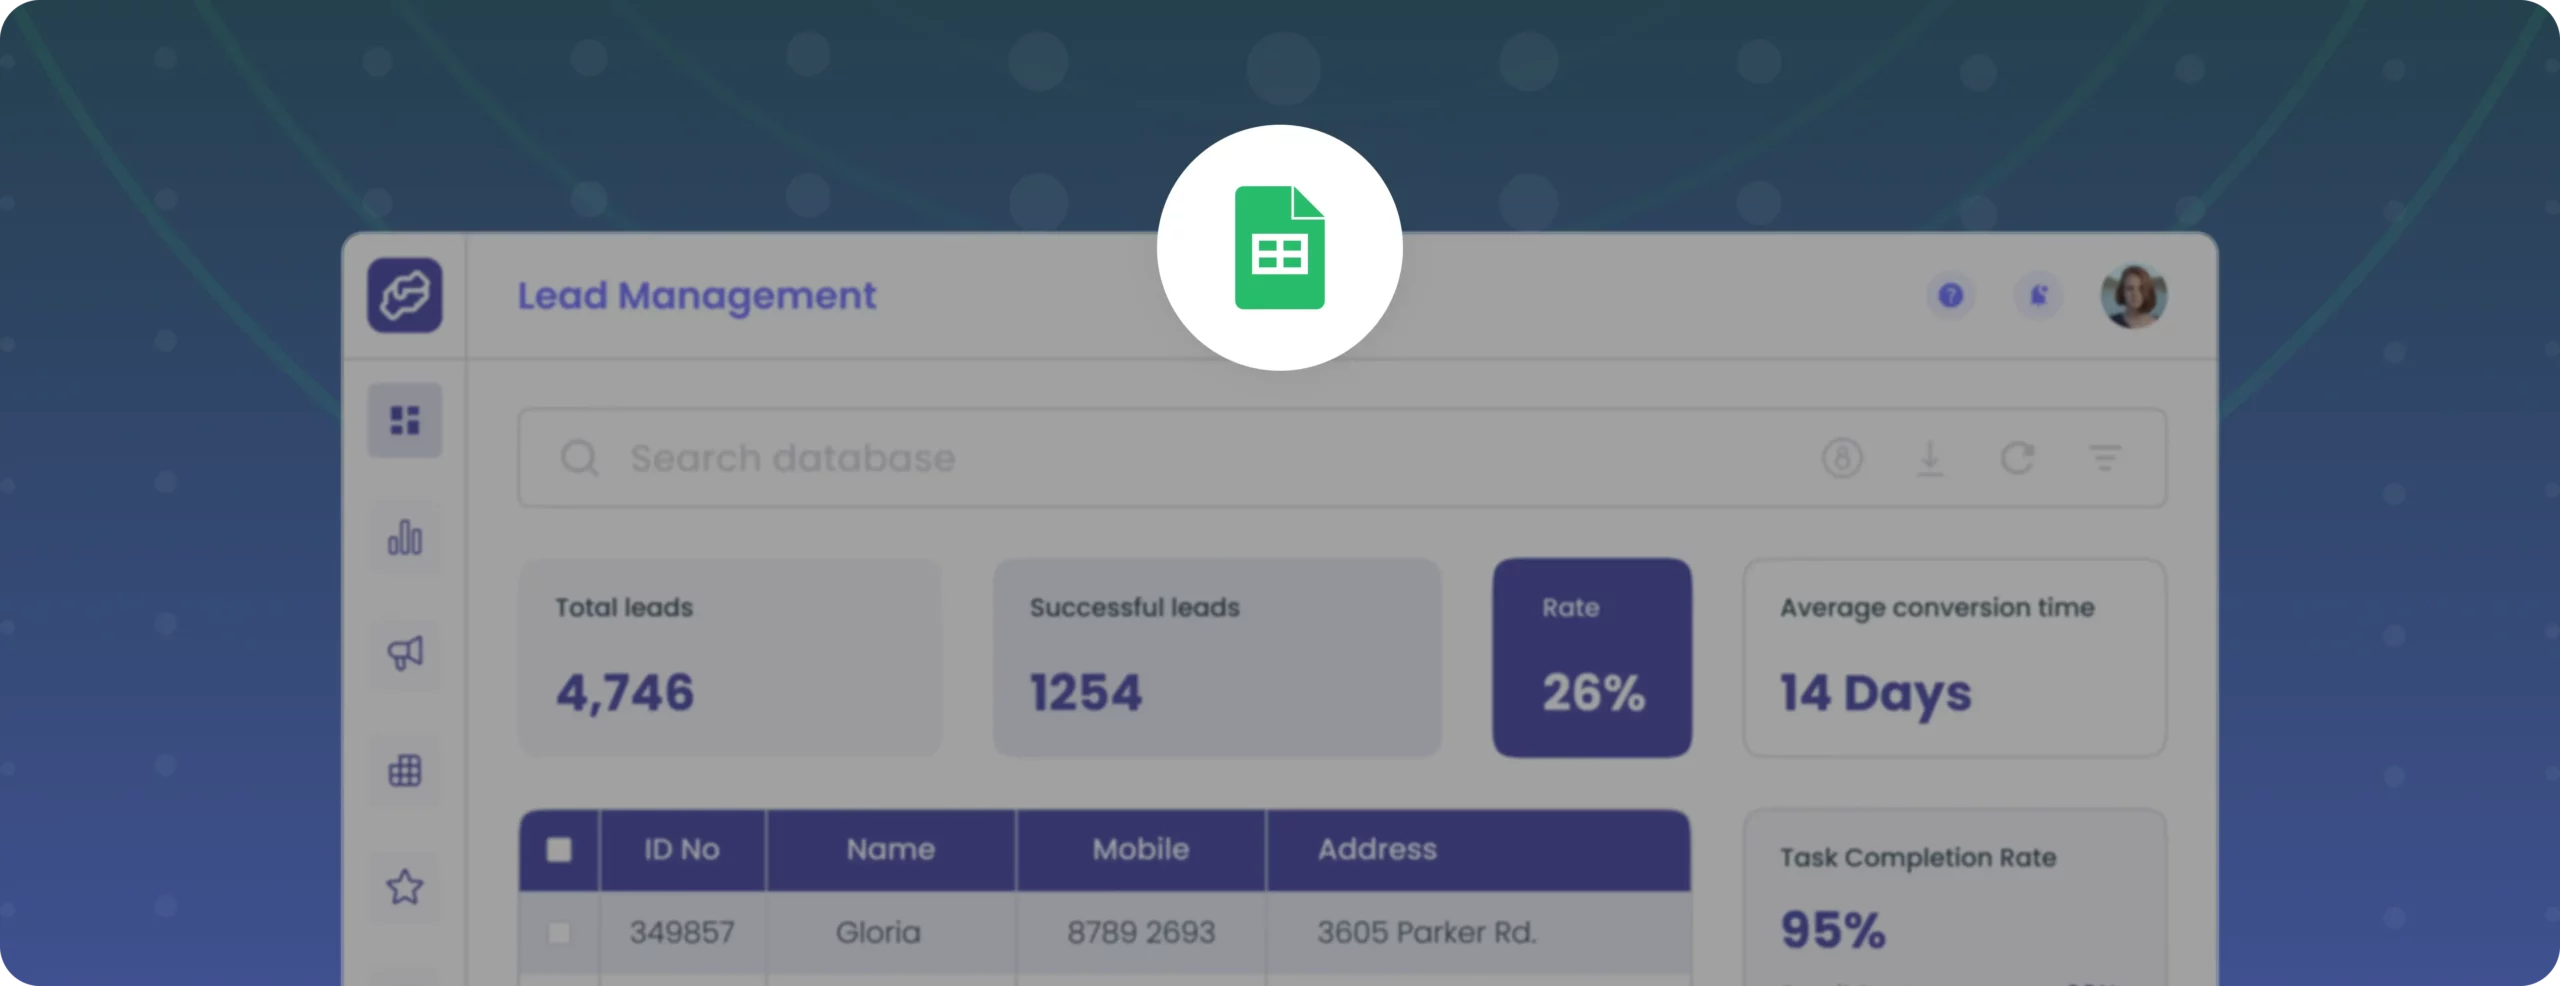

How to build a Lead Management app in under an hour
Managing leads efficiently is a core need for any sales or support team. However, building a custom CRM can often sound intimidating, especially if you’re not a frontend developer. That’s where DronaHQ comes in.
In this guide, you’ll learn how to build a fully functional Lead Management App using Google Sheets as the backend and DronaHQ’s low-code platform, with zero complex coding required.
Throughout the process, we’ll use two Google Sheets tables to manage our lead data. By the end of this build, you’ll have a working CRM dashboard with:
- A home screen displaying all leads in a clean table layout
- Update buttons to change the lead status
- A detailed view that lets you view or edit each lead’s information
- File upload capability for storing documents related to each lead
We’ll walk through everything step-by-step so you can follow along, even if you’re new to building apps.
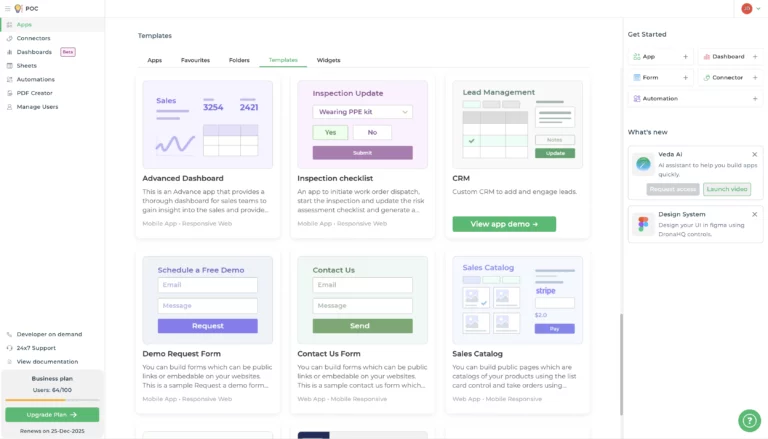
Step 1: Building the basic layout of the app
Once you log in to your DronaHQ account, we’ll begin by setting up the core UI of the app. Instead of starting from scratch, DronaHQ gives you a head start with its pre-built CRM template. Head to the Templates section, select the CRM template, and it will instantly create a new app with ready-to-use screens, including a lead table, detail view, and status update buttons.
Once the template is installed, take a moment to clean up the layout. Remove any unnecessary UI components and screens, and add elements that suit your app’s flow, such as a dropdown to update lead status. You can drag and drop these elements easily from the control panel.
Note: If you already have a visual design (such as a Figma mockup or a screenshot), you can upload it to DronaHQ’s AI Chat, and it will automatically generate the layout for you, saving manual work.
This base layout forms the foundation for your CRM app, setting you up for a smooth experience in the steps that follow.
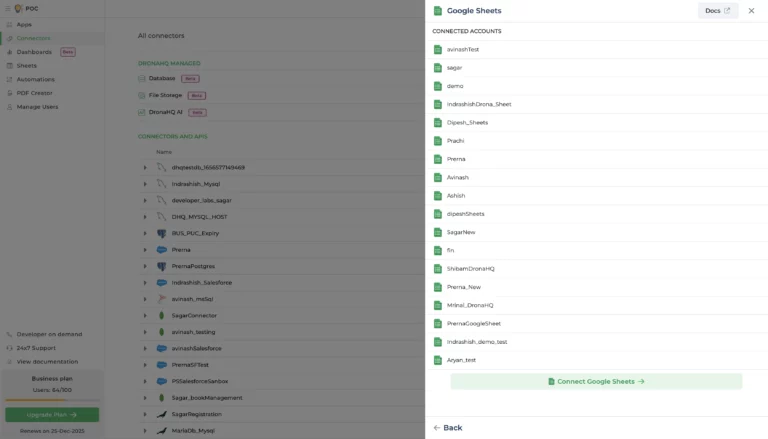
Step 2: Set up the Google Sheets connector
Before we start working on the app logic, we’ll set up a connection to Google Sheets, which will serve as our backend. This step allows DronaHQ to read from and write to your Sheets in real time.
Connecting Google Sheets is one of the easiest steps. Head over to the Connectors tab in the DronaHQ Studio and follow these steps:
- Click on New Connector, then select Google Sheets from the available options.
- At the bottom of the screen, click the green “Connect your Sheets account” button.
- Choose your Google Account, grant the necessary permissions, and give your connector a name like “LeadSheetConnector”.
- Once connected, this will allow you to work with both your Leads and Contracts sheets through data queries.
That’s it! You now have a live connection to your Google Sheets that will power all your data operations within the app.
Step 3: Table grid data binding
Now that your Google Sheets connector is ready, it’s time to pull that data into your app’s UI, specifically, the main table on the home screen.
To do this, select your table component and head to the Properties panel. Under Quick Select, choose:
- Connector Library
- Search for Google Sheets
- Choose the operation: Get Rows
Note: DronaHQ offers many operations like Find Row, Update Row, etc. For now, we’ll use Get Rows to fetch the entire dataset.
Once selected, fill in the following fields:
- Account: Choose the connected Google account
- Spreadsheet ID: Paste your spreadsheet ID here
- Sheet Name: Use the dropdown on the right to auto-select the sheet name (recommended)
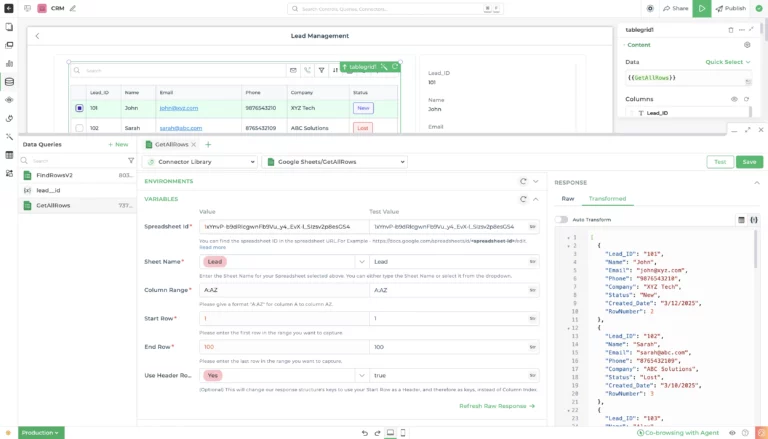
Now scroll down to the Transform Response section, this is where you can filter and reshape the data before it’s shown in the app. Add this JavaScript snippet to filter out only the useful data:
data = data.valuesStep 4: Binding the detail view and updating the status logic
Once your main table is successfully showing data from Google Sheets, the next step is to bind the Detail View component. This lets you display information for the lead that’s currently selected in the table.
To do this, use the following binding:
{{tablegrid1.PROPERTIES.SELECTEDROWS}}This dynamic keyword fetches the data of the selected lead. You can then choose which fields to display, such as LeadId, Name, Email, Phone, and Company.
Now let’s add some interactivity.
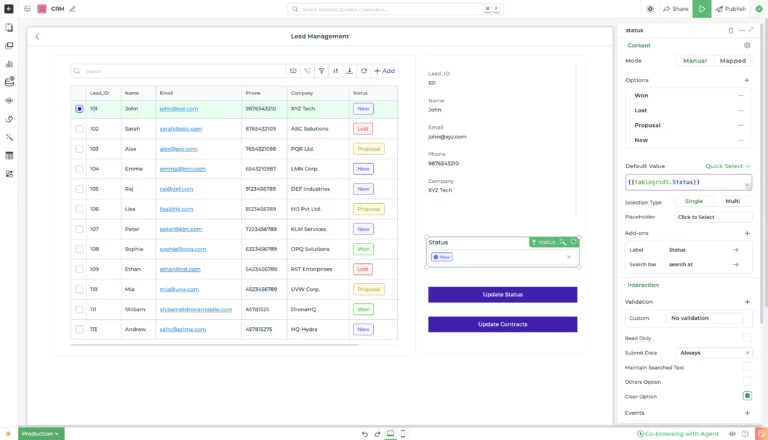
Earlier, we created an advanced dropdown control for the lead status. We’ll customize this dropdown by configuring its options(like “New”, ”Proposal”, “Lost”, “Won”) and setting up an action flow for when the user selects a new status.
Here’s how:
- Add a button next to the dropdown labelled Update Status.
- When clicked, it should trigger an “UpdateRow” query. Similarly, we created a query for binding table data.
- This query will update the status in your Google Sheet for the selected lead.
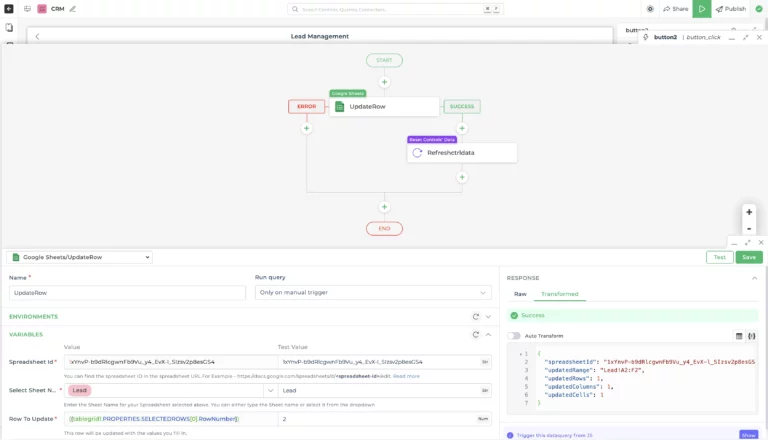
- After the update, use the Refresh Data action to reload the latest data into your Table Grid.
This way, any changes made to a lead’s status will instantly reflect in the table, keeping everything up to date without needing a page reload.
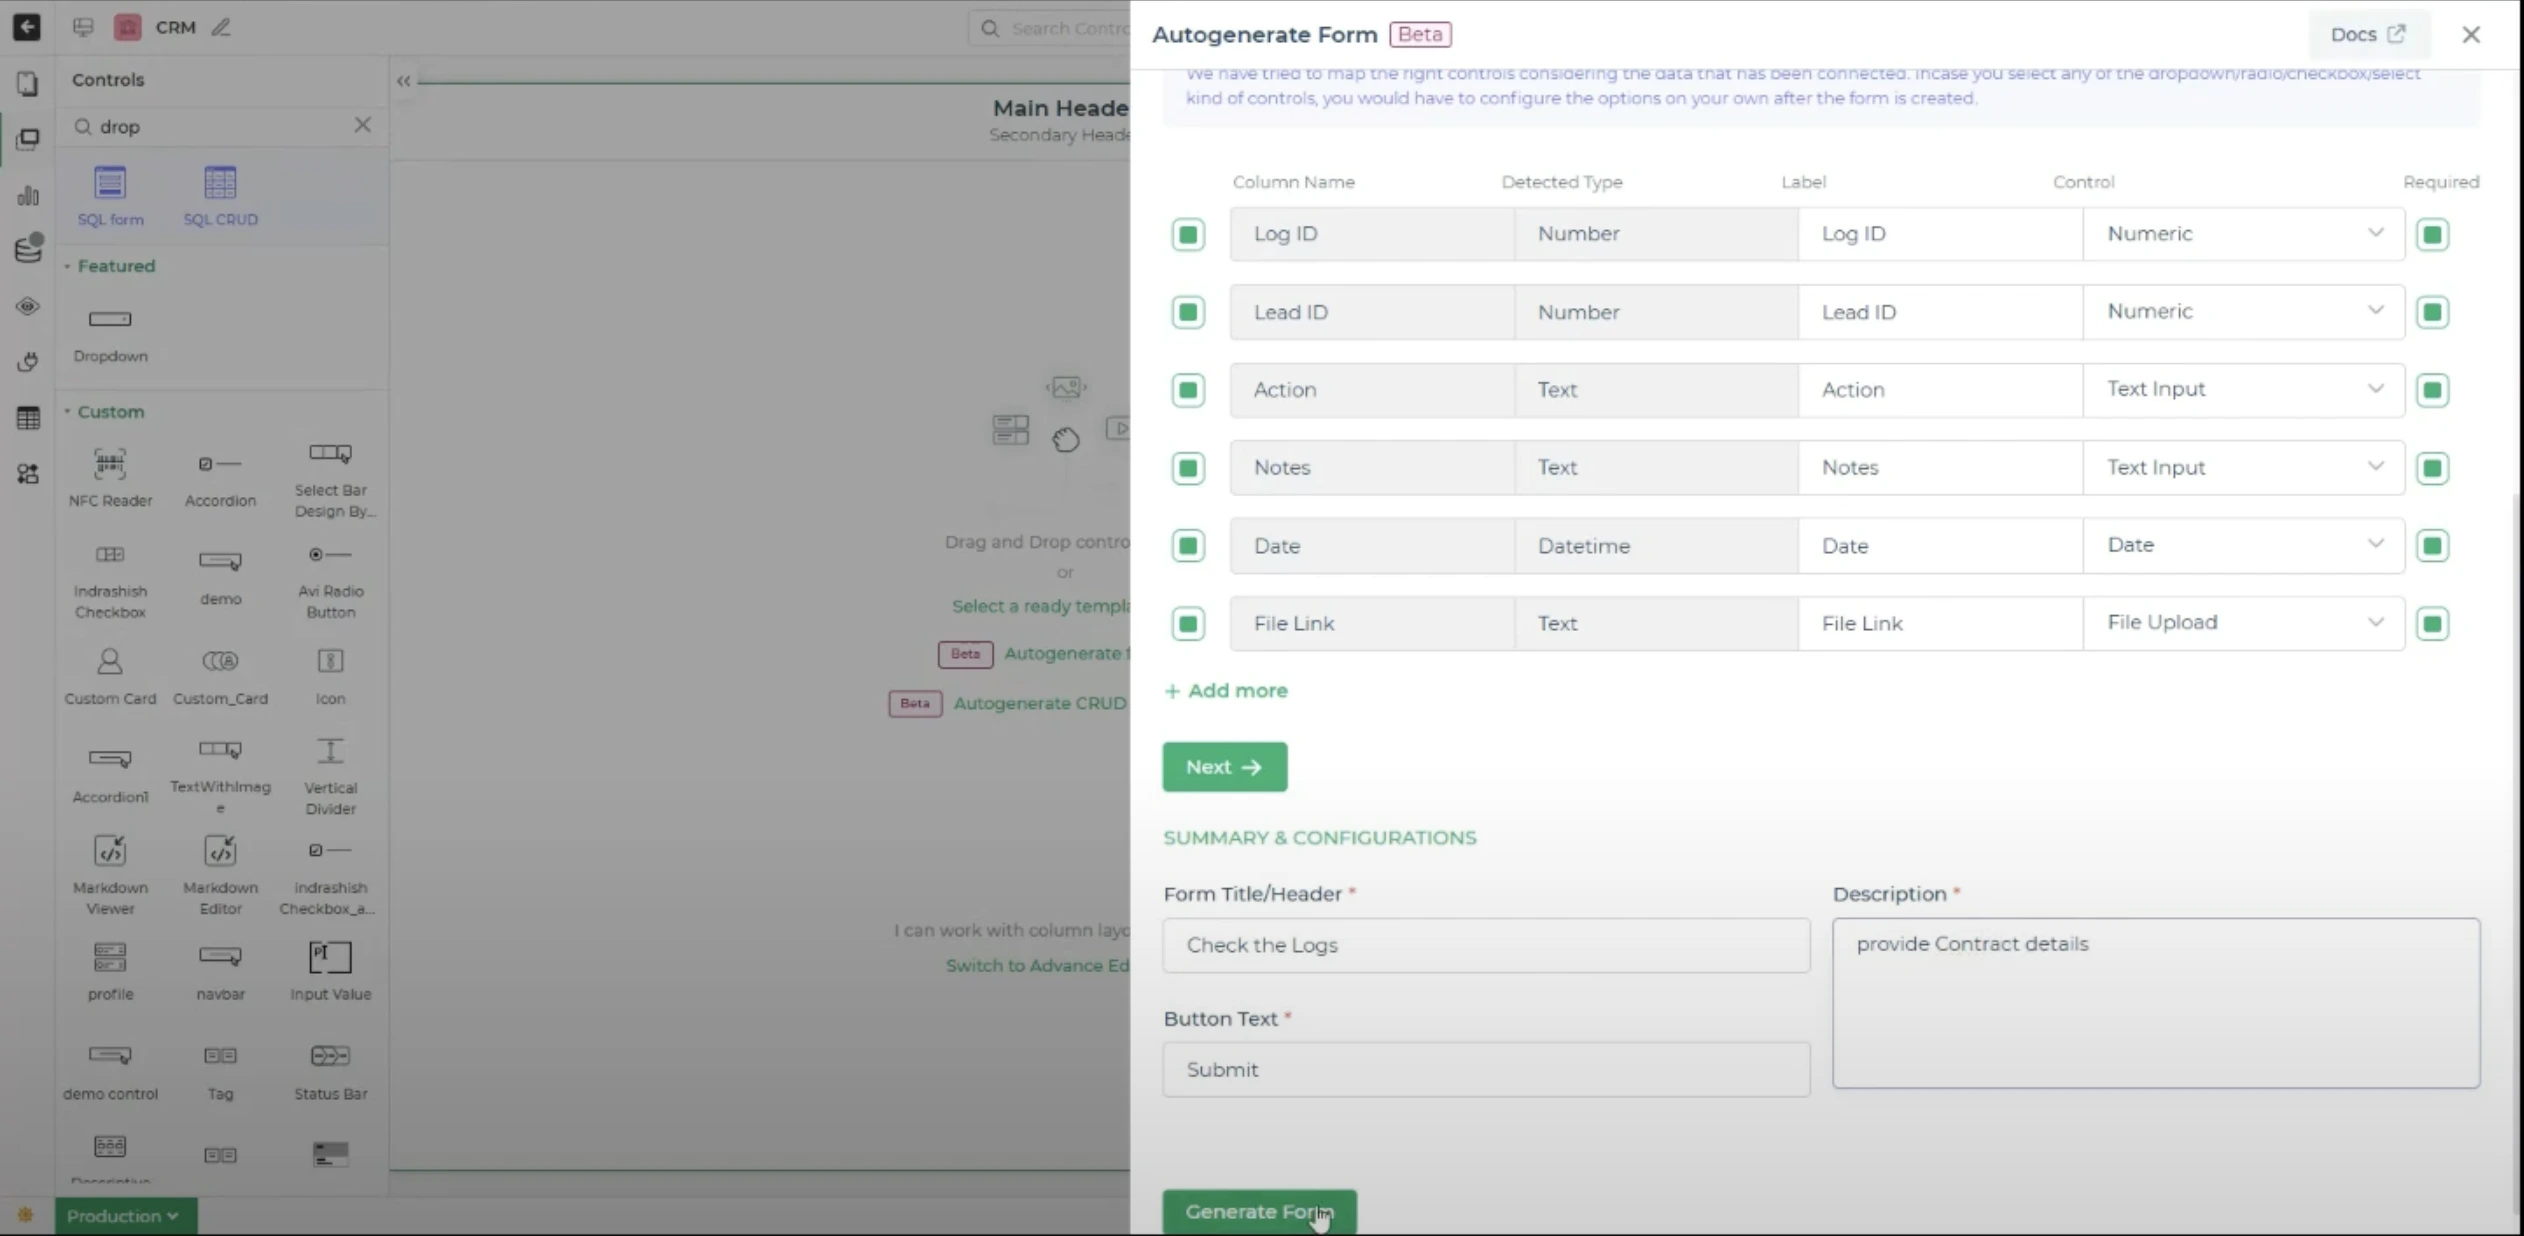
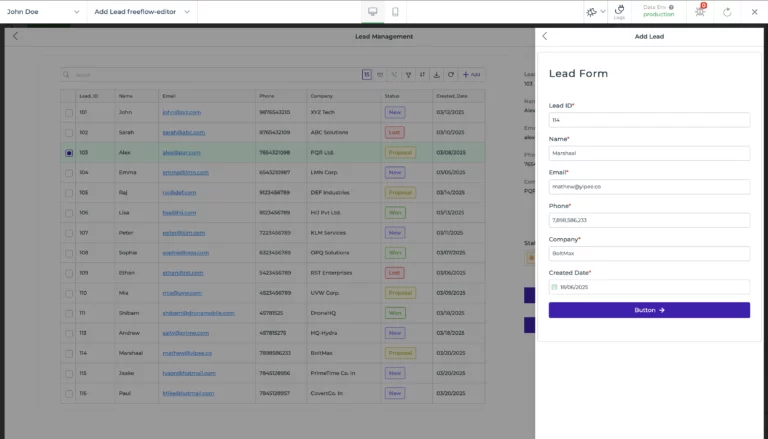
Step 5: Adding a new lead entry form
To allow users to add fresh leads directly from the app, we’ll create a dedicated screen with an Auto-generated form. Since we’re using a CRM template, you’ll notice that a form screen has already been created automatically. Let’s make it our own:
- Navigate to the screen from the top-left Screens section.
- Clear out any default UI components that you don’t need.
- Now, click Auto-Generate Form. This handy tool saves time by instantly creating form fields based on your data schema.
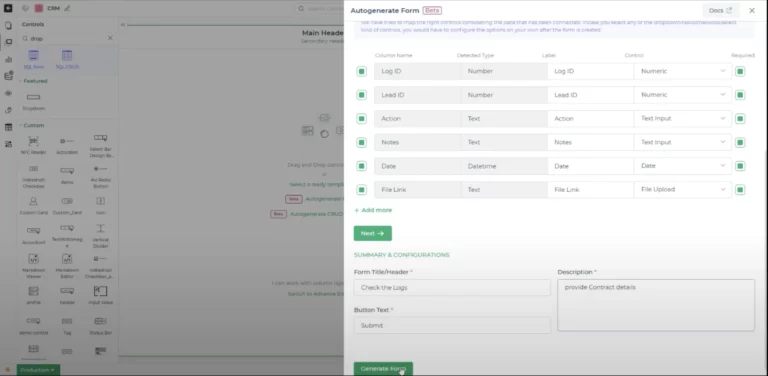
We’ll use the JSON Schema option and input the following structure:
There are other options, like connectors, DronaHQ DB, and more, that you can use if you are comfortable with them (read about them in the docs)
JSON –
{
  "lead_id": "",
  "name": "",
  "email": "",
  "phone": "",
  "company": "",
  "created_date": "",
  "status": "New"
}
This will generate input fields for all required data points. You can easily customize the labels, set which fields are required, and choose the right data types (like text, date, etc.).
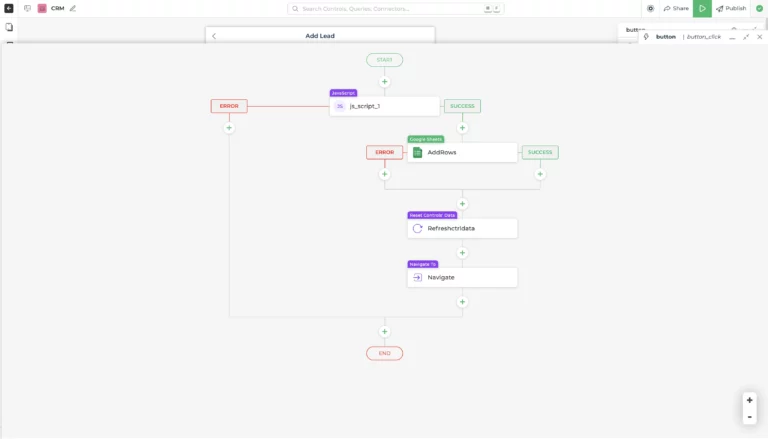
Next, configure the Submit button:
- Add the Insert Row action to push the form data into your Leads sheet.
- Use a JS block “{“date”:{{createddate}}}” with moment.js (built-in with DronaHQ) to convert date formats if needed.
- After submission, add actions to reset the form controls and refresh the home screen table so that the new lead shows up instantly.

With this setup, new leads are stored directly in your connected Google Sheet, no manual syncing required.
Step 6: Lead ID tray
To make your CRM app more interactive, we’ll add a tray screen that displays the activity history of a specific lead, along with a pre-filled form to update their information.
Start by creating a new tray screen from the top-left screen panel. This tray will have two parts:
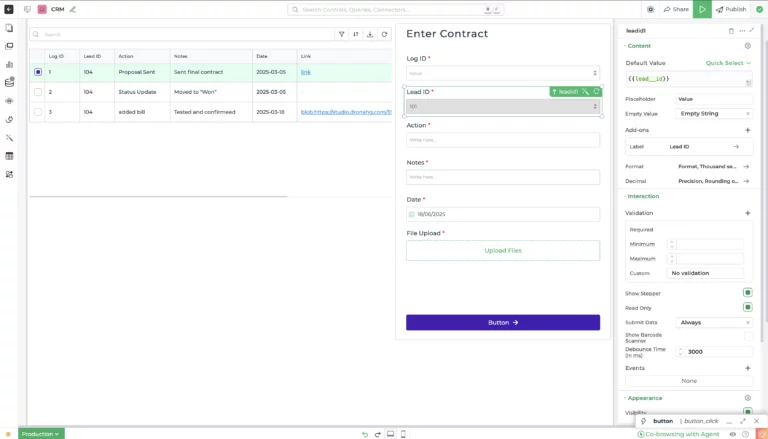
Left Side – Table of Past Activities and Right Side – Update Form for that specific lead.
Drag a Table Grid component. From the Data Query section, create a new Google Sheets query to fetch lead-specific data.
To filter the query:
- Create a variable called LEAD_ID.
- Set the value using JavaScript like this:
{{tablegrid1.Lead_ID}} - While configuring the “Get Rows” operation, use the variable in the filter condition under “Search Value”.
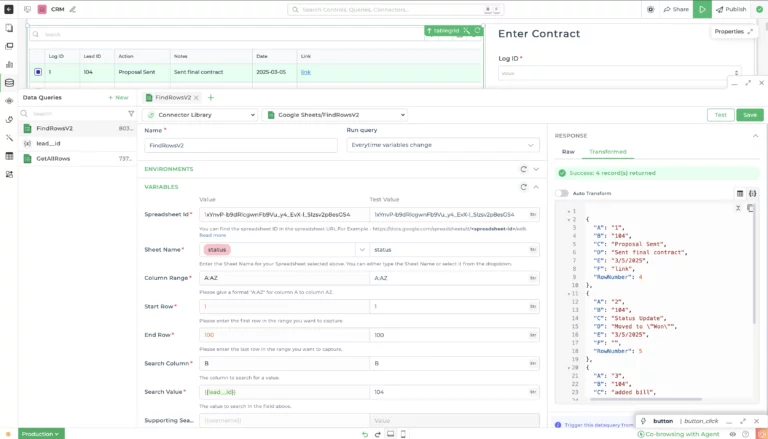
This will ensure the table only shows entries related to the selected lead.
Right Panel – Editable Lead Form
Next, add an Auto-Generated Form. Choose the JSON Schema option to define the fields.
{
  "lead_id": "",
  "name": "",
  "email": "",
  "phone": "",
  "company": "",
  "created_date": "",
  "status": "New"
}
The form will automatically be pre-filled with the selected lead’s information (thanks to the bound data). You can allow users to update their name, phone, company, etc.
Finally, set up the Submit button to trigger an Update Row action in Google Sheets. You can also use a toast message to confirm success.
This tray makes it easy for users to review a lead’s history and update details, all from one screen.
Step 7 – Preview Test Publish
Now that your Lead Management App is up and running, with a home screen showing leads from your Google Sheet, a detail view for updating lead status, and screens to add or edit leads, it’s time to test everything thoroughly.
Click the green Preview button in the top-right corner of your DronaHQ Studio to open a live preview of your app. You’ll get to interact with the app exactly as an end-user would, which is crucial before going live.
Here’s a quick checklist for your testing:
- Is your leads table loading data correctly from the Google Sheet?
- Does selecting a row correctly populate the detail view?
- Are the status dropdown and update actions reflecting changes in the sheet?
- Is the “Add Lead” form saving new leads and refreshing the table?
- Do all action flows show proper toast messages and logs?
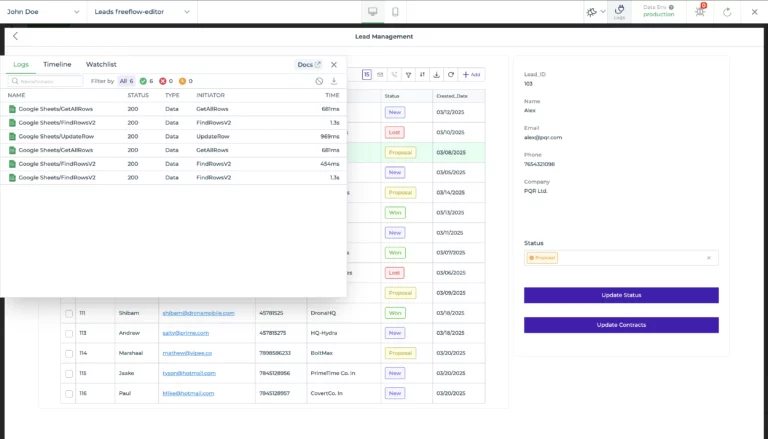
💡 Tip: Keep an eye on the log viewer at the top; it helps confirm whether your data queries, insert/update actions, and conditions are firing correctly.
Once everything works as expected, hit the Publish button. DronaHQ will generate a shareable link you can send to your team or open directly on mobile, tablet, or desktop.
What’s next?
Once your CRM Lead Management App is up and running, you can level it up further with these enhancements:
- Add user roles and login access – Control who can add or edit leads by enabling role-based access.
- Visualize lead performance – Use the Charts widget to track lead conversions, statuses, or activity over time.
- Automate email notifications – Integrate with Gmail to send confirmation emails after a new lead is added.
- Set up error handling – Use failure conditions in your action flows to show error messages or retry logic when data fails to submit.
- Add validations and business rules – Use conditional visibility, input validation, or logic branches to enforce data quality.
All of this is fully supported in DronaHQ and well documented. You can explore more in the official documentation.
Final thoughts
Managing leads shouldn’t mean managing a ton of code. With DronaHQ’s low-code platform, you can build a fully functional, visually appealing lead management system powered by Google Sheets, all in just a few hours. Whether you’re a backend developer or just getting started, DronaHQ’s drag-and-drop UI builder, smart queries, and auto-generated forms make it incredibly easy to bring your CRM ideas to life.
In this guide, you’ve gone from a blank slate to a working CRM, with a lead listing table, detail view, status updates, and even a tray view for editing and reviewing leads, all without writing a single line of frontend code.
Want to give it a try?
Head over to DronaHQ and start building your lead tracking tool. Or, if you’d prefer to follow along with a visual walkthrough, check out the full workshop recording and build side-by-side.