

Create a Supabase UI dashboard using DronaHQ
Supabase is one of the most popular database solutions in the market. In this blog, we take a look at how we can create a task management app using DronaHQ where the data will be loaded from Supabase and how can you create a Supabase UI for a Supabase dashboard using DronaHQ instantly.
This task management app will be able to –
- View the status of all tasks
- Add / Delete /Update tasks
- Comment on tasks
- Have a timeline representing the deadline for tasks
- Having a dashboard that will show you the % of tasks completed
There can be many more functions that can be added to the task management Supabase UI app you are making depending on your requirements and needs but these are the few ones that we will be creating for now.
What is Supabase ?
Supabase is a free and open-source alternative to Firebase. It offers every backend service you require to create a product. Supabase utilizes the real-time Postgres database. In essence, Supabase offers a Postgres database management interface that you can use to create tables and insert, amend, and delete data from them.
To access the data in the Postgres database, we can utilize the REST API or client libraries from Supabase. Accessing the database is only one aspect of Supabase. Additionally, it offers several pre-built solutions, like authentication, file storage, and real-time capabilities.
DronaHQ plays an important role here to create the UI for the data which you have on Supabase and hence helps you create a wonderful Supabse UI.
Prerequisite
Basic knowledge of PostgreSQL is a must to understand and write queries for our task management Supabase UI app after connecting the Supabase connector. To get a detailed overview of connecting Supabase as a connector in DronaHQ studio, give a read to Connecting to a Supabase database.
Getting the Connection String
To connect to Supabase from your App you need the Connection String.
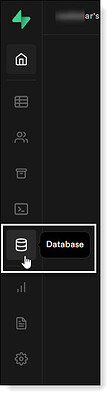
- Head over to your Supabase database, on the left sidebar you can find the Database option.

- Click Database. You will be taken to the Configuration and the Connection info which can be used to create the connection with the Supabase database from your application.

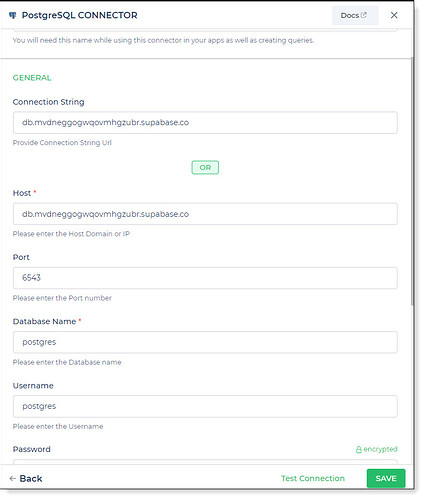
You can copy the connection string or the connection parameters from here and paste them to your Supabase connector configuration. - Enter the Host, Port, Database name, Username, and Password.

- Test the connection and click Save.

Now your Supabase connection is ready from within your Studio App. You can define queries as per your use case and bind the data to the Controls and Actions.
Build Supabase UI with DronaHQ
In DronaHQ Studio we will be creating the task management app for which we will be requiring five screens, 1 detailed view screen, 1 main screen, and 3 pop-ups for the following purposes –
- Inputting information for adding a new task
- Inputting information for updating an existing task
- Adding comments to an existing task
Creating the home screen
This screen is the most informative screen of your task management app.
This Supabase UI app screen is going to have the following controls –
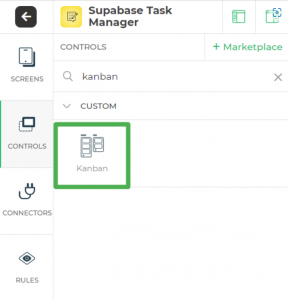
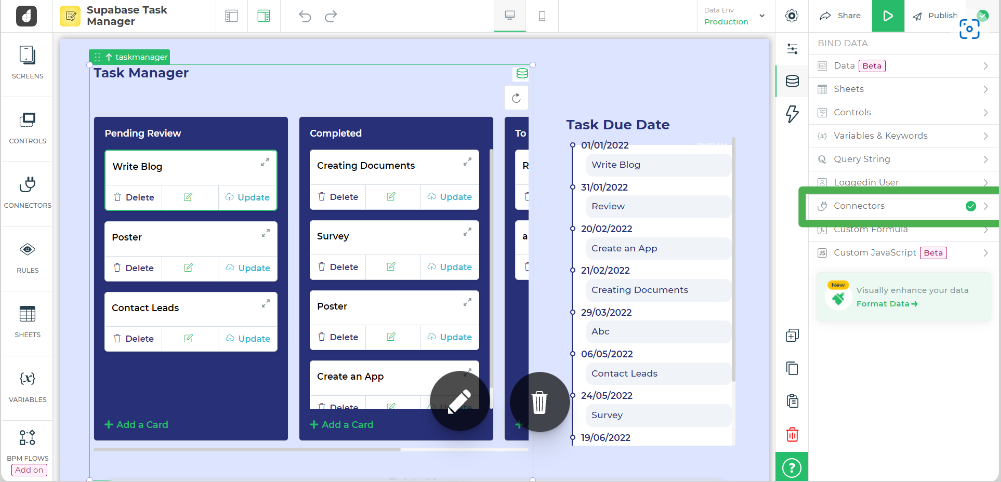
Kanban control –
This control is an integral part of the Supabase UI and the task management app.
Along with this it also has buttons to which you can add functionalities which in turn will make the task management app functional and interactive.
Selecting the Kanban control
This control has many properties which can be edited to suit your Supabase UI for the task management app.
These editable features involve theme, color, card size, buttons to be displayed, background color, and many more features which can be explored by you if you want to be clicking the link above.
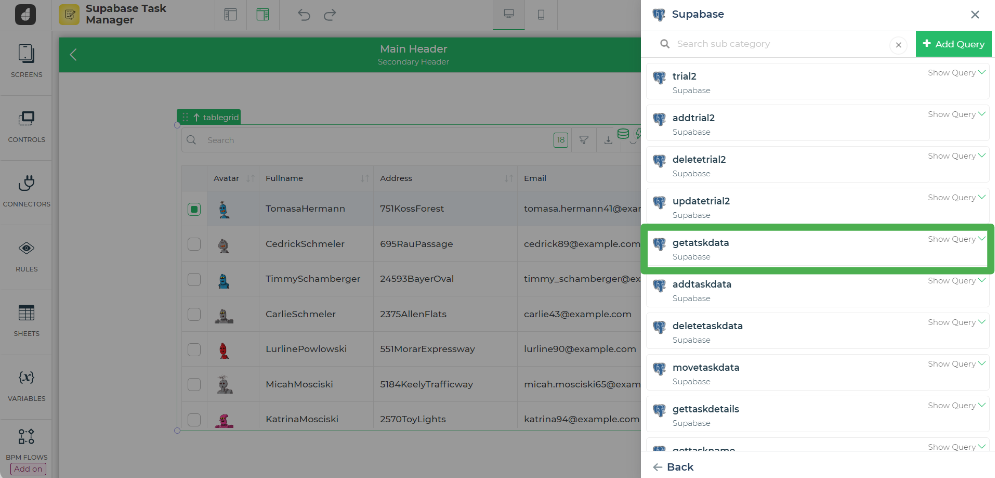
But first of all, you need to add some queries for functions to be performed which can be added by selecting the add query option which will appear after you select the Supabase connector.
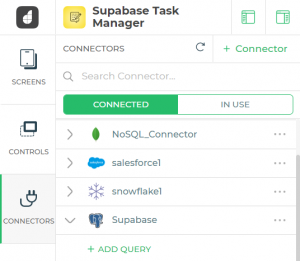
Queries added –
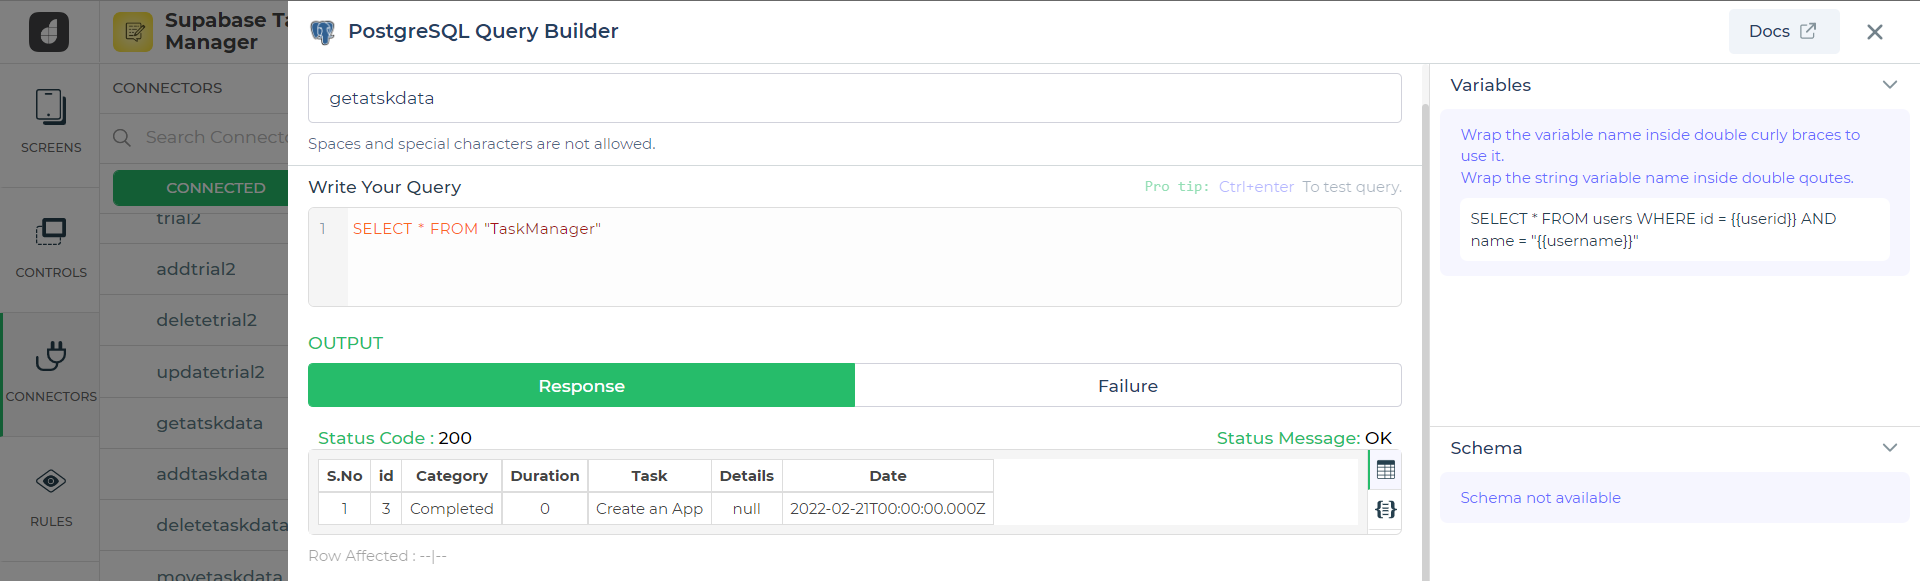
getatskdata – This is added to bring data from the Supabase database to the Supabase UI
Query –
SELECT * FROM “TaskManager”
Addtaskdata – This query will add a task with its details to the Supabase database via the Supabase UI
Query –
INSERT INTO “TaskManager”
VALUES ({{id}}, ‘{{category}}’, {{duration}}, ‘{{task}}’, ‘{{details}}’);

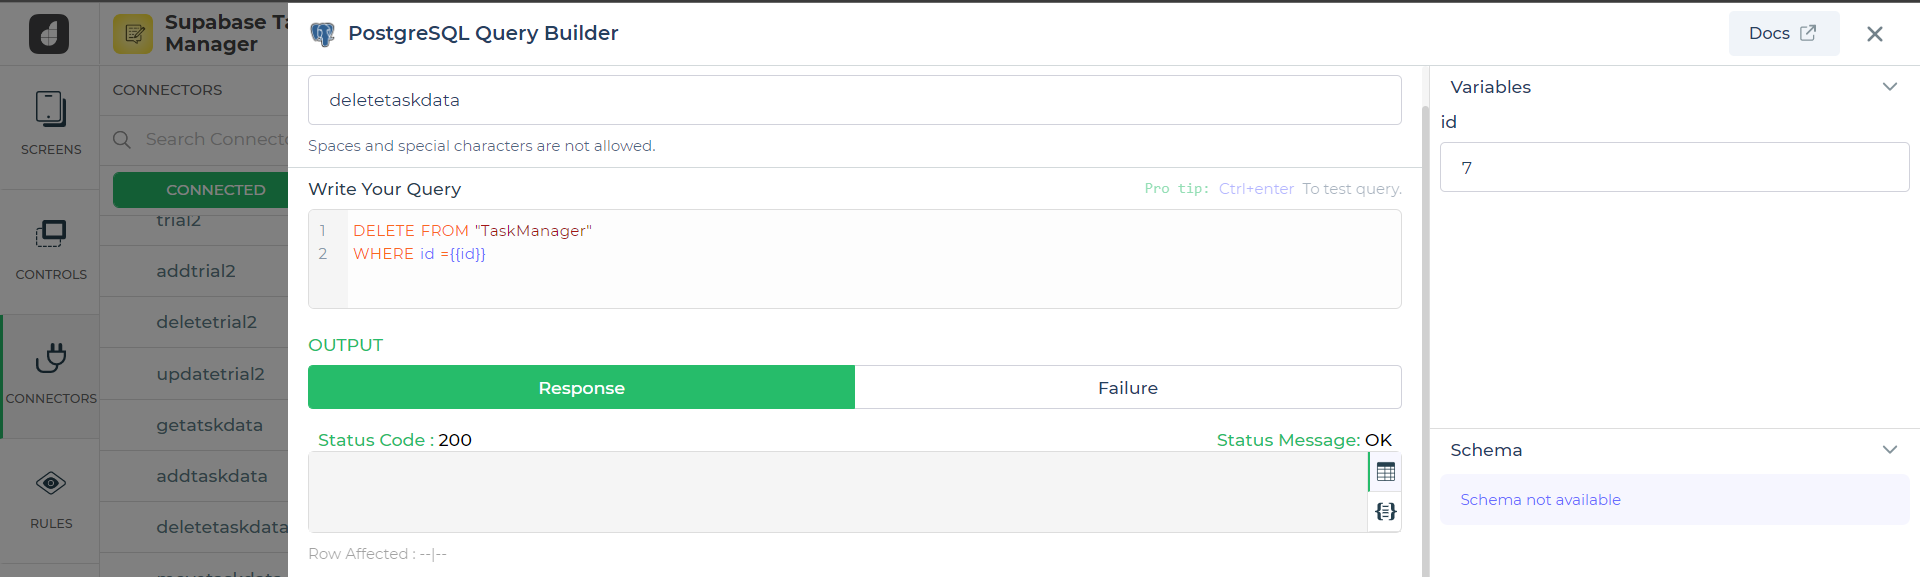
Deletetaskdata – This will delete the task and its details from the Supabase database via the Supabase UI
Query –
DELETE FROM “TaskManager”
WHERE id ={{id}}
Movetaskdata – This query is there to provide the functionality to move the task from one category to another category on the Supabase UI which will also reflect in the Supabase database.
Query –
UPDATE “TaskManager” SET “Category”='{{category}}’
WHERE id={{id}};

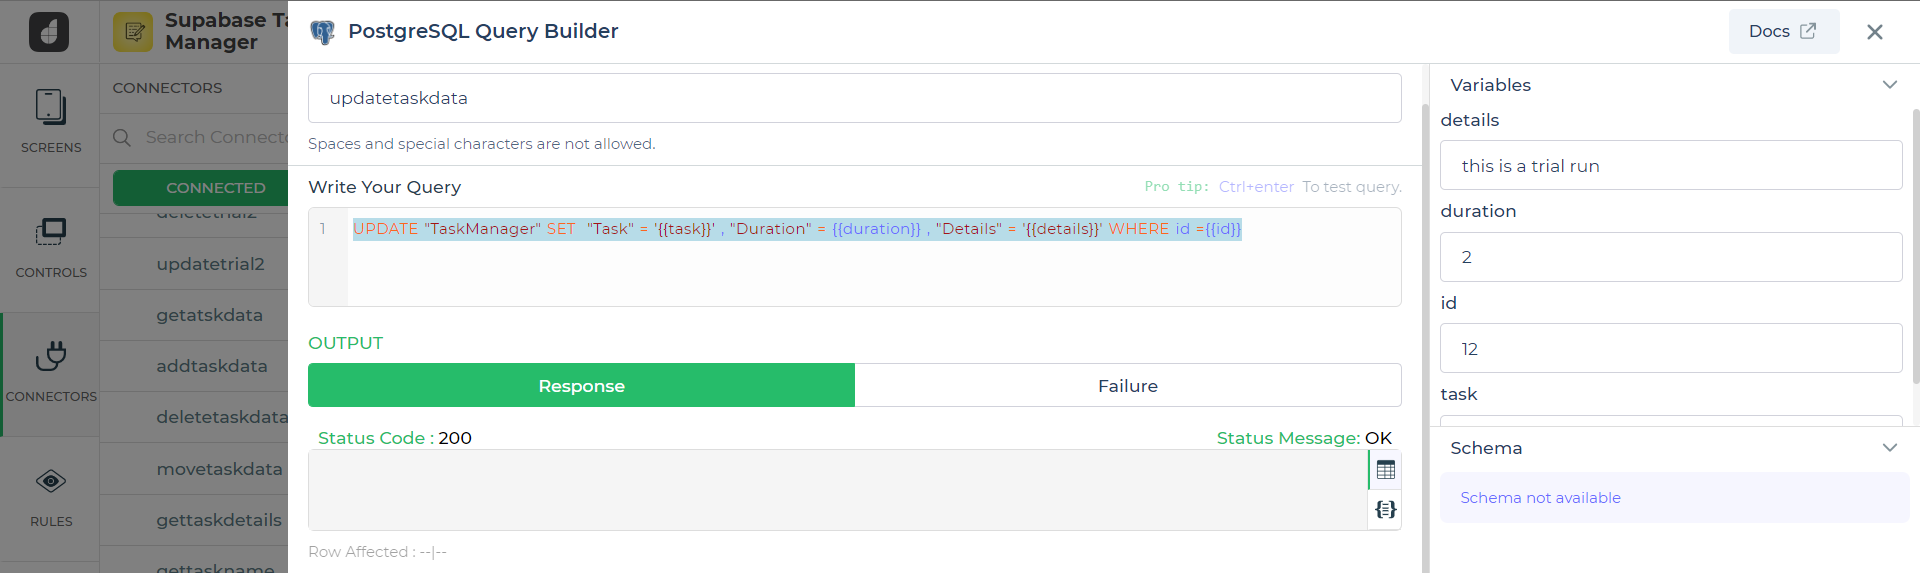
Updatetaskdata – This query is there to update the task details on the Supabase UI which will also be reflected in the Supabse database.
Query –
UPDATE “TaskManager” SET “Task” = ‘{{task}}’ , “Duration” = {{duration}} , “Details” = ‘{{details}}’ WHERE id ={{id}}
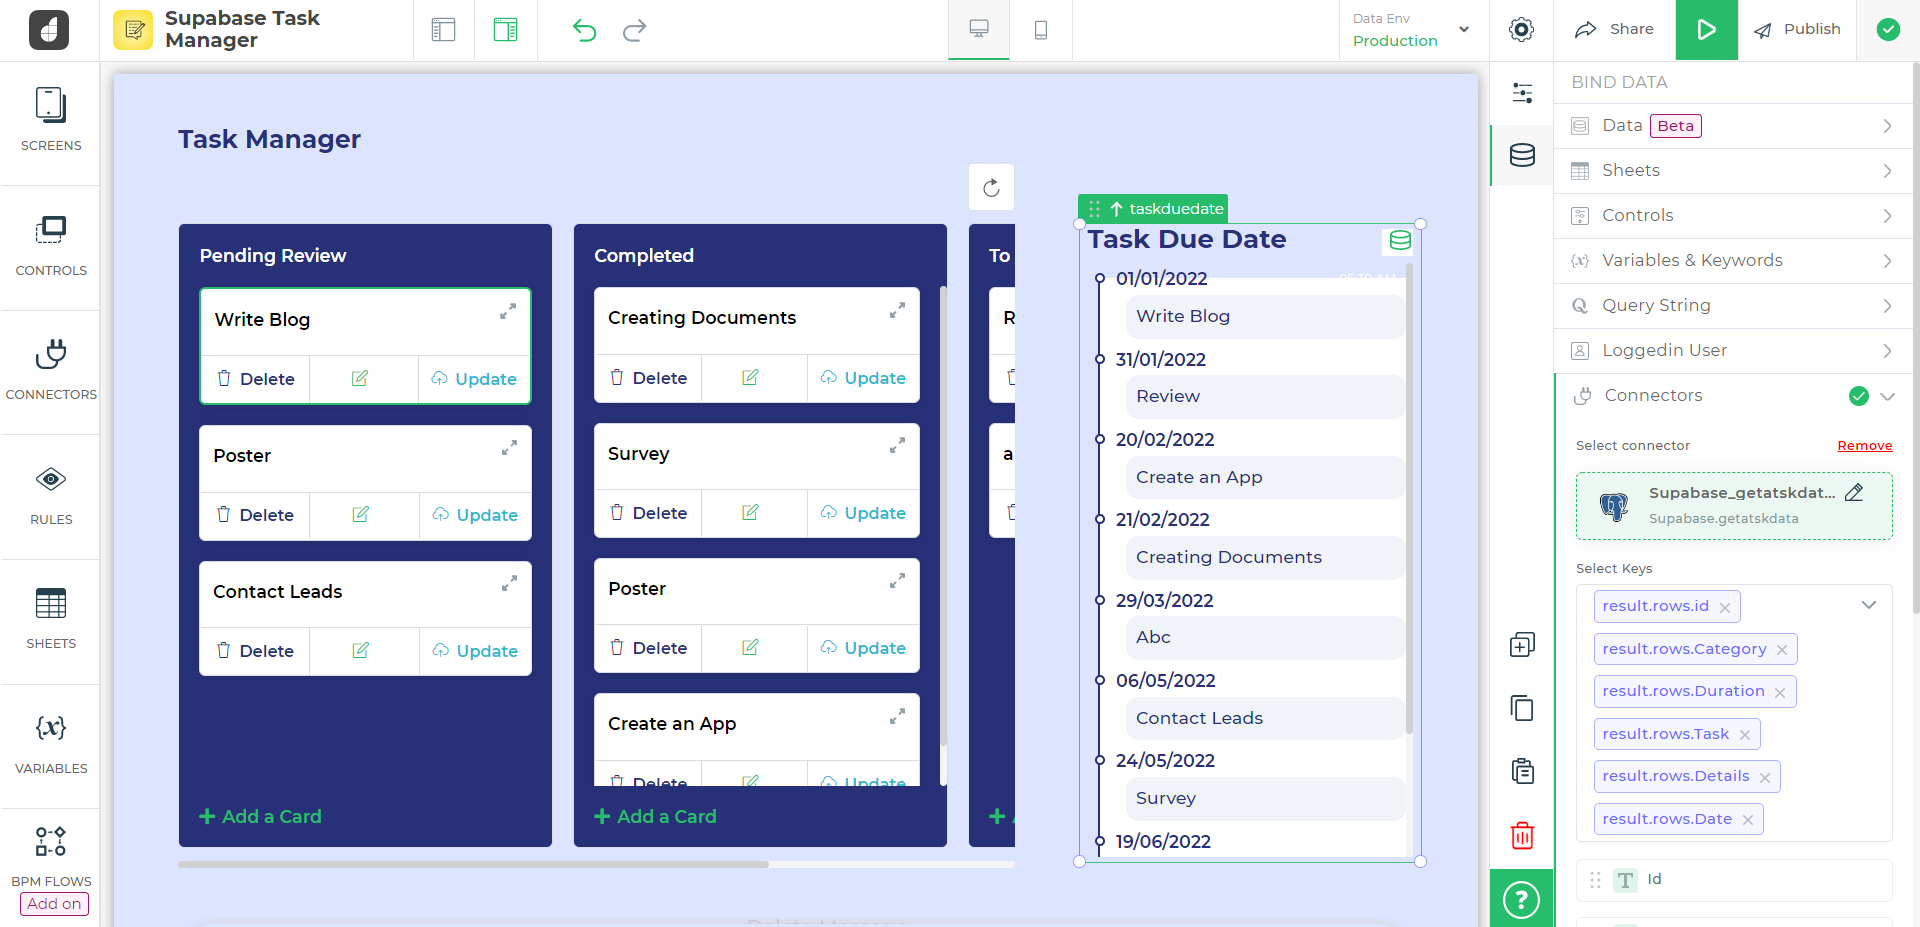
We need to add data from the Supabase database to represent it through the Supabase UI which can be done by clicking the connector after clicking the data option
Then select the Supabase connector

Then the query named getatskdata to import all the data from the Supabase database to the Supabase UI
You can also select which columns you want to import to your Supabase UI from the Supabase database.
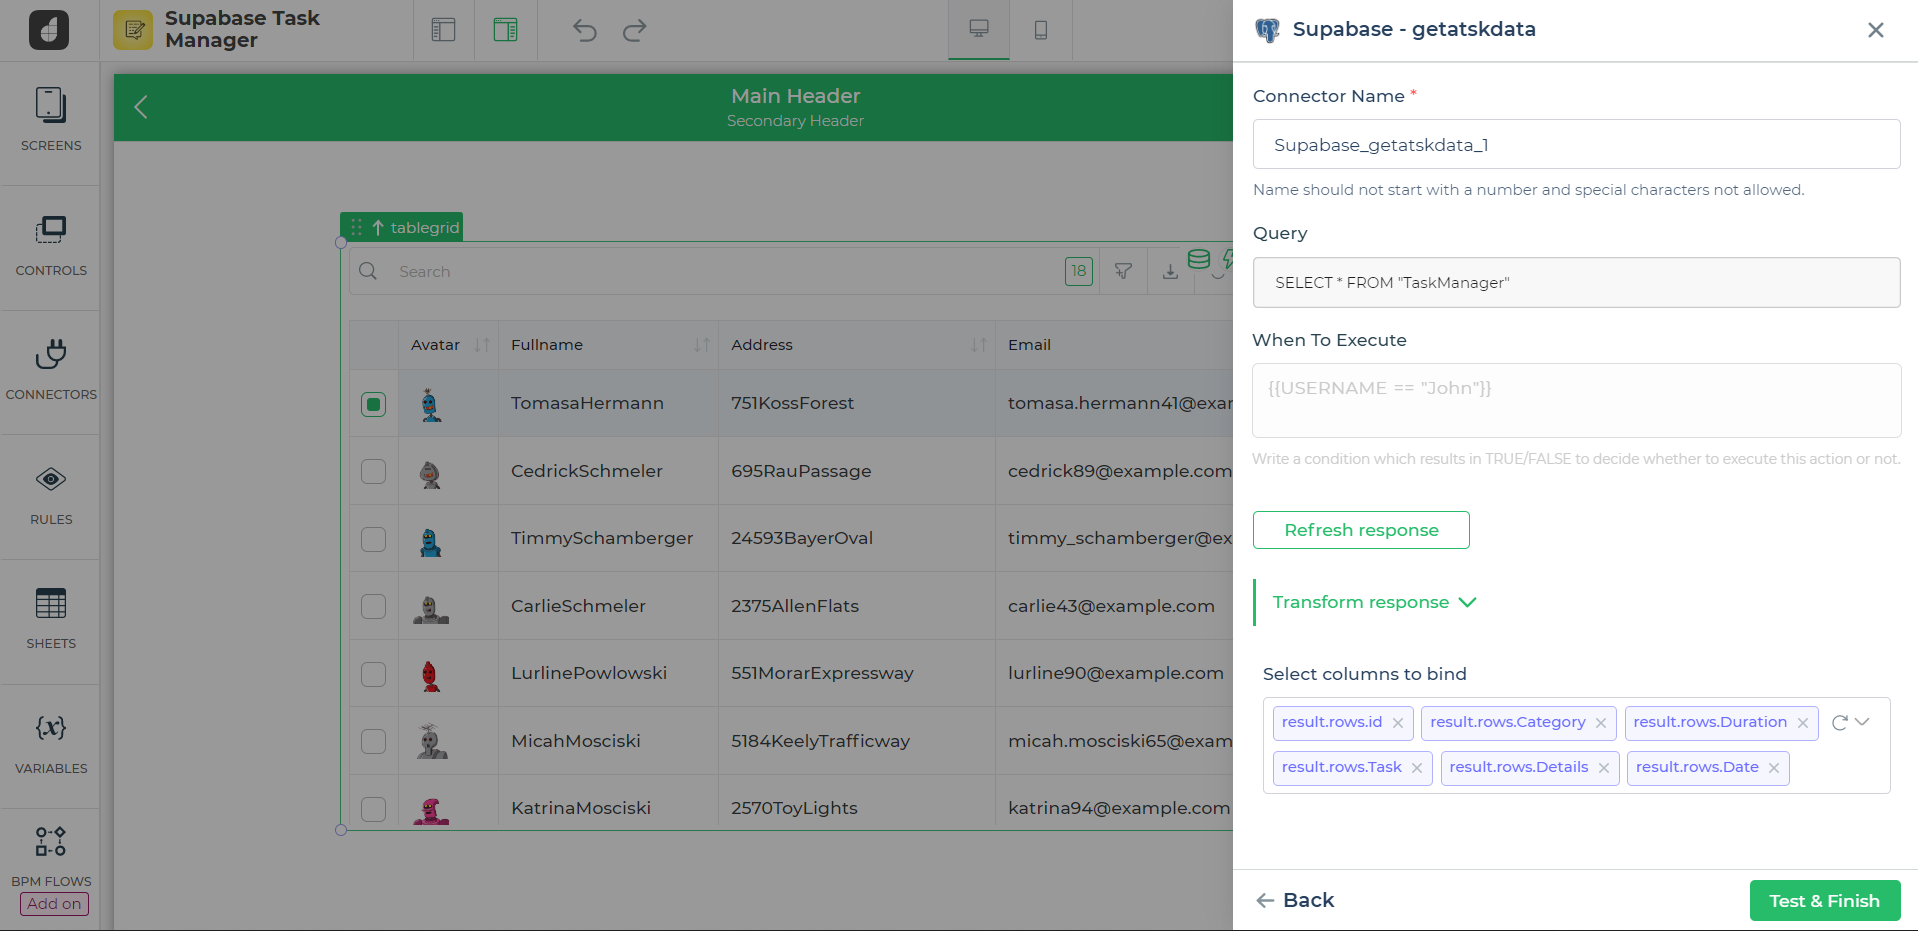
After you have completed the process, you have successfully added the data to your Supabase UI from your Supabse database.

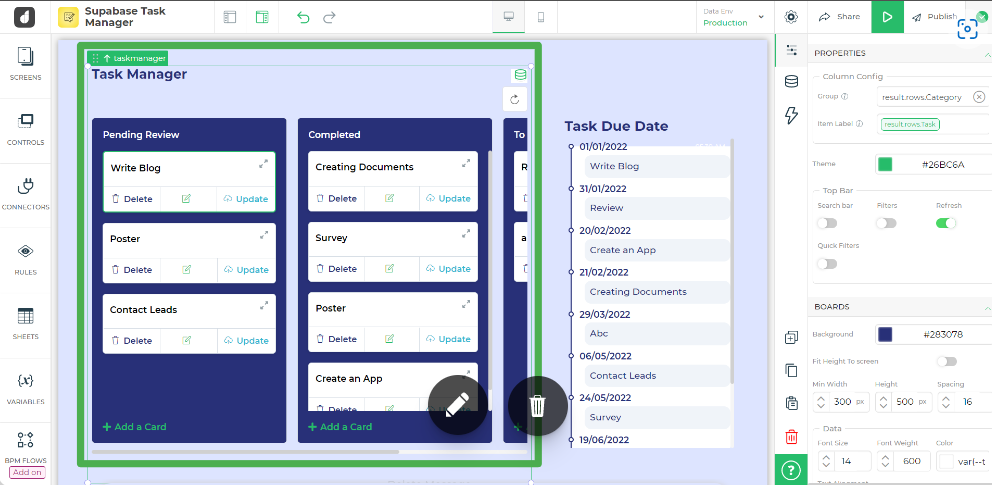
After customization based on the requirement of your Supabase UI, this control will look like this –
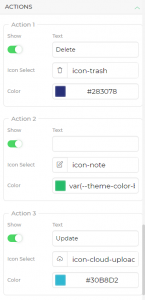
I have added 3 buttons –
- Delete
- Comment
- Update


Adding functionality to the buttons in Kanban control
For this, we first need to toggle on the action buttons for performing/triggering main functions in the task management app.
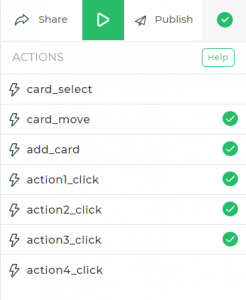
This is the action flow for moving a card from one category to another

This is the action flow that will cause the pop-up to appear to add the details for tasks
This action flow is present to delete a task from the Supabase database

This is the action that will cause the pop-up to appear to update the details of tasks

This action flow is present to comment on a task
All the action flows will be properly explained further as we go on when those specific functionalities will be discussed.
1] Add a card
This will add a task to the Supabase UI/Kanban control
After you click on it, a pop-up will appear where you can enter the details for the specific task to be added to the task management app.
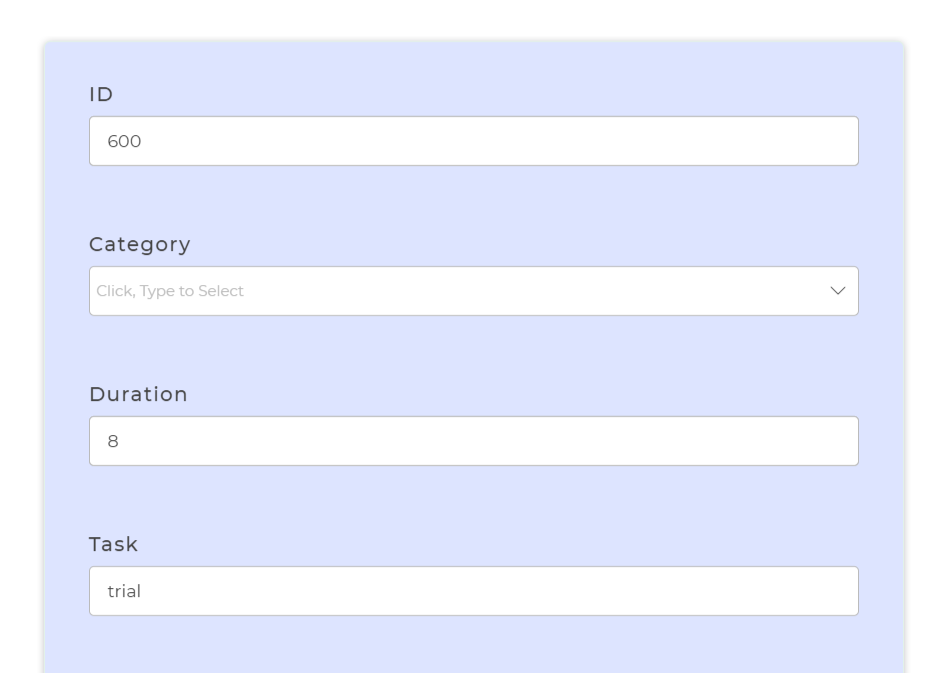
For that, you will have to create a pop-up that will also be a part of the Supabase UI with the following controls –
- Container – To have everything organized within it.
- Numeric – To take numeric input values from the user for duration and ID for the task management app.
- Dropdown – This is present in the task management app to categorize the tasks into different categories.
- Text input – To take textual input values from the user for task name and details for the task management app.
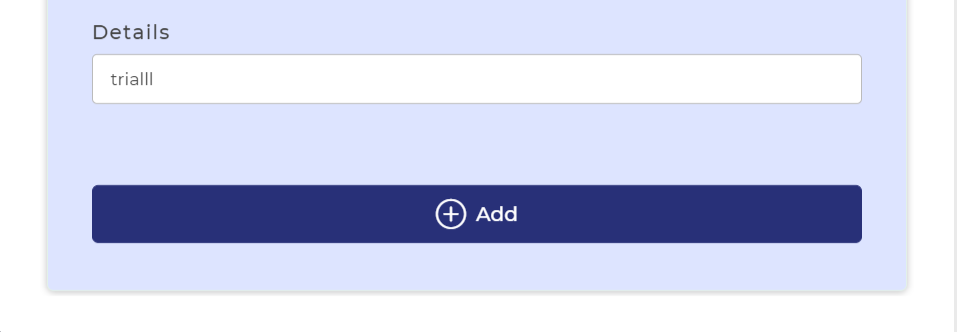
- Button – This is present to help perform the action of adding the task to the Supabase database.
All these controls can be edited by changing the properties to make the Supabase UI look better and more information can be viewed by clicking on those respective links.
This is what the pop-up will look like.
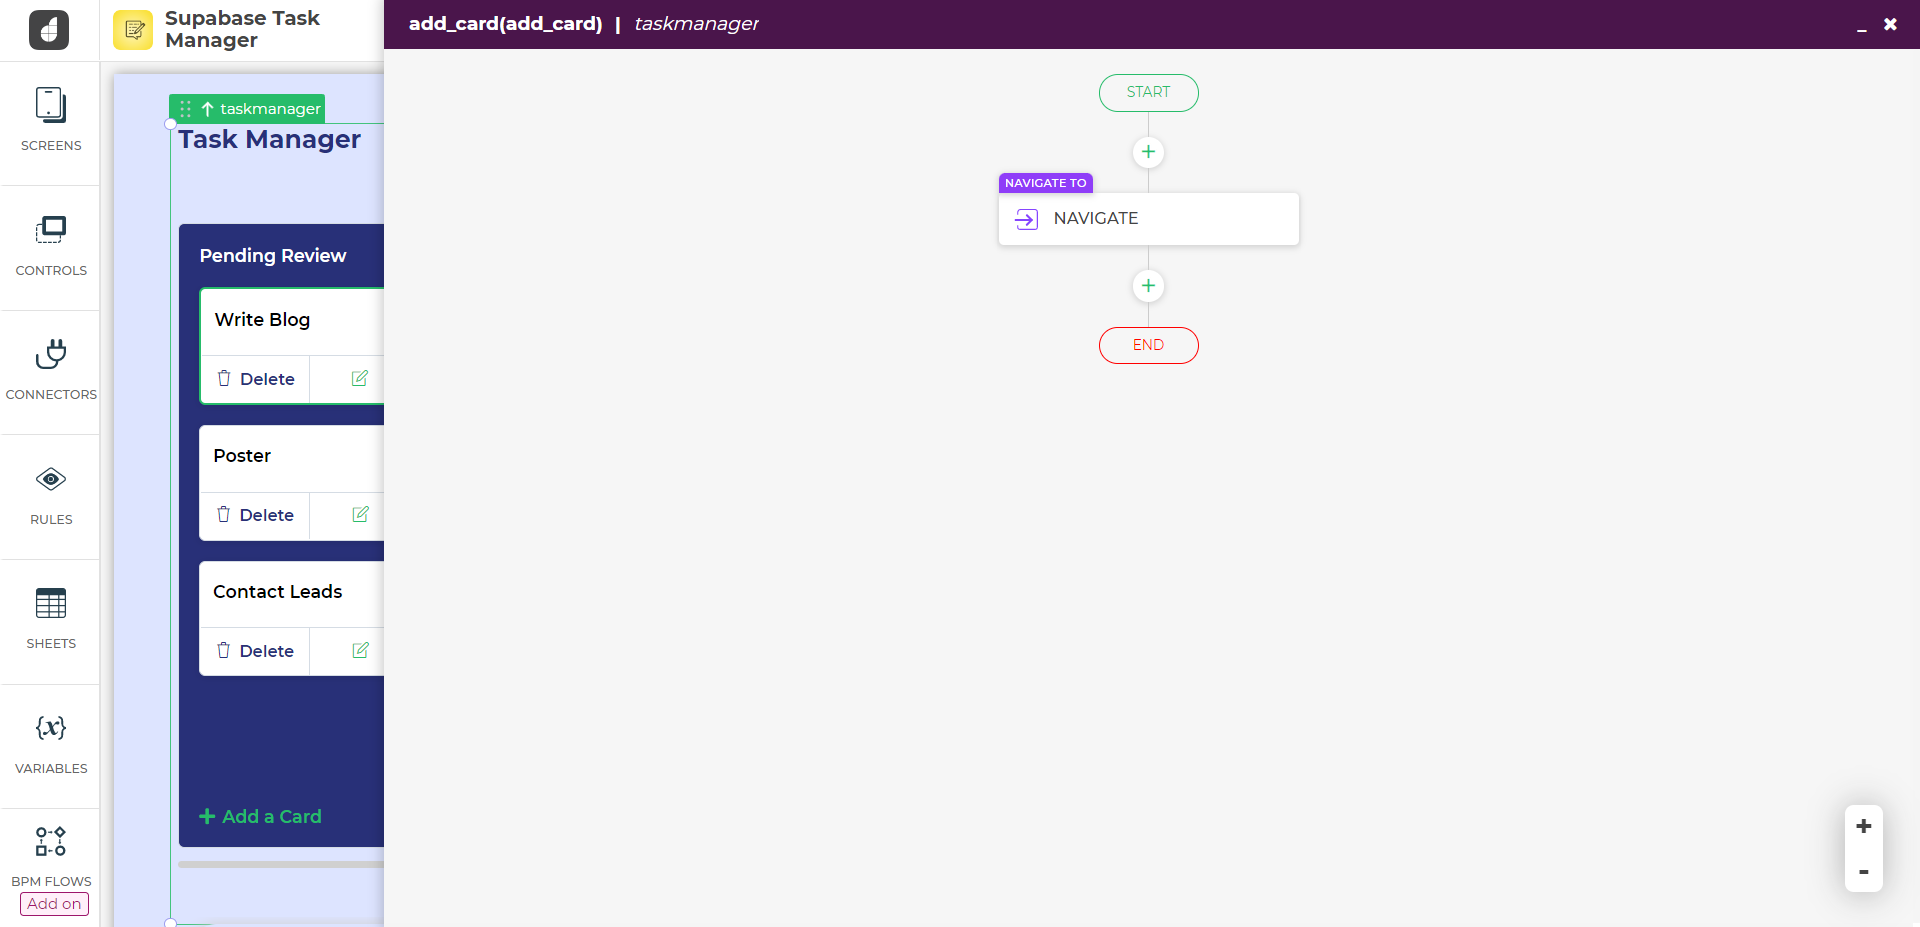
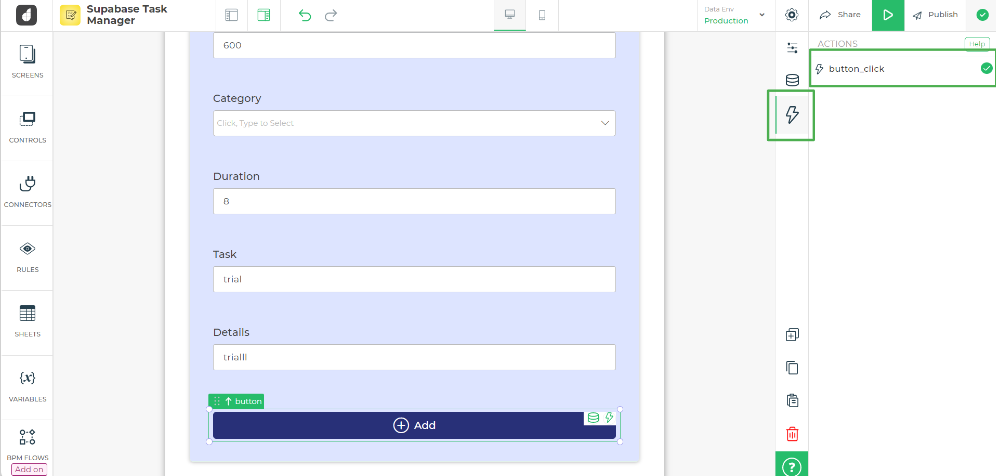
Now we also need to add action to the add button which we have added and to do that we will select the button click option from the action option.
After that, you need to add the action flow for the actions to take place in a specific order.
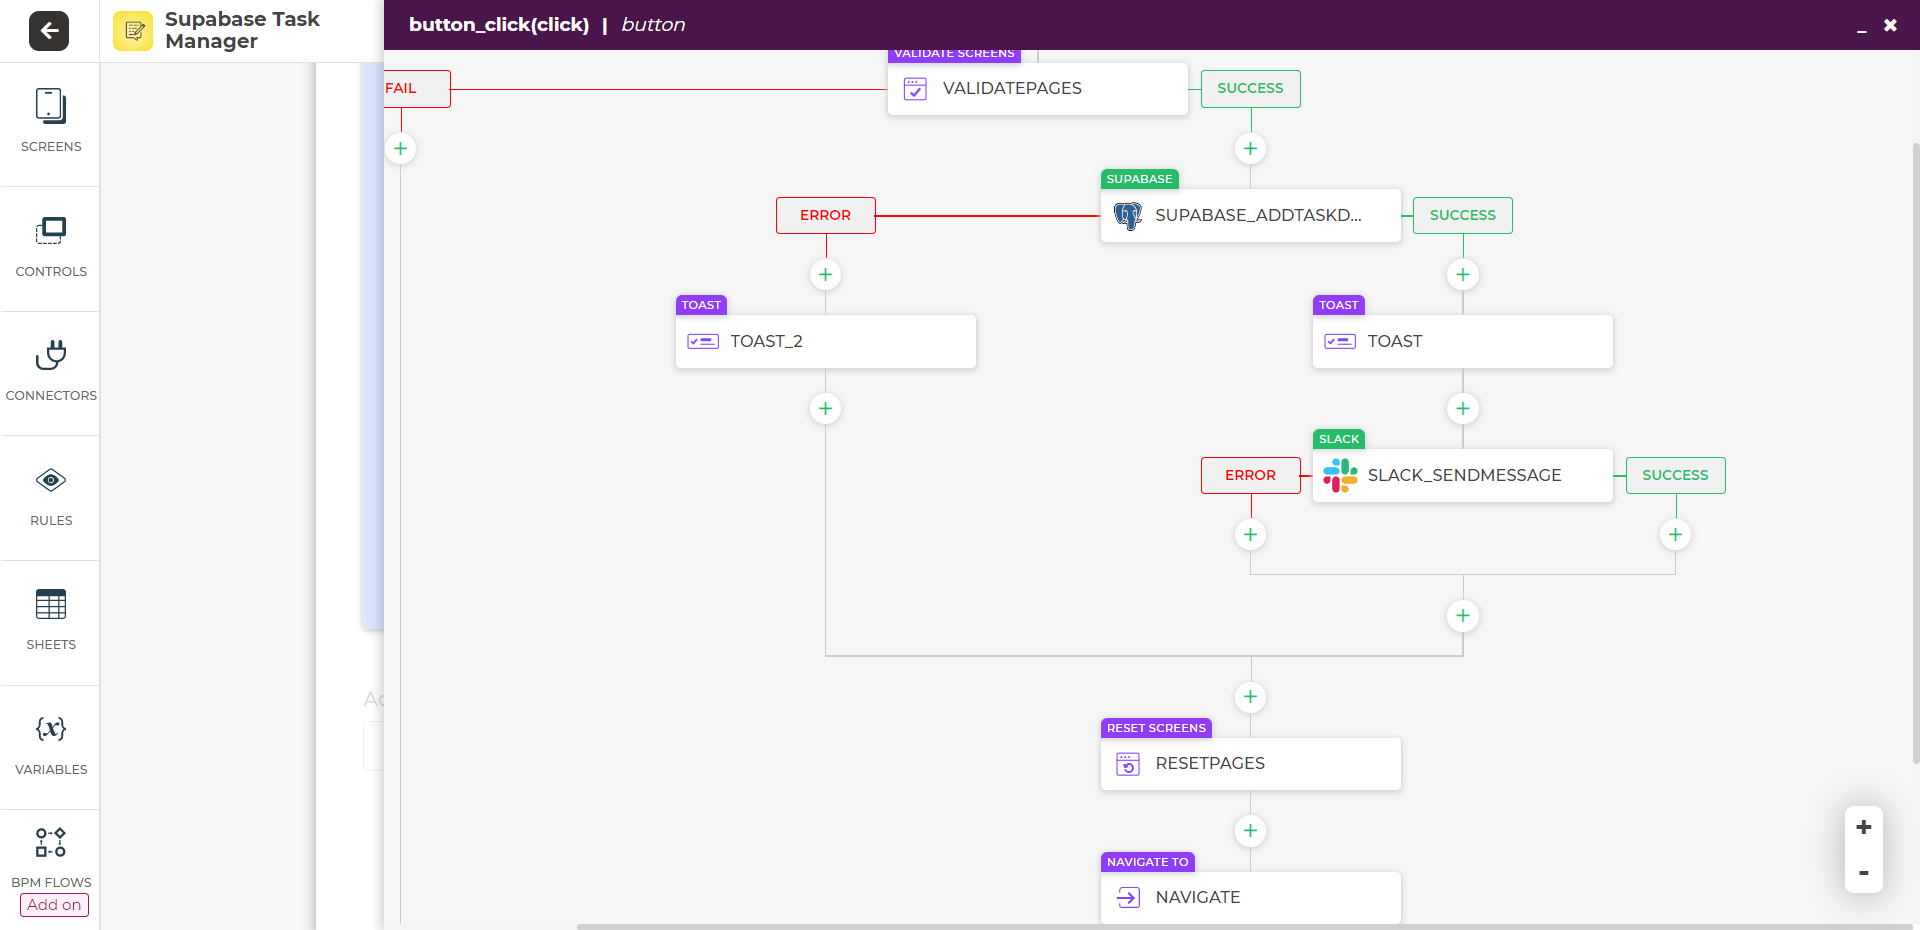
Here we have added the Supabase_addtaskdata connector by selecting the Suapabase server-side action of actually adding the data to the Supabase database.
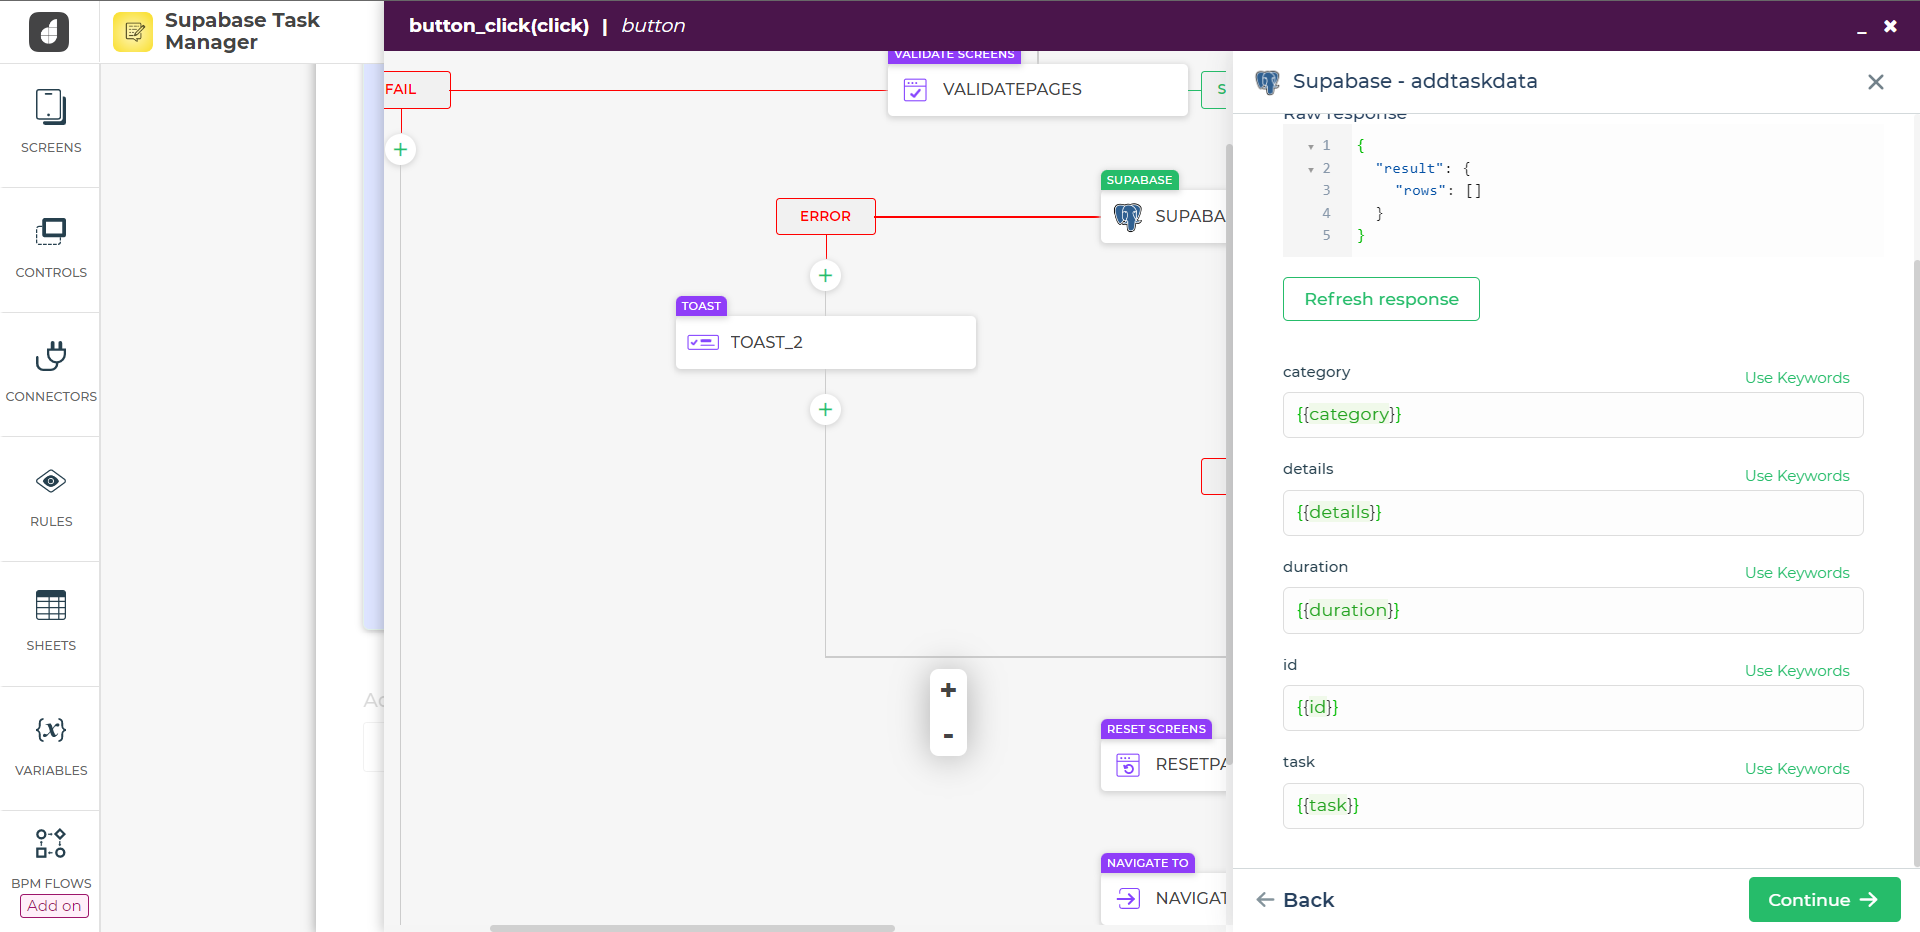
You also need to select the fields in which the data will be added to the database.
The Toast and Toast_2 are there to display the message if the data has been successfully added or not which will be notified by the respective Toast.
After that, there is a function of sending a slack message to notify the user about the changes made via the Supabase UI to the Supabase database.
2] Deleting a task
On clicking the delete button, you will be able to set the action flow the same way you had done for the add button but we do not require a pop-up for this.


We have added the supabase_deletetask connector from the server side action to delete the data from the Supabase database via the Supabase UI.
We will reset the page to refresh the Supabase UI and also add a feature of sending a slack message to the user to notify them that the task has been deleted.
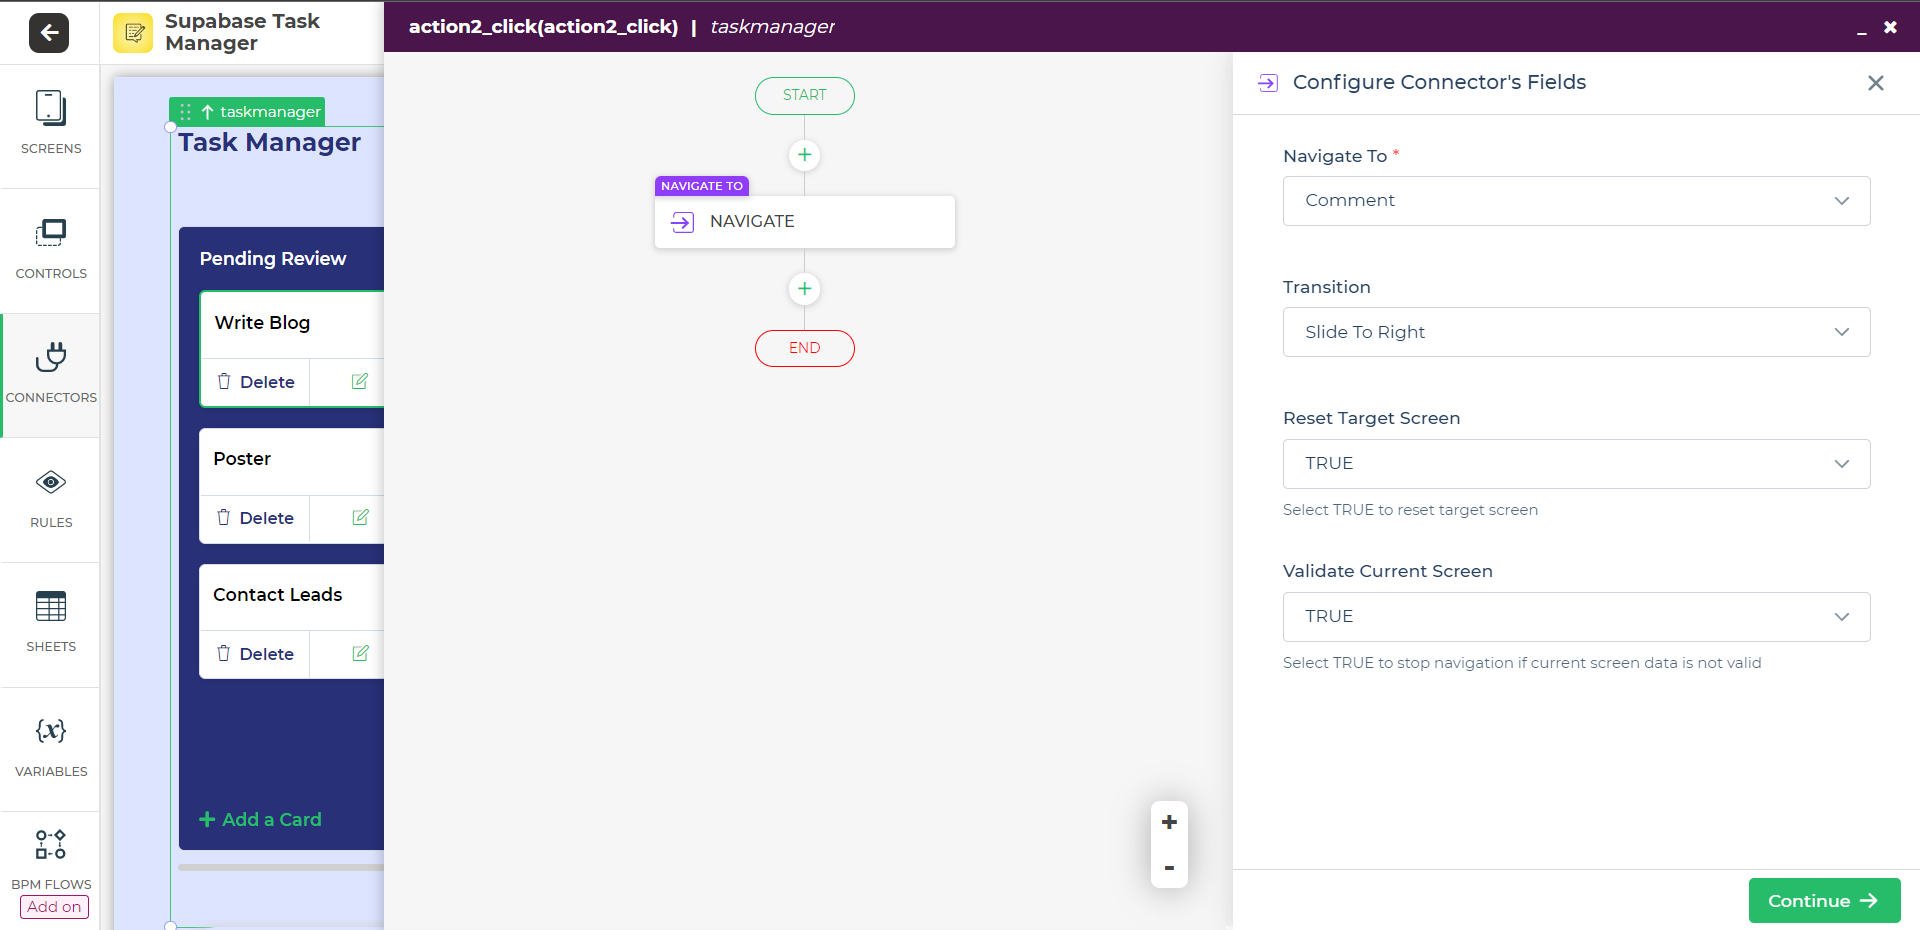
3] Move task
This will help you to drag and drop the task from one category to another category hence making changes to the Supabase database via the Supabase UI.
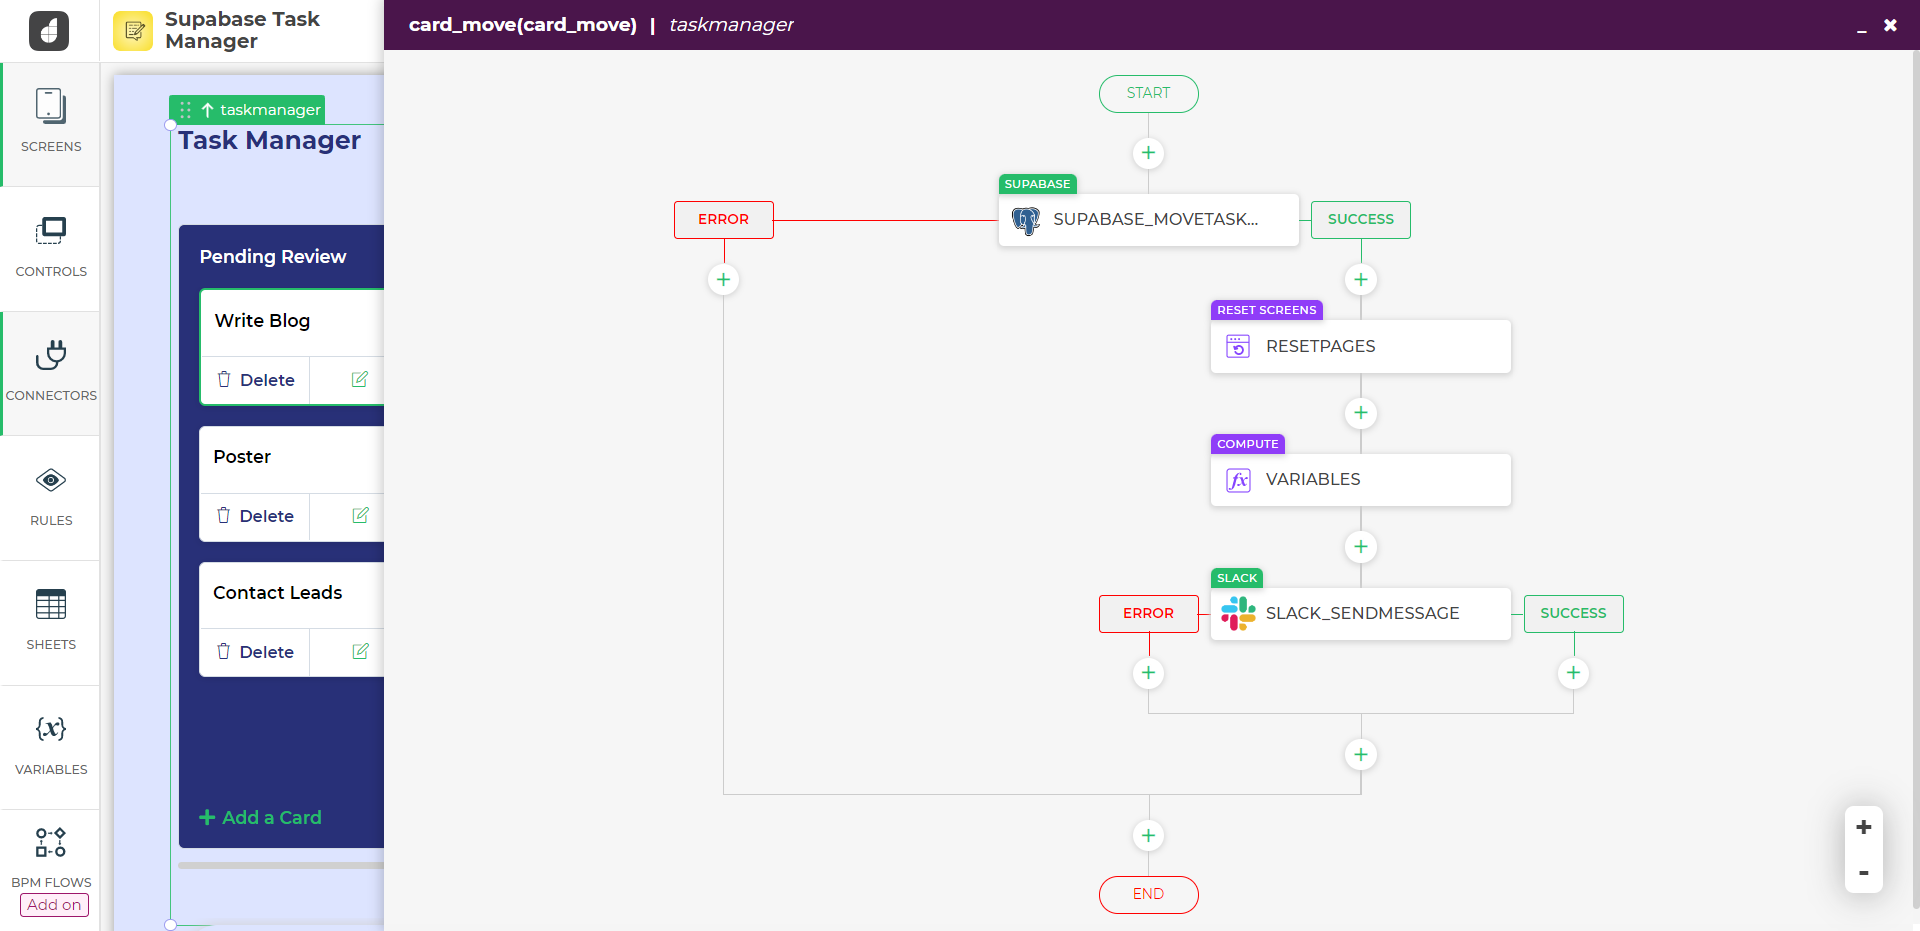

Supabase_movetask connector can be connected from the server side action to move the task from one category to another.
4] Update task
This will update a task to the Supabase UI/Kanban control.

The way which we used for creating a pop-up for adding a task can be repeated here in order to create a pop-up for updating data.
After you click on it, a pop-up will appear where you can enter the details for the specific task to be updated in the task management app.
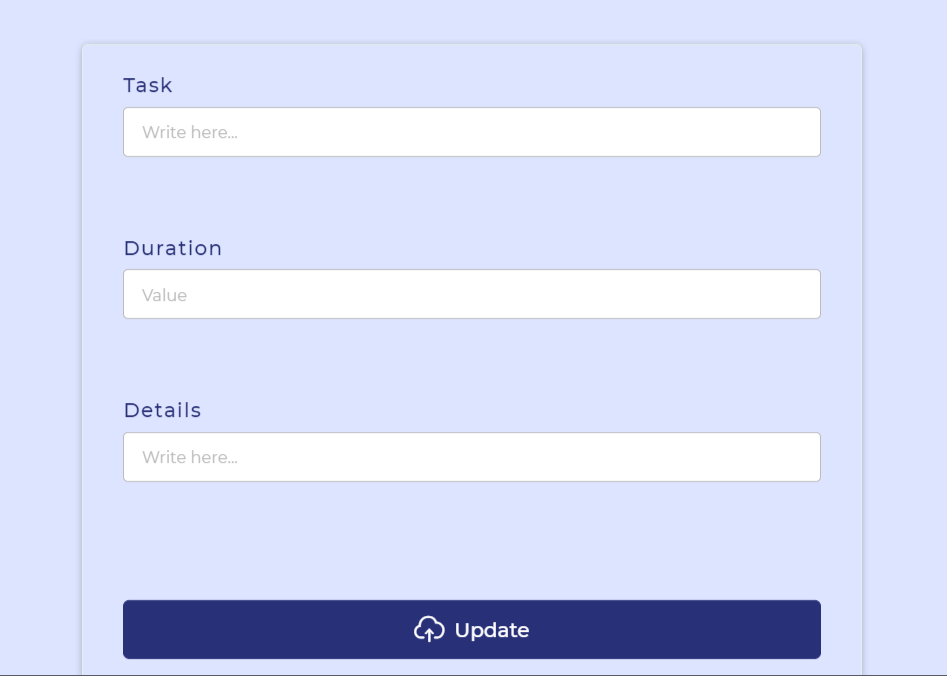
For that, you will have to create a pop-up that will also be a part of the Supabase UI with the following controls –
- Container – To have everything organized within it.
- Numeric – To take numeric input values from the user for the duration of tasks for the task management app.
- Text input – To take textual input values from the user for task name and details for the task in the Task management app.
- Button – This is present to help perform the action of updating the task to the Supabase database.
All these controls can be edited by changing the properties to make the Supabase UI look better and more information can be viewed by clicking on those respective links.
This is what the pop-up will look like.
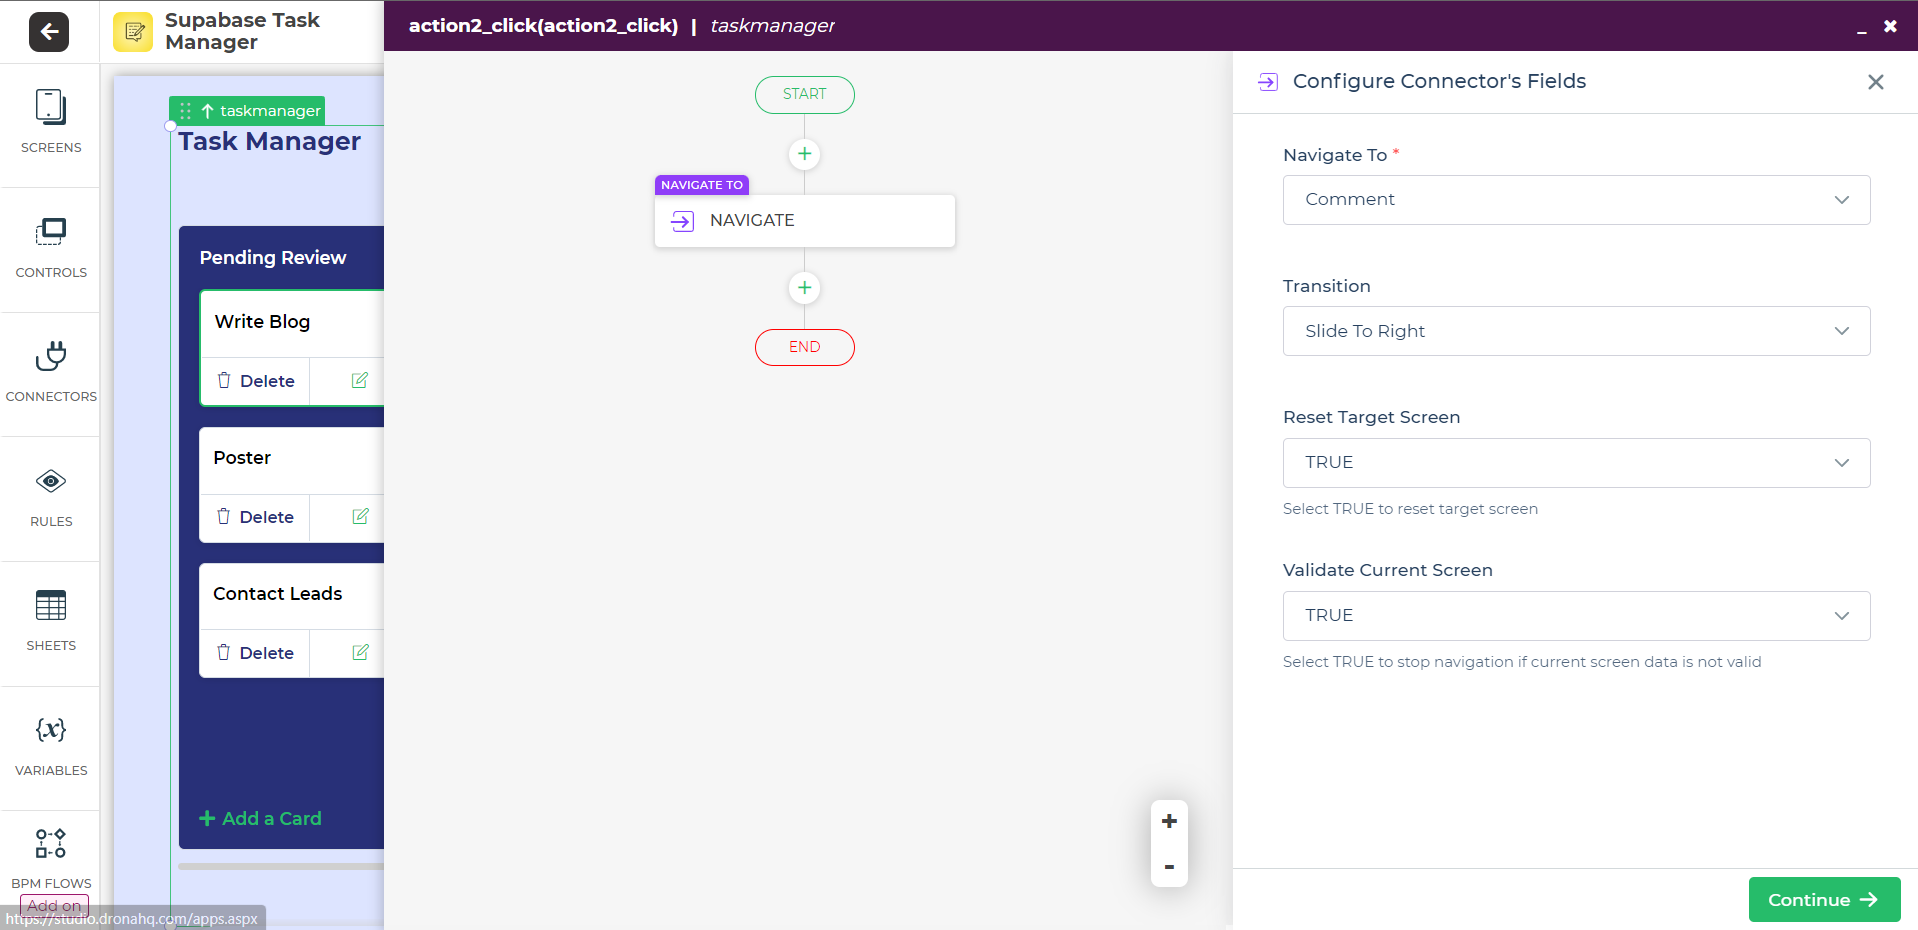
Now we also need to add action to the update button which we have added and to do that we will select the button click option from the action option.
After that, you need to add the action flow for the actions to take place in a specific order.
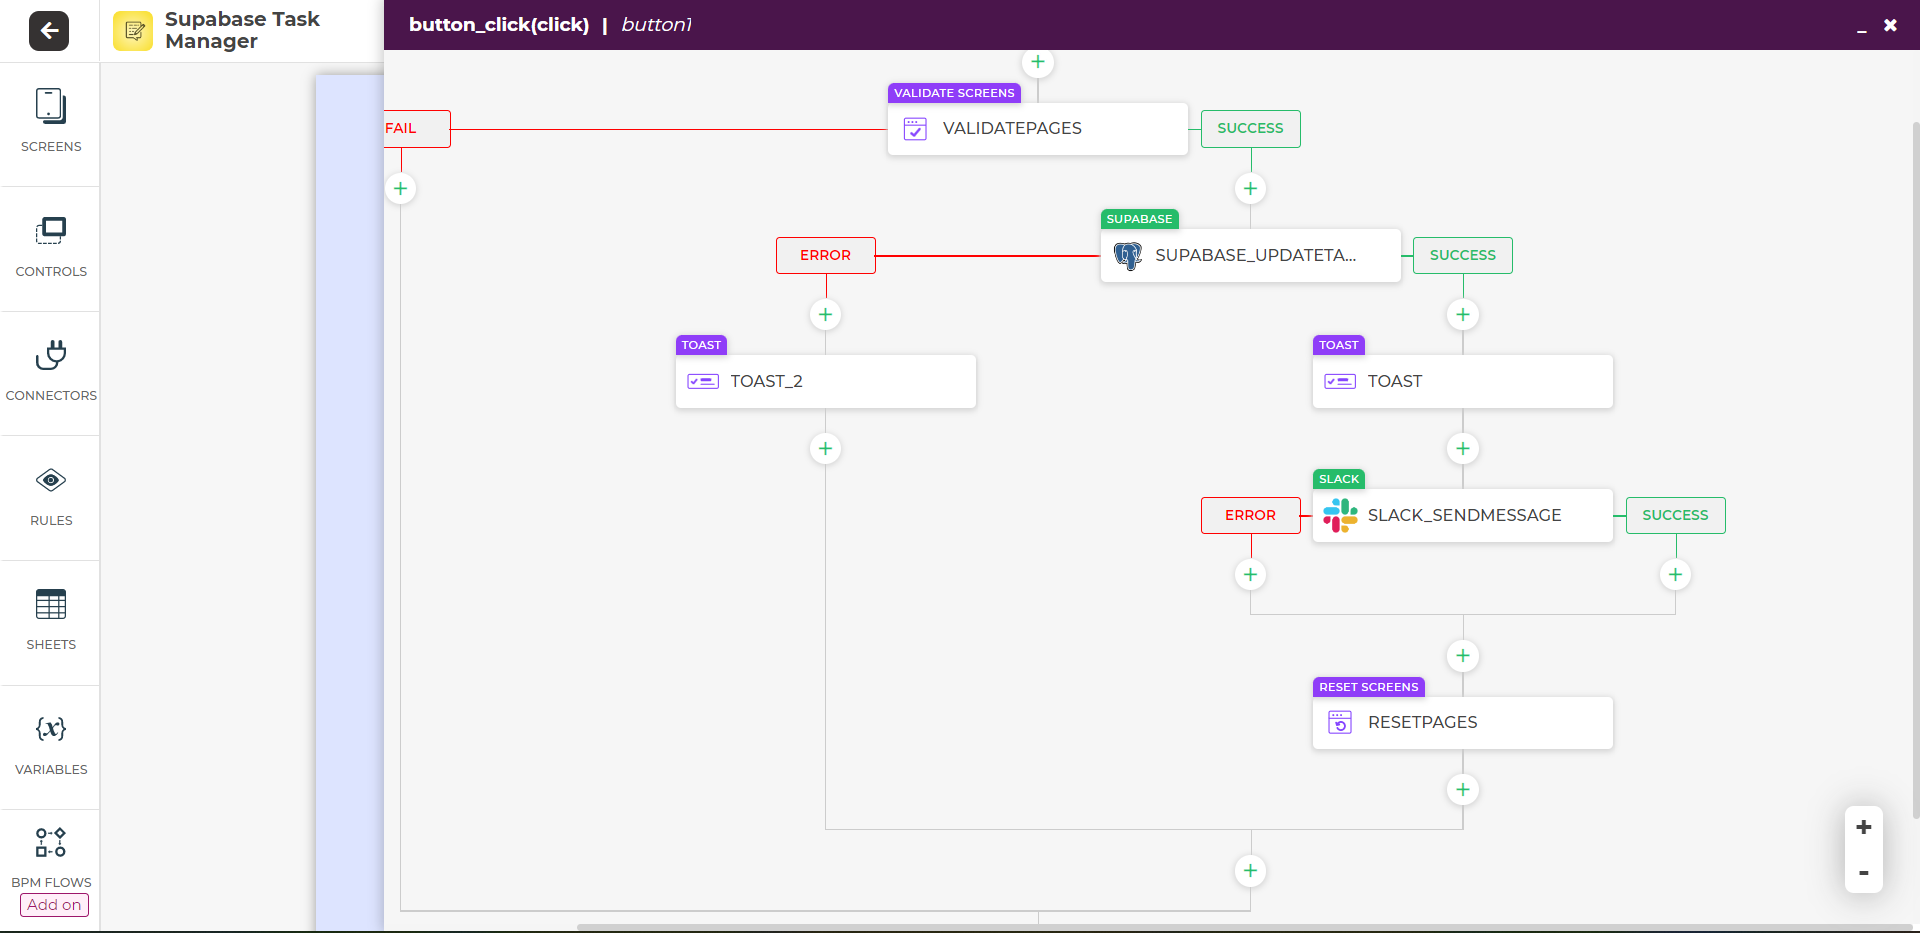
Here we have added the Supabase_updatetaskdata connector by selecting the Suapabase server-side action of actually adding the data to the Supabase database.
You also need to select the fields whose data will be updated to the database.
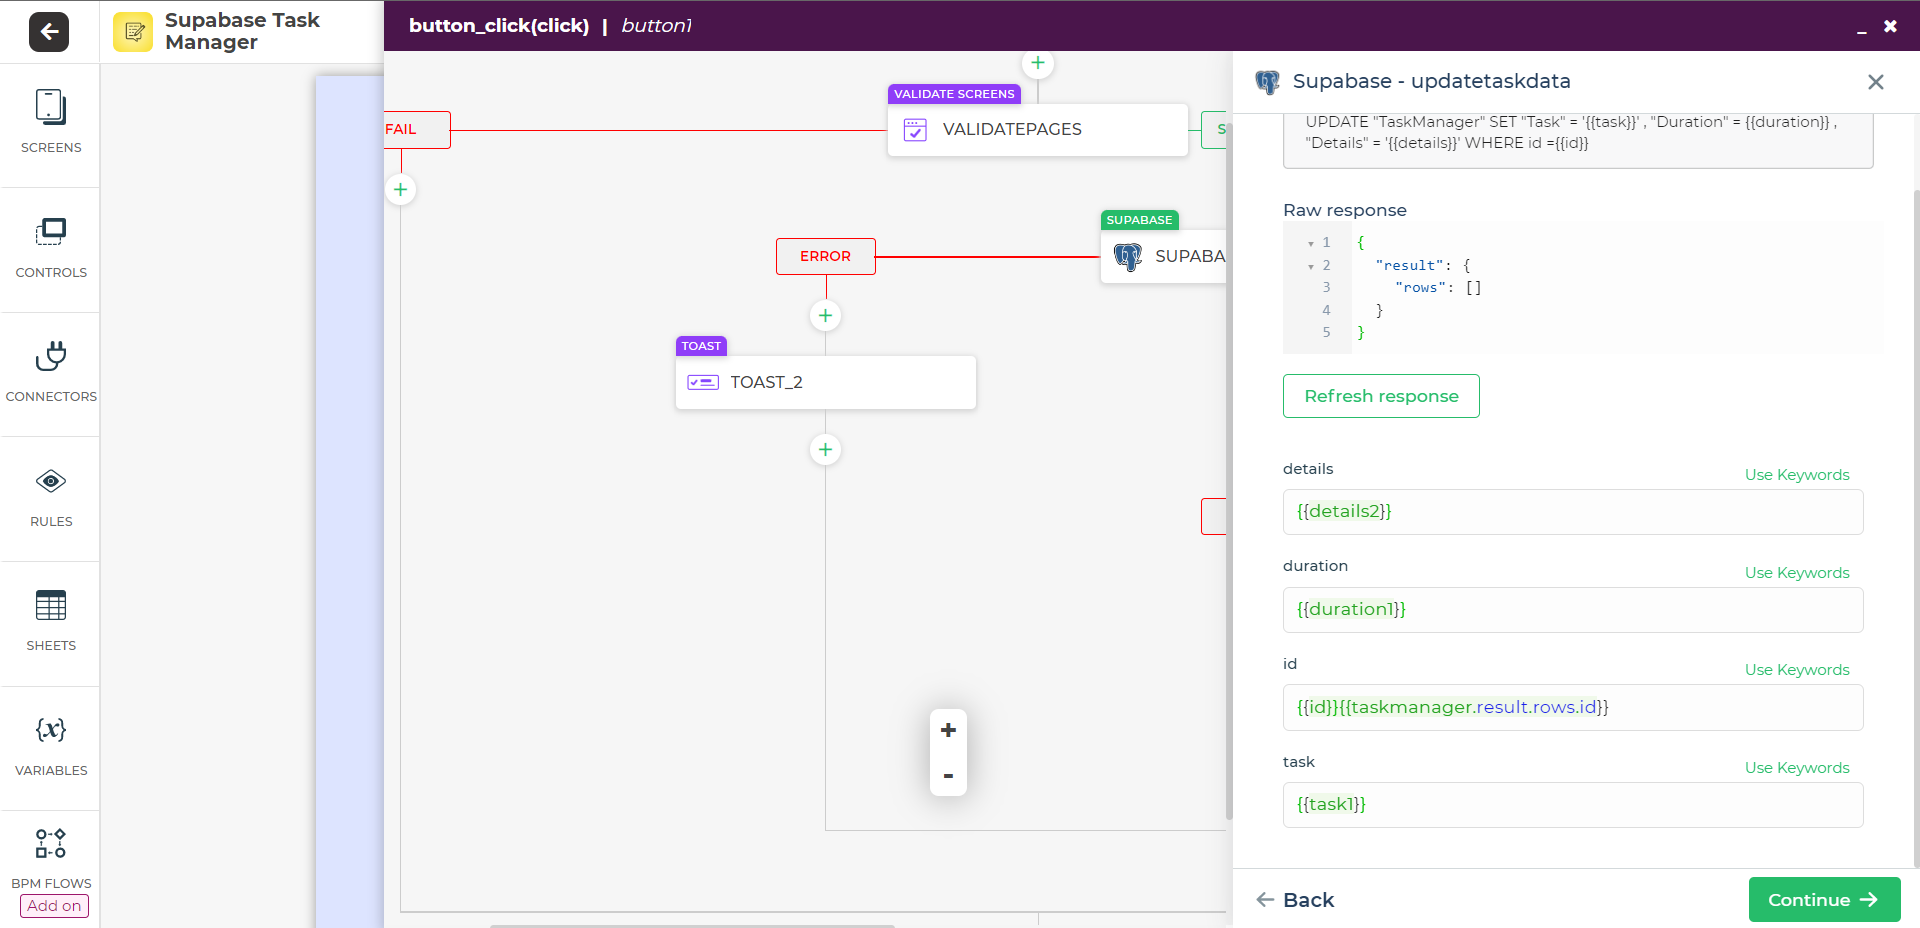
The Toast and Toast_2 are there to display the message if the data has been successfully added or not which will be notified by the respective Toast.
After that, there is a function of sending a slack message to notify the user about the changes made via the Supabase UI to the Supabase database.
5] Commenting on the task
This will let you comment on a task on the Supabase UI/Kanban control.
The way which we used for creating a pop-up for adding a task can be repeated here in order to create a pop-up for commenting on tasks.
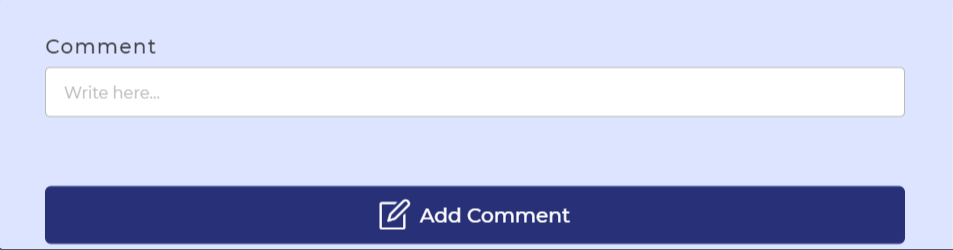
After you click on it, a pop-up will appear where you can enter the comments for the tasks in the task management app.
For that, you will have to create a pop-up that will also be a part of the Supabase UI with the following controls –
- Container – To have everything organized within it.
- Text input – To take textual input values from the user for comments for the task in the Task management app.
- Button – This is present to help perform the action of commenting on the task to the Supabase database.
All these controls can be edited by changing the properties to make the Supabase UI look better and more information can be viewed by clicking on those respective links.
This is what the pop-up will look like.
Now we also need to add action to the comment button which we have added and to do that we will select the button click option from the action option.
After that, you need to add the action flow for the actions to take place in a specific order.
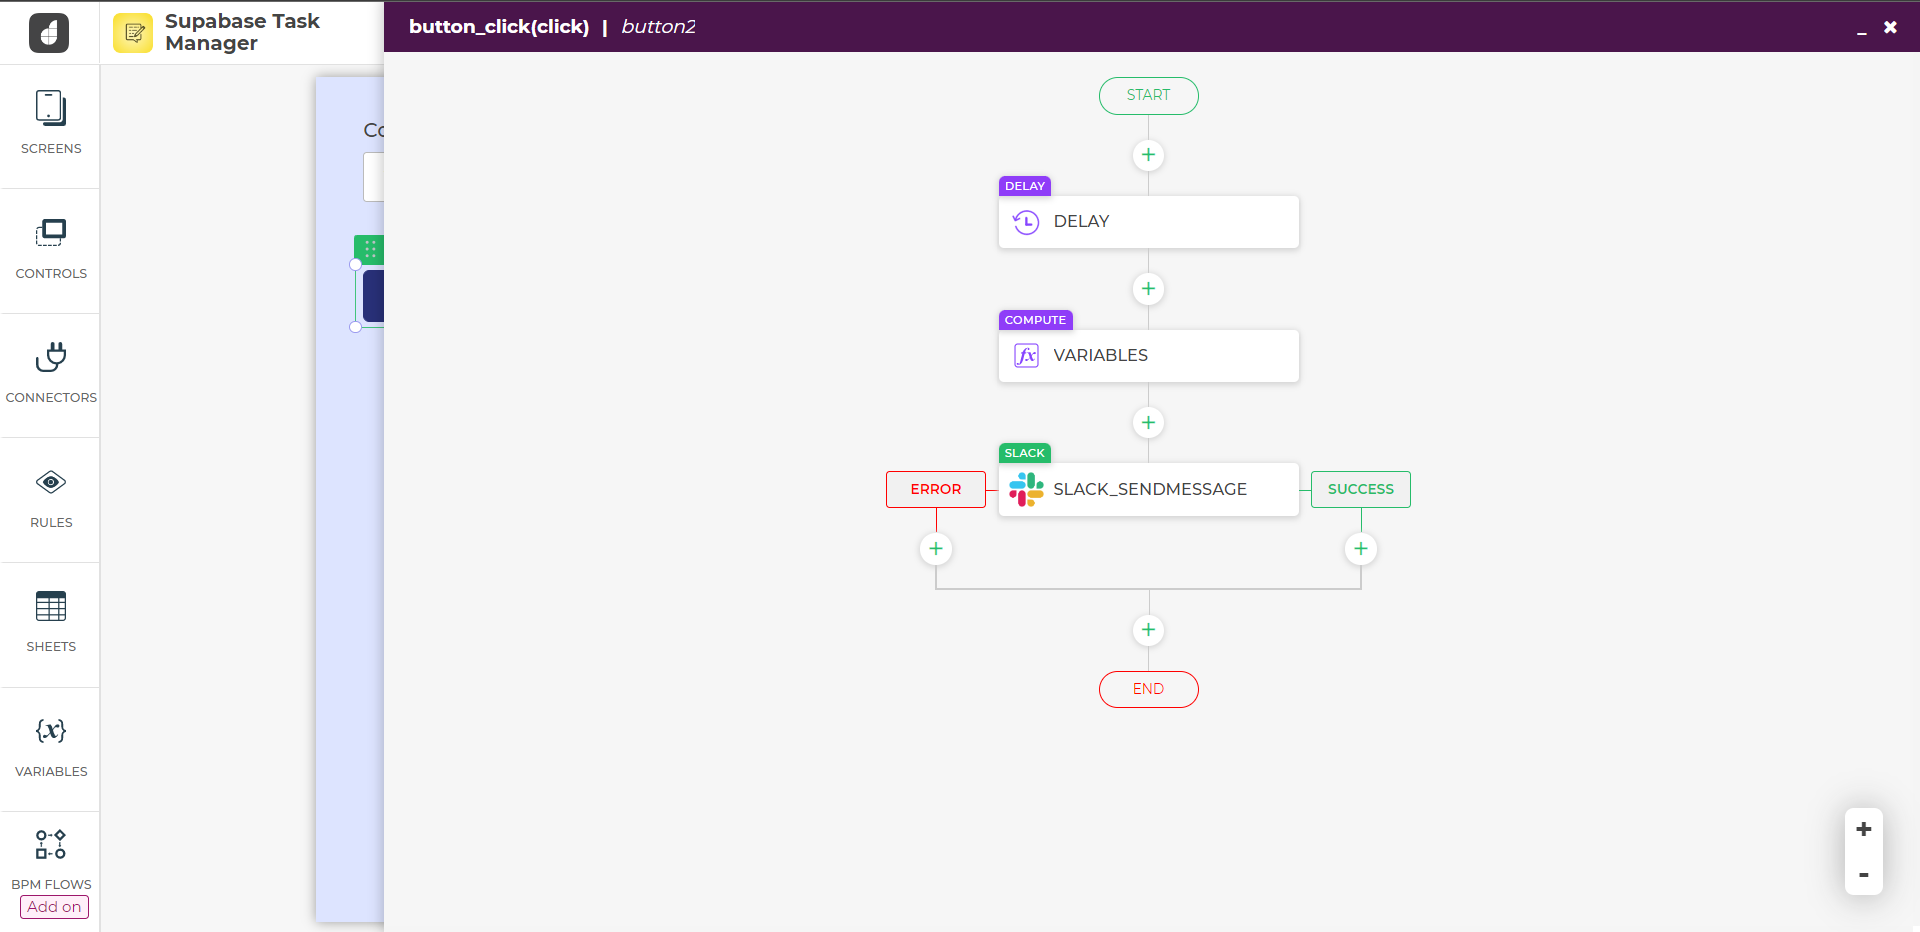
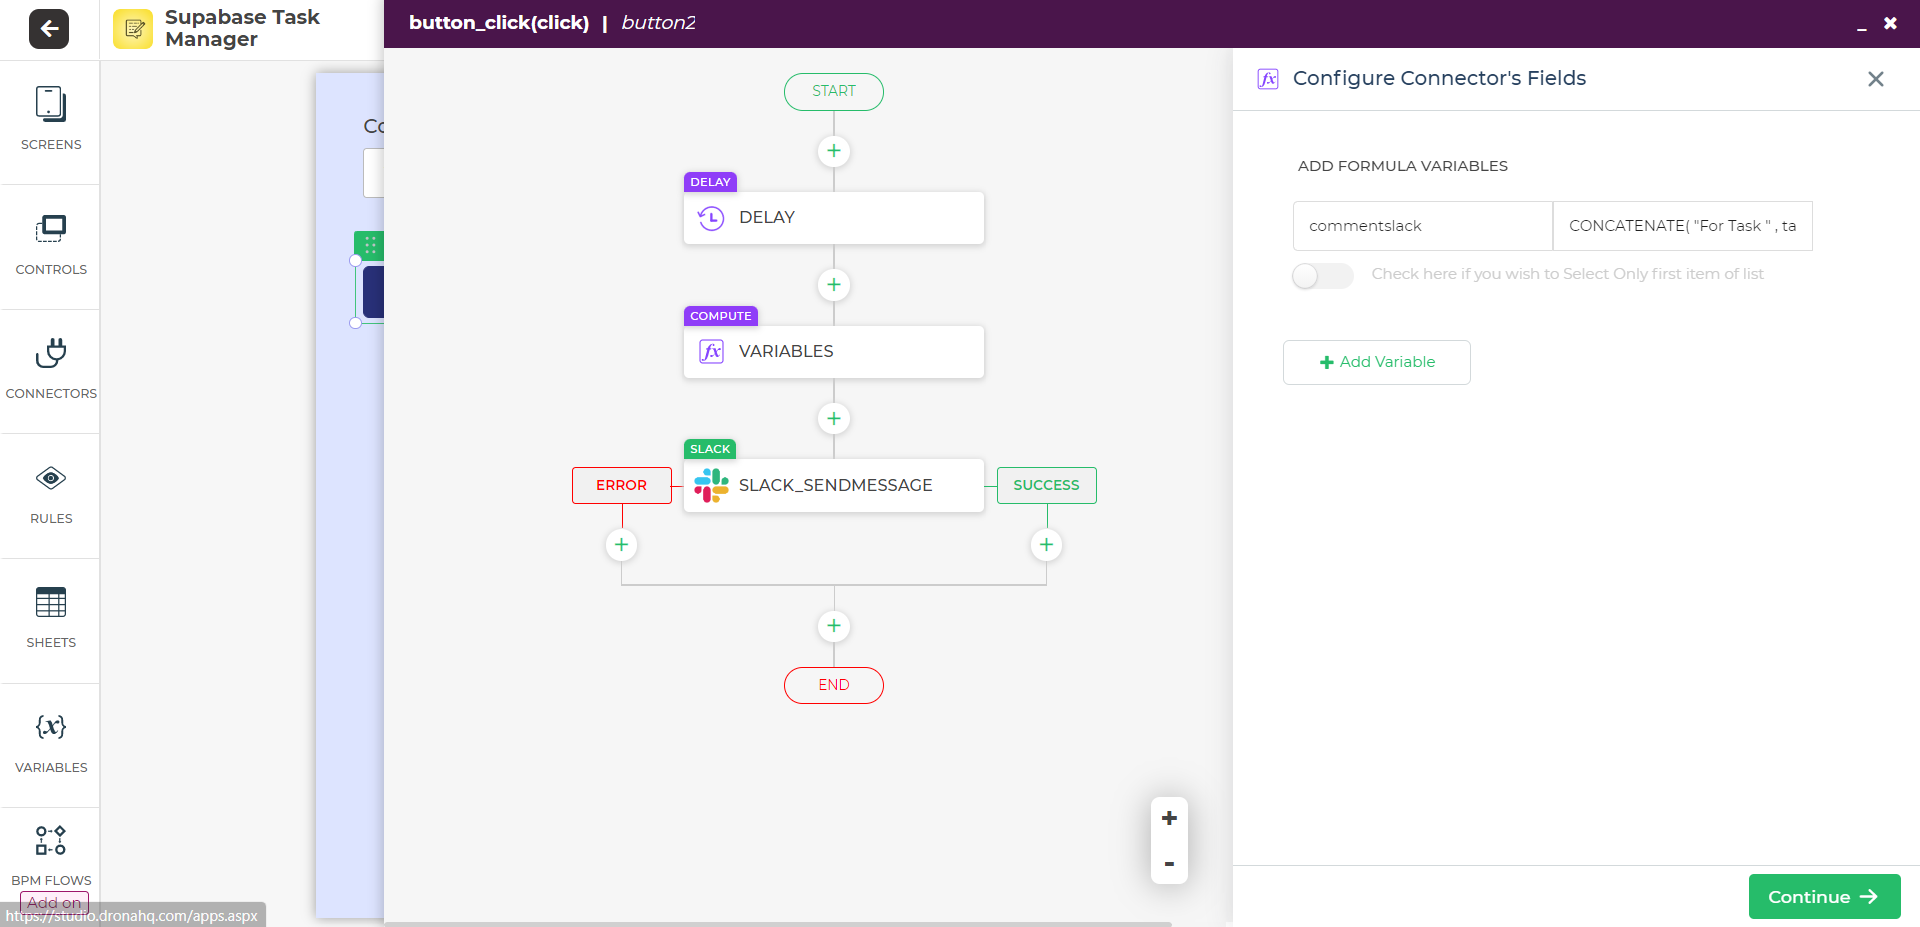
Here you can add a variable in order to store the message/comment that you want to be sent to the user via slack.
After that, there is a function of sending a slack message to notify the user about the changes made via the Supabase UI to the Supabase database.
This finally completes the functionality of the Kanban control which is the most integral part of the SupabaseUI and the task management app.
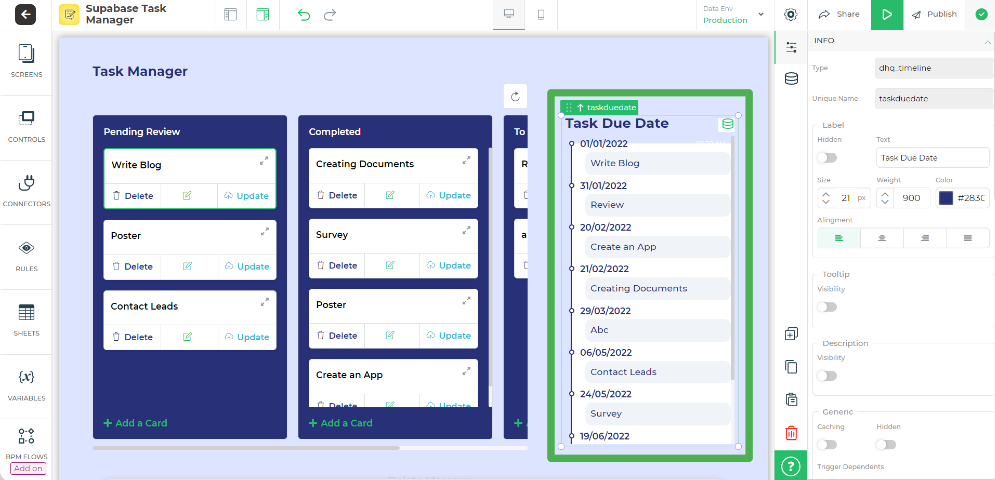
After this, we will move to the timeline which will represent the due date of the task, and arrange them in the order of which will appear first on the list to be completed on priority.
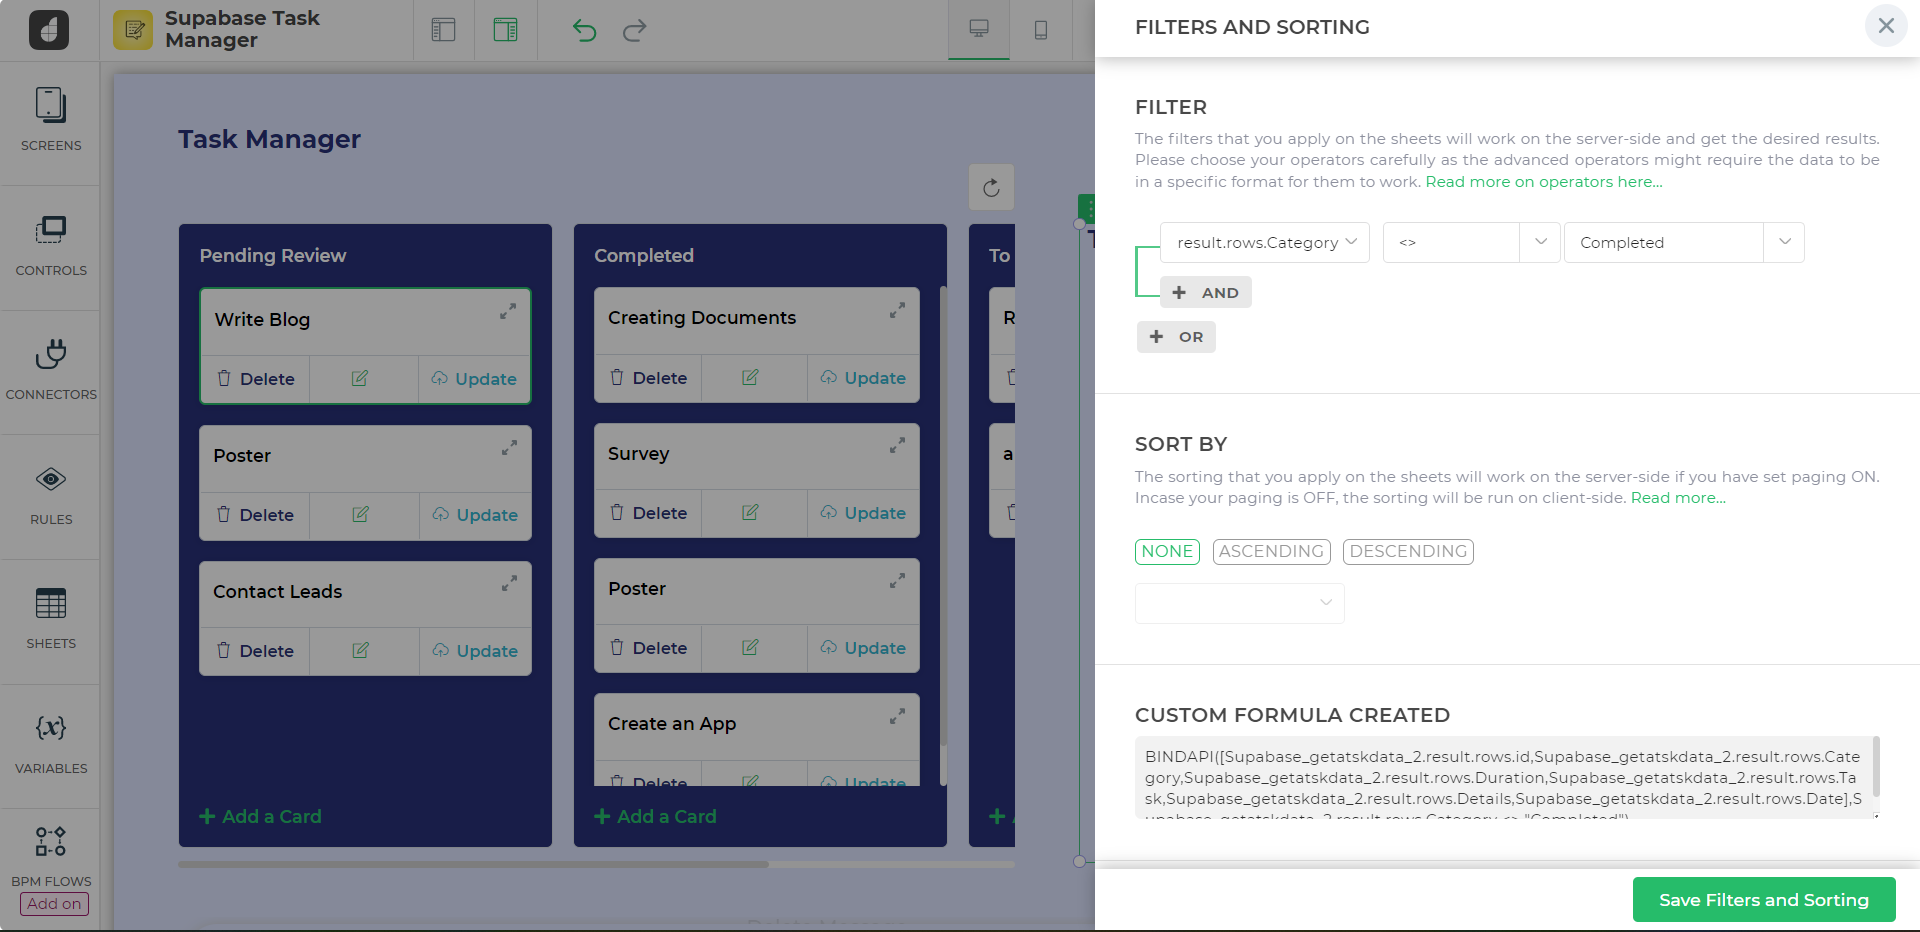
We want to only show those tasks which are not completed and for that we will add a filter.
This completes most of the SupabaseUI of the task management app.
Making the Supabase Dashboard faster
By using DronaHQs controls and functionalities, we can further add and improve what we can already do with the Supabase database by creating different and innovative applications just like we just created the task management application for the SupabaseUI. There are many more applications that can also be created such as Admin panels, Supabase dashboards, CRUD applications, etc.
DronaHQ also provides you with instant quick connectors which enable you to connect to the Supabase database very easily so that you can access that data and utilize it for your desired applications. Not only is establishing the connection with the Supabase database easy and simple but also it provides you with the option of having filters for connectors which allow you to have selective data being taken up for the Supabase UI.