
Building a dynamic frontend UI for Neon’s serverless postgres
Building a frontend user interface from scratch can be time-consuming, but with the help of low-code platforms like DronaHQ, developers can create custom UIs quickly and efficiently. In this tutorial, we will explore how to leverage DronaHQ’s capabilities to build a rich frontend UI that connects to Neon, a serverless Postgres database. By following a few simple steps, you can create an admin tool or a lead management app with ease.
What is Neon?
Neon is open-source serverless Postgres built for the cloud.
With Neon, developers can focus on application development without worrying about managing and scaling infrastructure.
Neon provides features such as data branching, on-demand scalability, and bottomless storage, making it an ideal choice for modern applications.
What is DronaHQ?
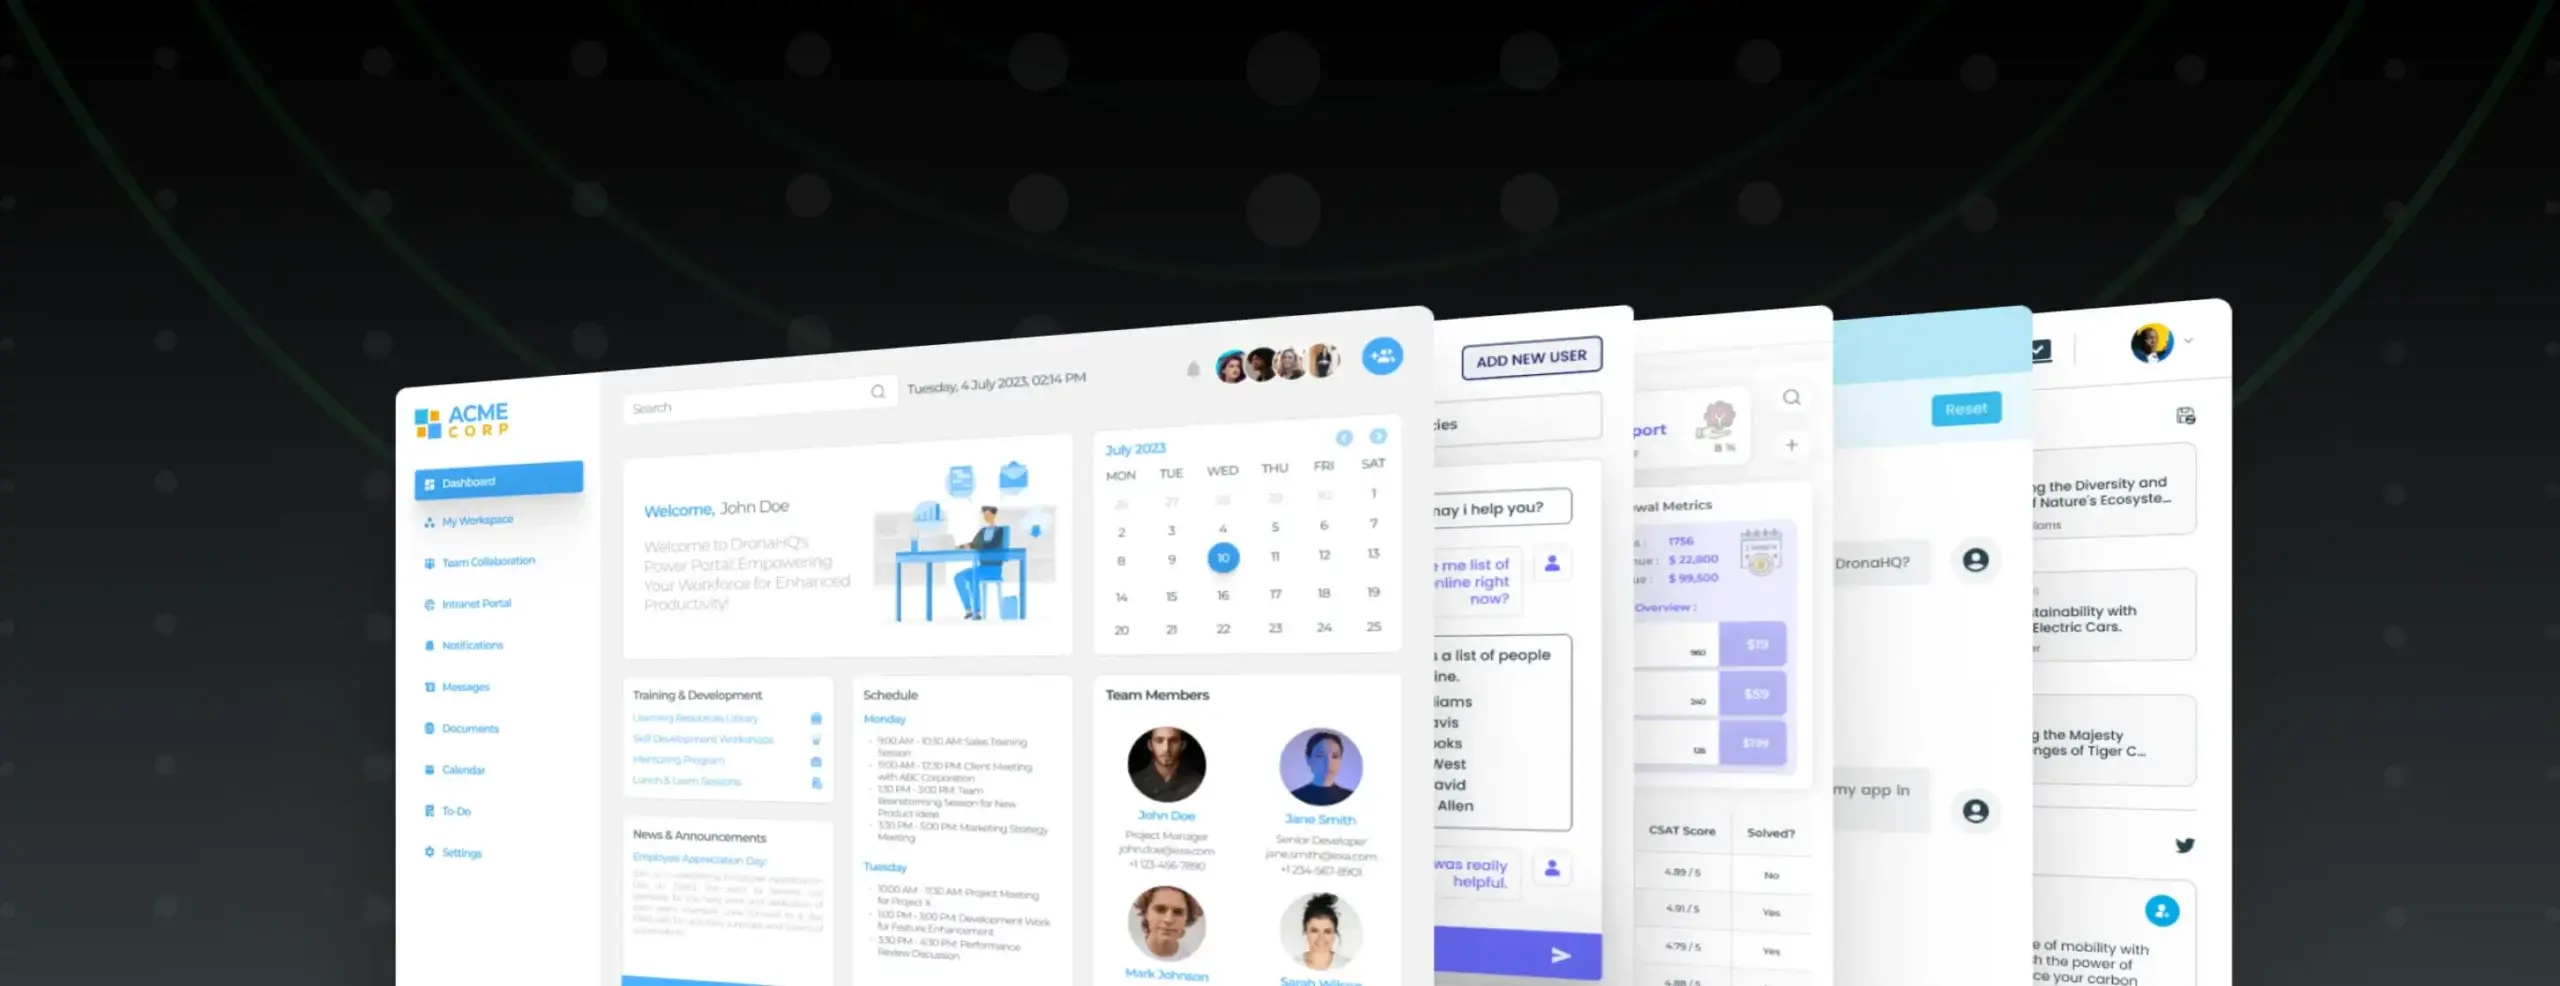
DronaHQ is a leading low-code platform designed to accelerate the development and deployment of comprehensive internal tools. It offers an intuitive interface to developers to create multi-screen web and mobile applications by simply dragging and dropping UI components. With DronaHQ, developers can connect to any database or API, making it a versatile platform for building robust frontend user interfaces.
At DronaHQ, we pride ourselves on our developer-centric approach. We have found that the powerful features offered by Neon DB also complement DronaHQ’s low-code capabilities.
As mentioned above, Neon.tech offers a fully managed multi-cloud Postgres while DronaHQ is compatible with PostgreSQL from the start, giving you the ability to quickly create all of the functionality you need for a custom operational tool like an admin panel along with data visualization and manipulation, activity logs, permission controls, automations, PDF report generation, dashboards, and much more.
This compatibility between the two technologies significantly simplifies the process of creating an admin panel for a Neon.tech Postgres database, eliminating the need for developers to build from scratch.
Set up your database on Neon
Step 1: Sign up on Neon and create a new project
Visit the Neon website and sign up for an account. Once you have signed up, create a new project in Neon. This project will serve as the backend for your DronaHQ application.
Step 2: Obtain the connection string
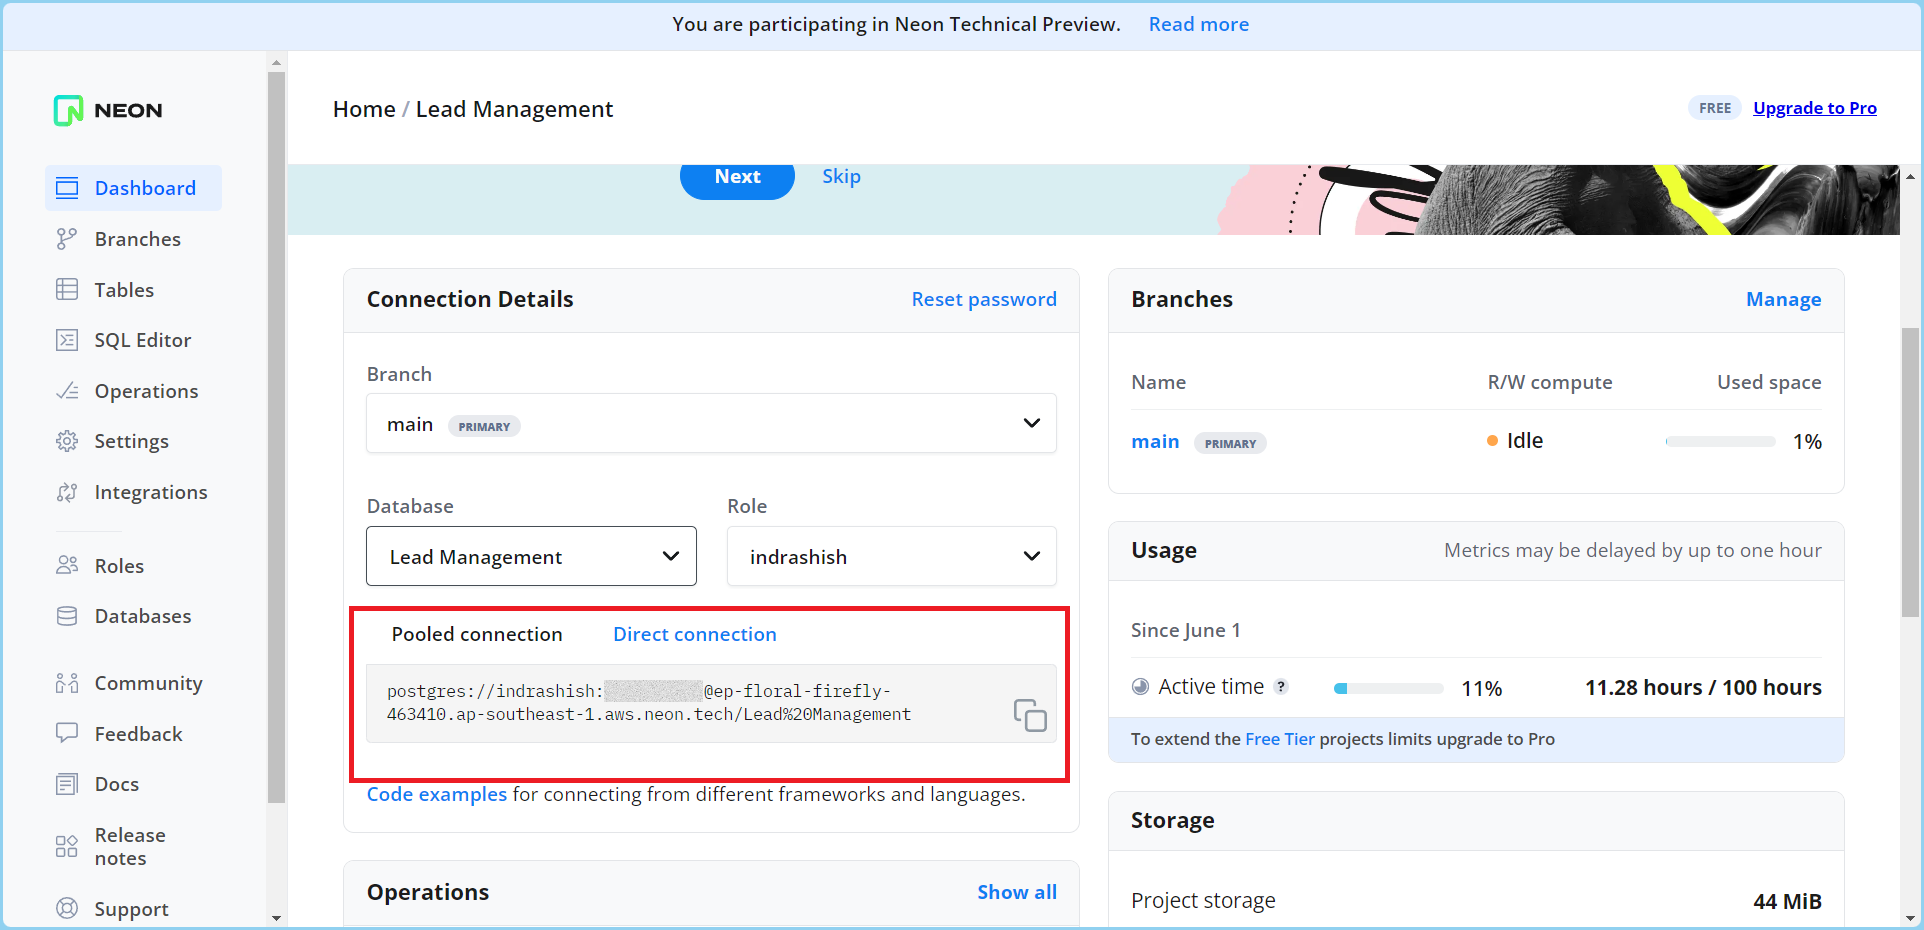
After creating the project in Neon, navigate to the project dashboard. In the dashboard, you will find the connection string for your database. This connection string is required to establish a connection between Neon and DronaHQ.
After creating the project in Neon, navigate to the project dashboard. In the dashboard, you will find the connection string for your database. This connection string is required to establish a connection between Neon and DronaHQ.
Designing the admin tool in DronaHQ
Step 1: Adding Neon as a data source in DronaHQ
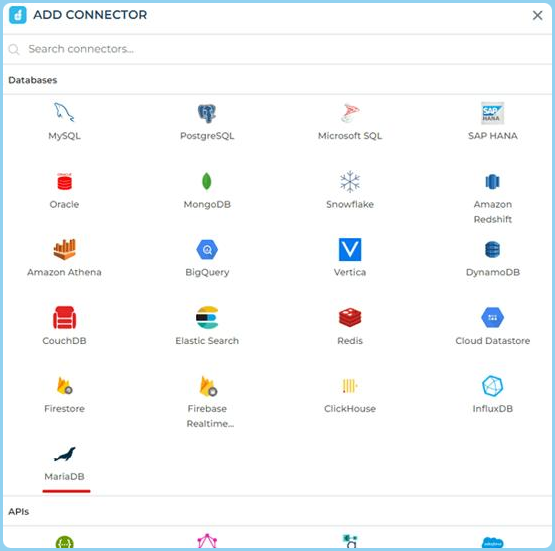
DronaHQ offers an exhaustive list of ready connectors to databases like PostgreSQL, MySQL, MS SQL, MongoDB, etc. (you can explore the entire list of connectors here > dronahq.com/integrations)
In this tutorial, we use the PostgreSQL ready connector to add Neon as a data source.
1. Head over to ‘Connectors’, select Postgres
2. Enter the Connector Name
3. The most important part of the process is to provide the connection string. It will be dependent upon the different types of relational databses that you might want to use. You would now need to add the Connection string or the connection parameters
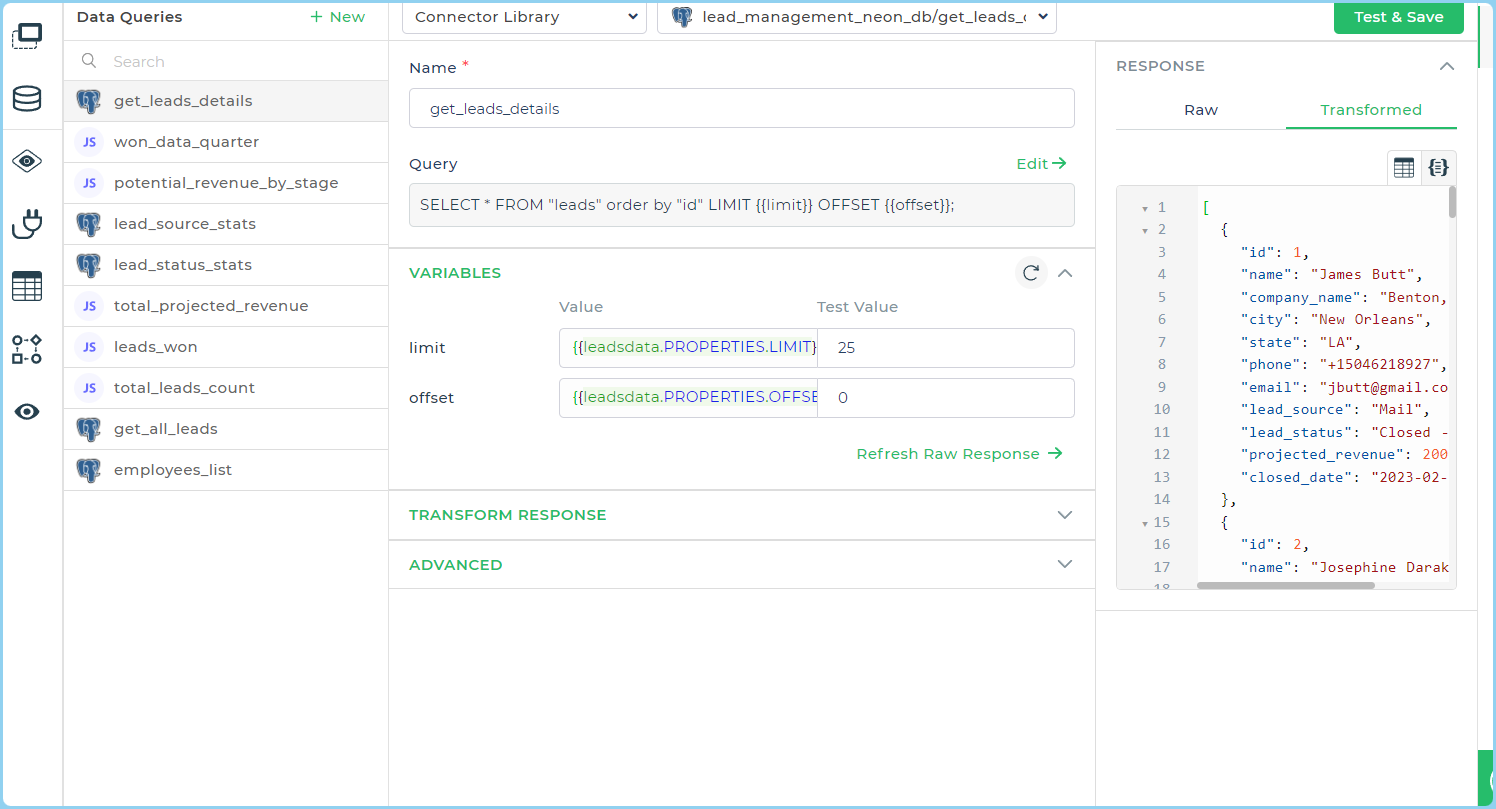
Step 2: Adding queries to Neon (Postgres) connector
Now that you have configured the connector you will find it under the Custom Database connectors list. Further to fetch data or undertake any other action, click the Add query option available after your connection is ready.
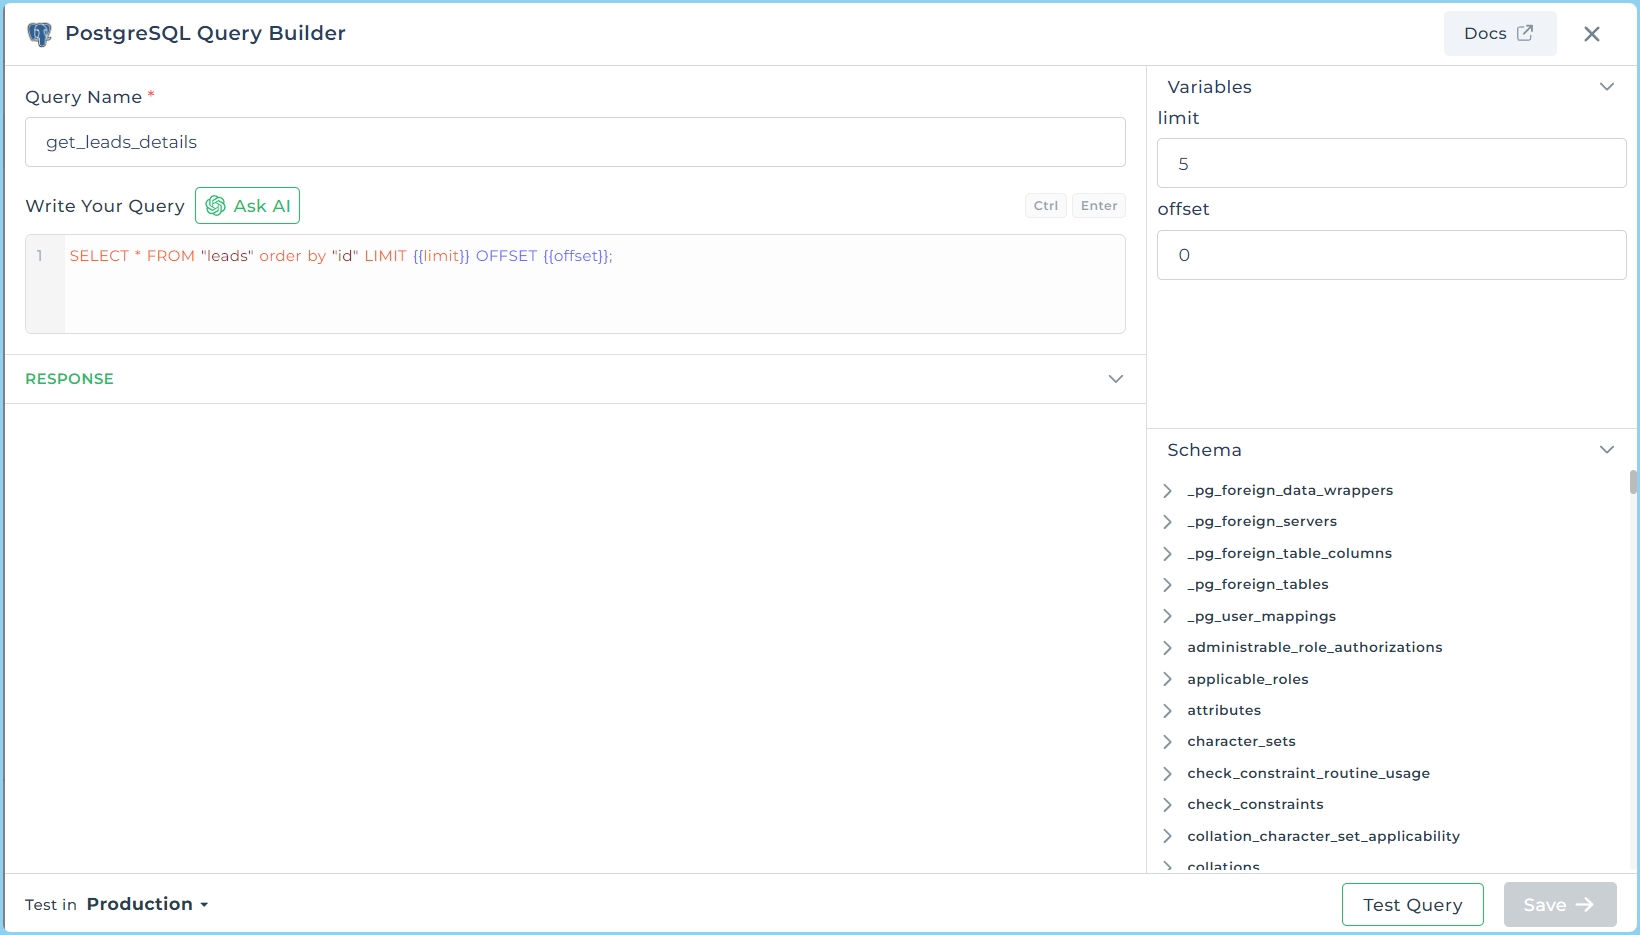
Here you can add your queries – simple as well as complex ones. On the right-hand side of the screen, you can see the list of tables from the database. You can expand the tables to view the fields from the table. You’ll need to configure two queries for our use case –
- Insert data
- Get data
[Bonus] Using OpenAI enabled Ask AI you can type prompts to generate queries (read more)
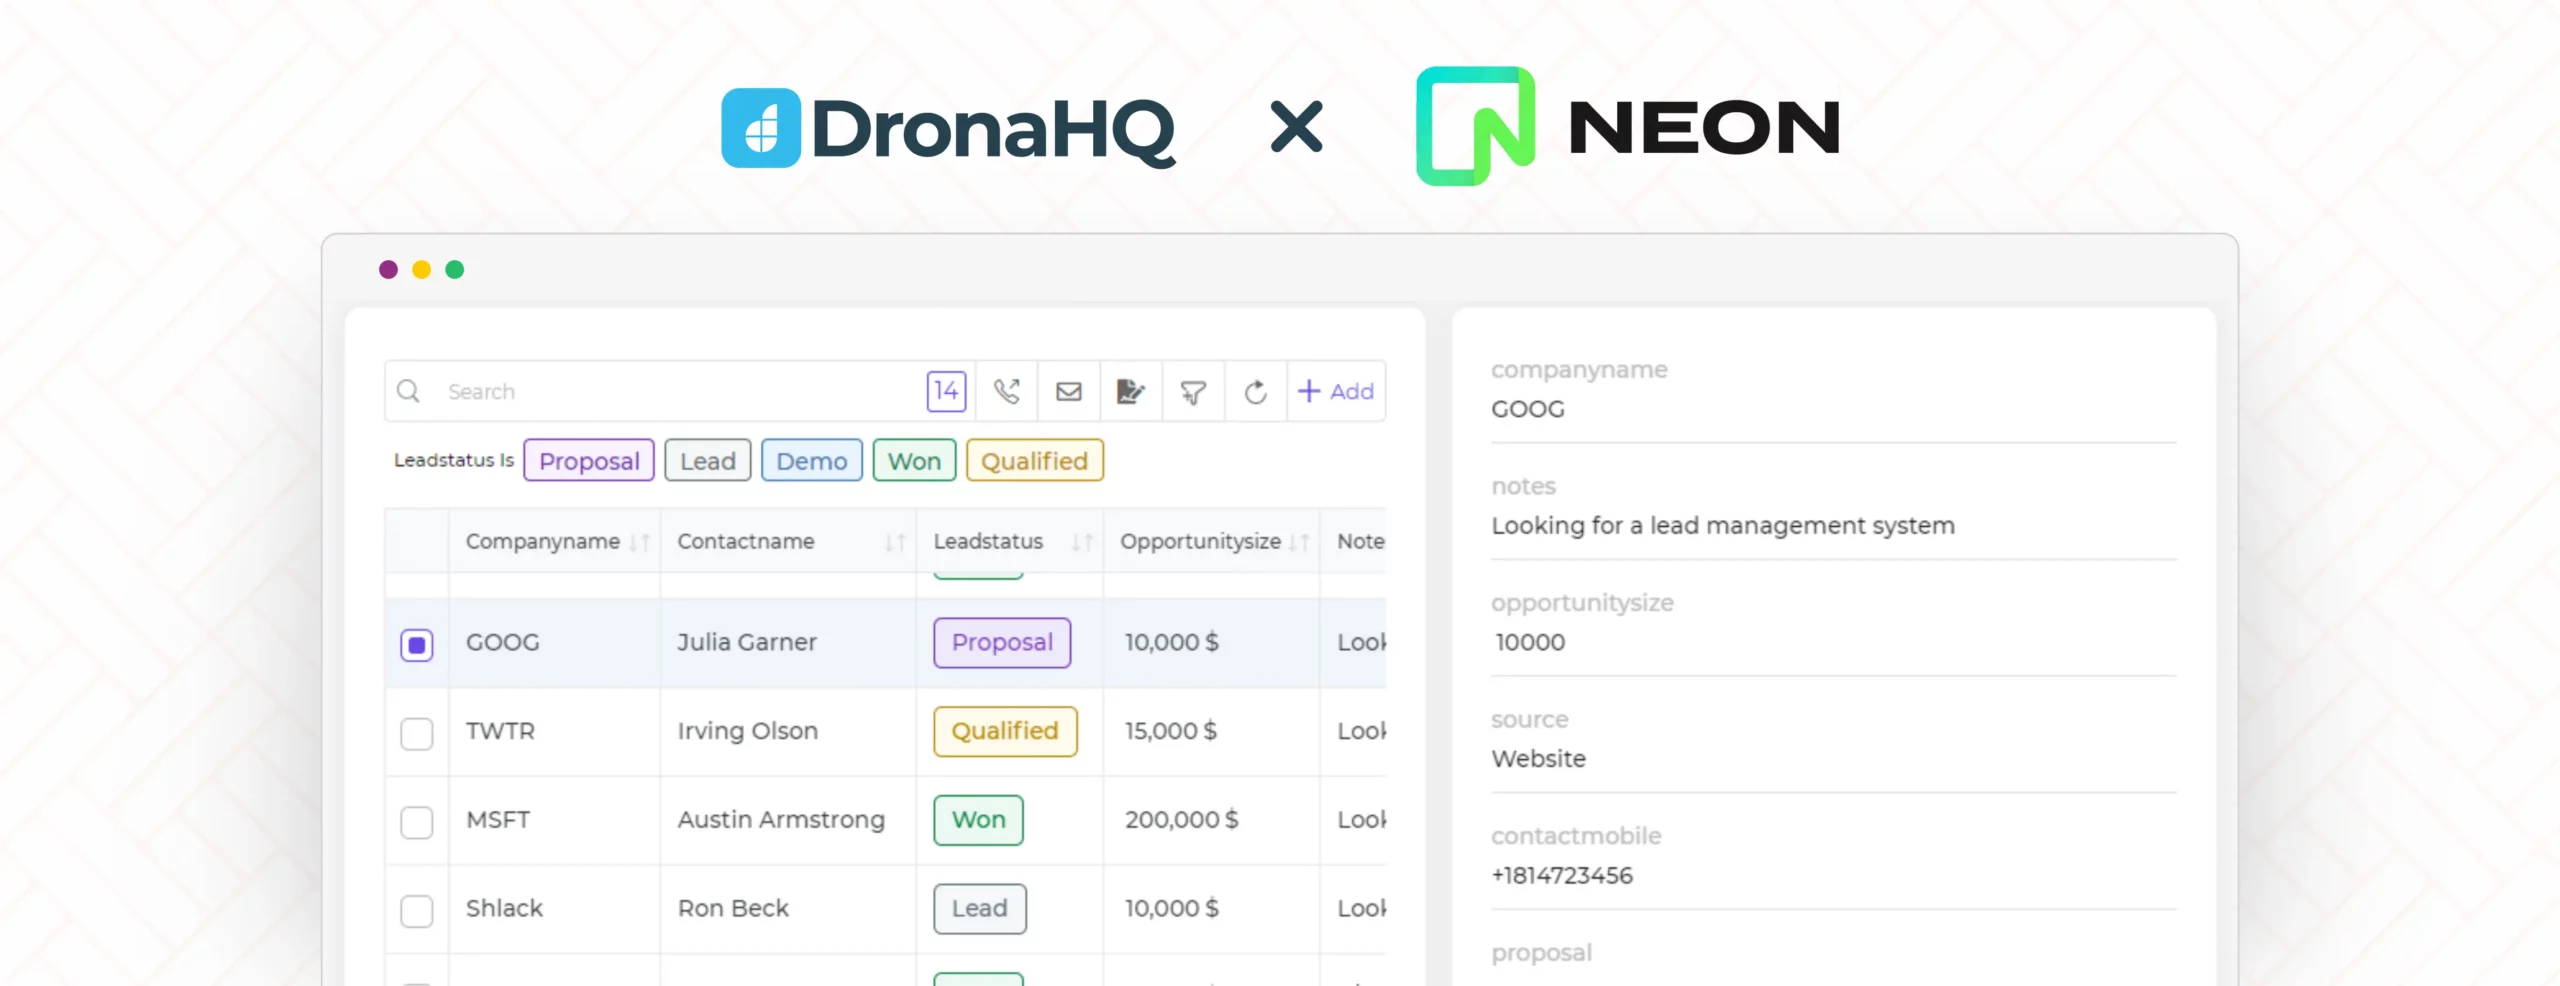
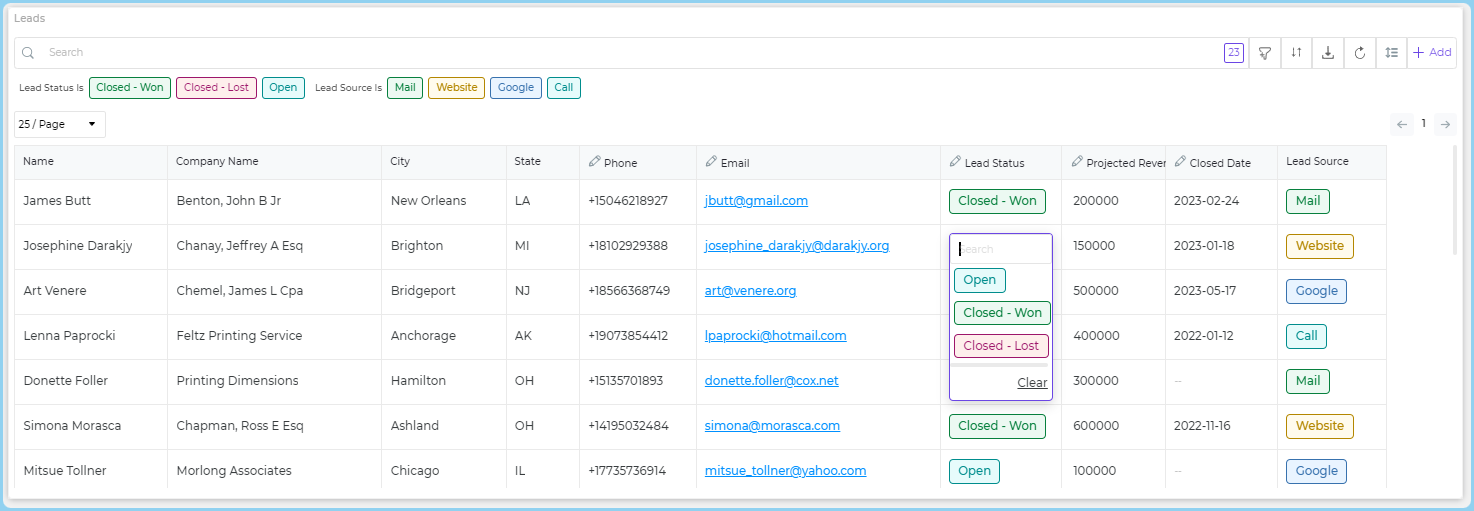
Step 3: Designing the Tabular UI for the Admin Tool
We are interfacing with a sales lead database and building a lead management app.
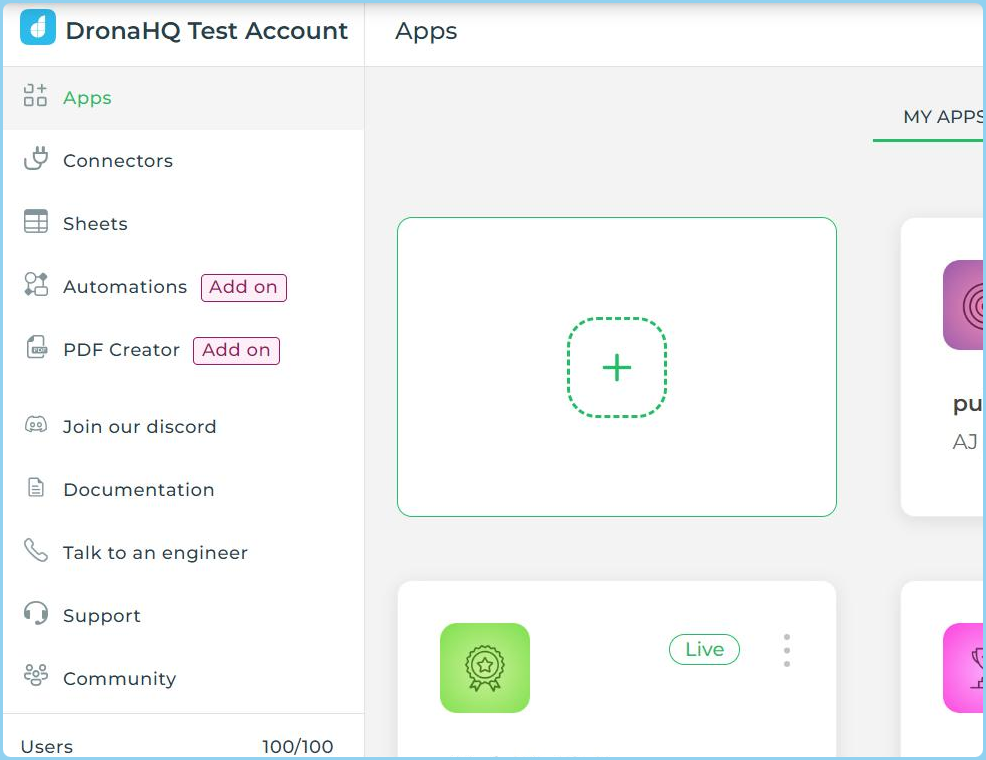
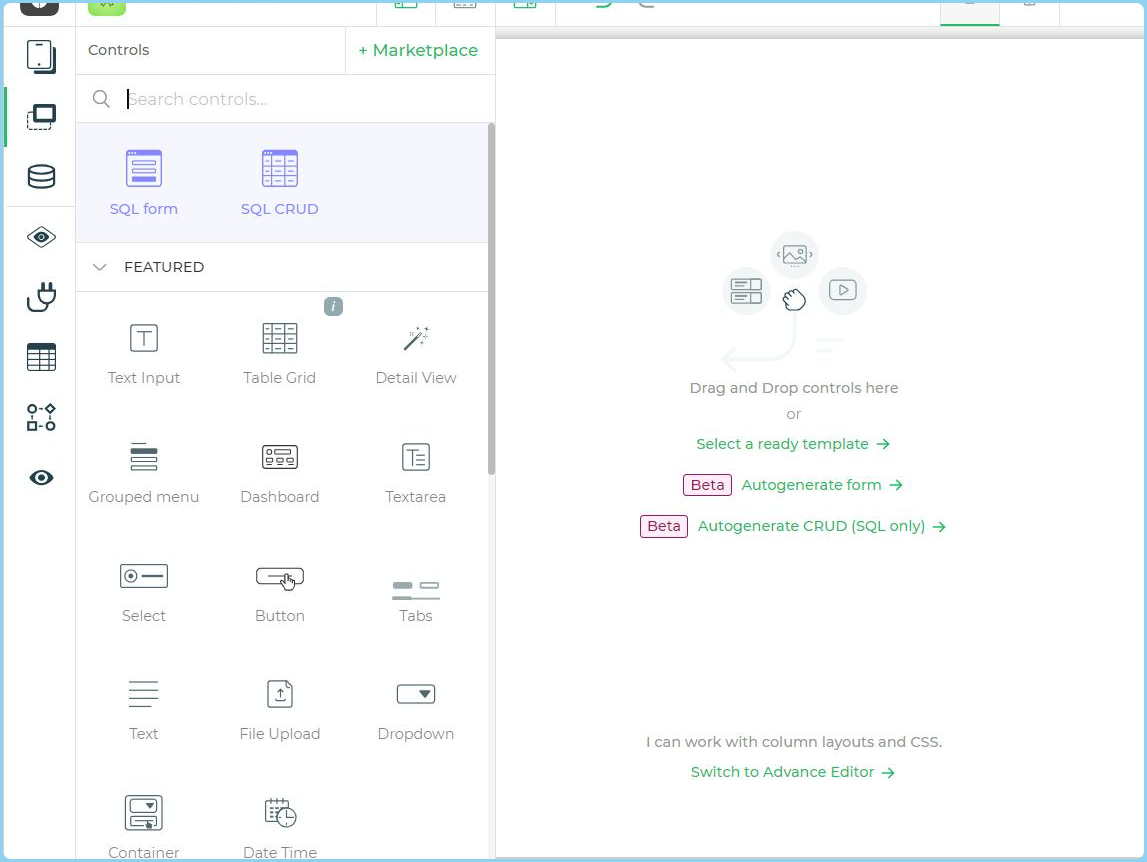
- On the left menu, click on “Apps,” and then click on the “ + “ sign to start building your app.
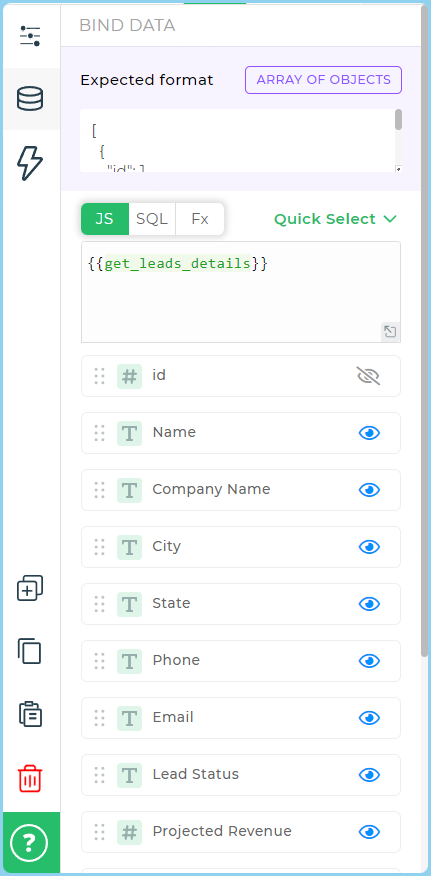
- To kick things off we will add a Table Grid
- Go to its data binding properties and click on ‘Quick Select’ and then ‘Connector Library’
- Then a new tray will open from the bottom which you can use to bind your data with the tablegrid. We created a bunch of Data queries to pull our sales lead data from the Neon database.
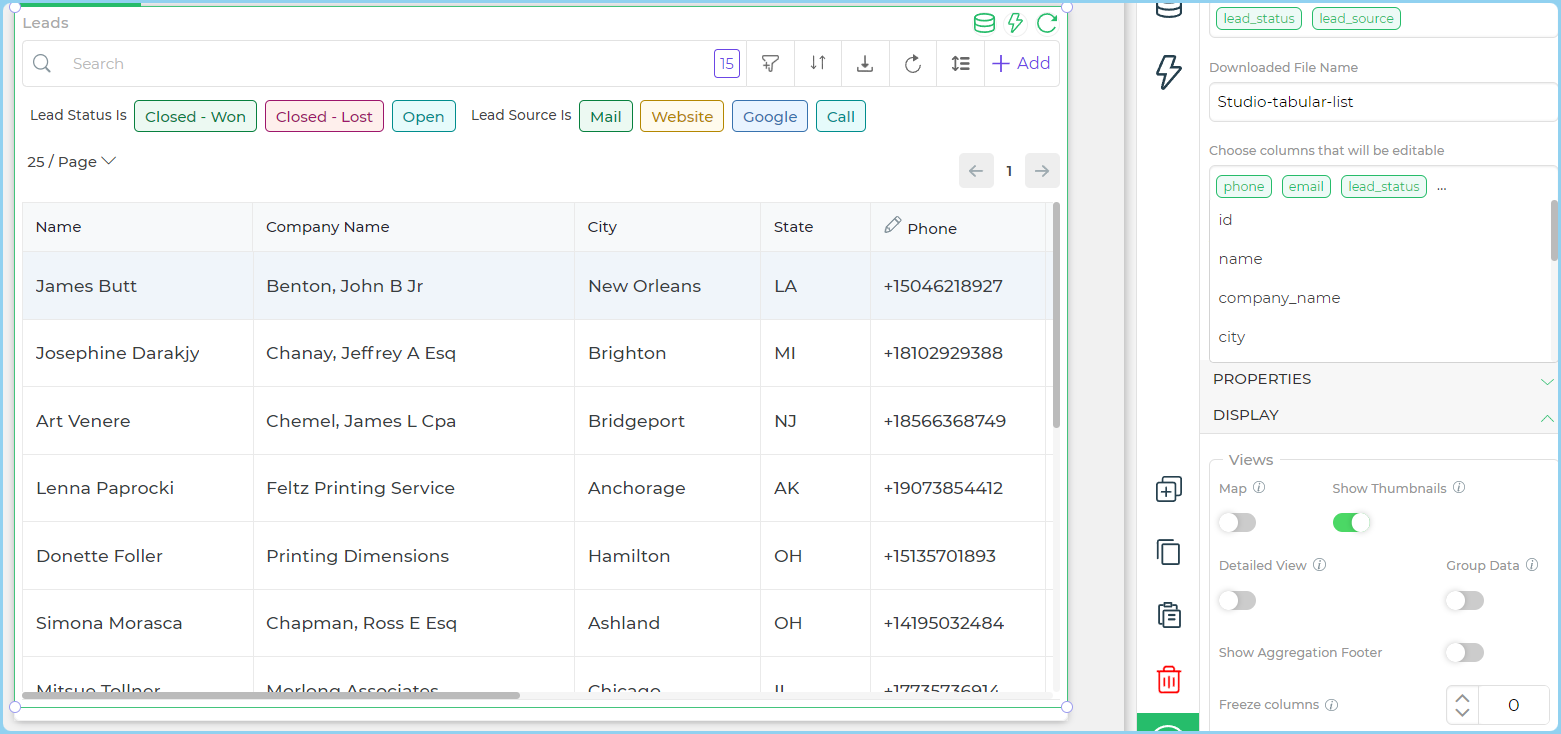
- Then you can use the right sidebar section to configure which columns you want to add/hide/remove from your tablegrid control.
Bonus: Format Data for UI beautification and aesthetic. Learn more
- You can also configure Tablegrid properties to enable search, filter, sort. Options to perform CRUD operations and more, by just turning on the Toggle switch
2. To kick things off we will add a Table Grid
3. Go to its data binding properties and click on ‘Quick Select’ and then ‘Connector Library’
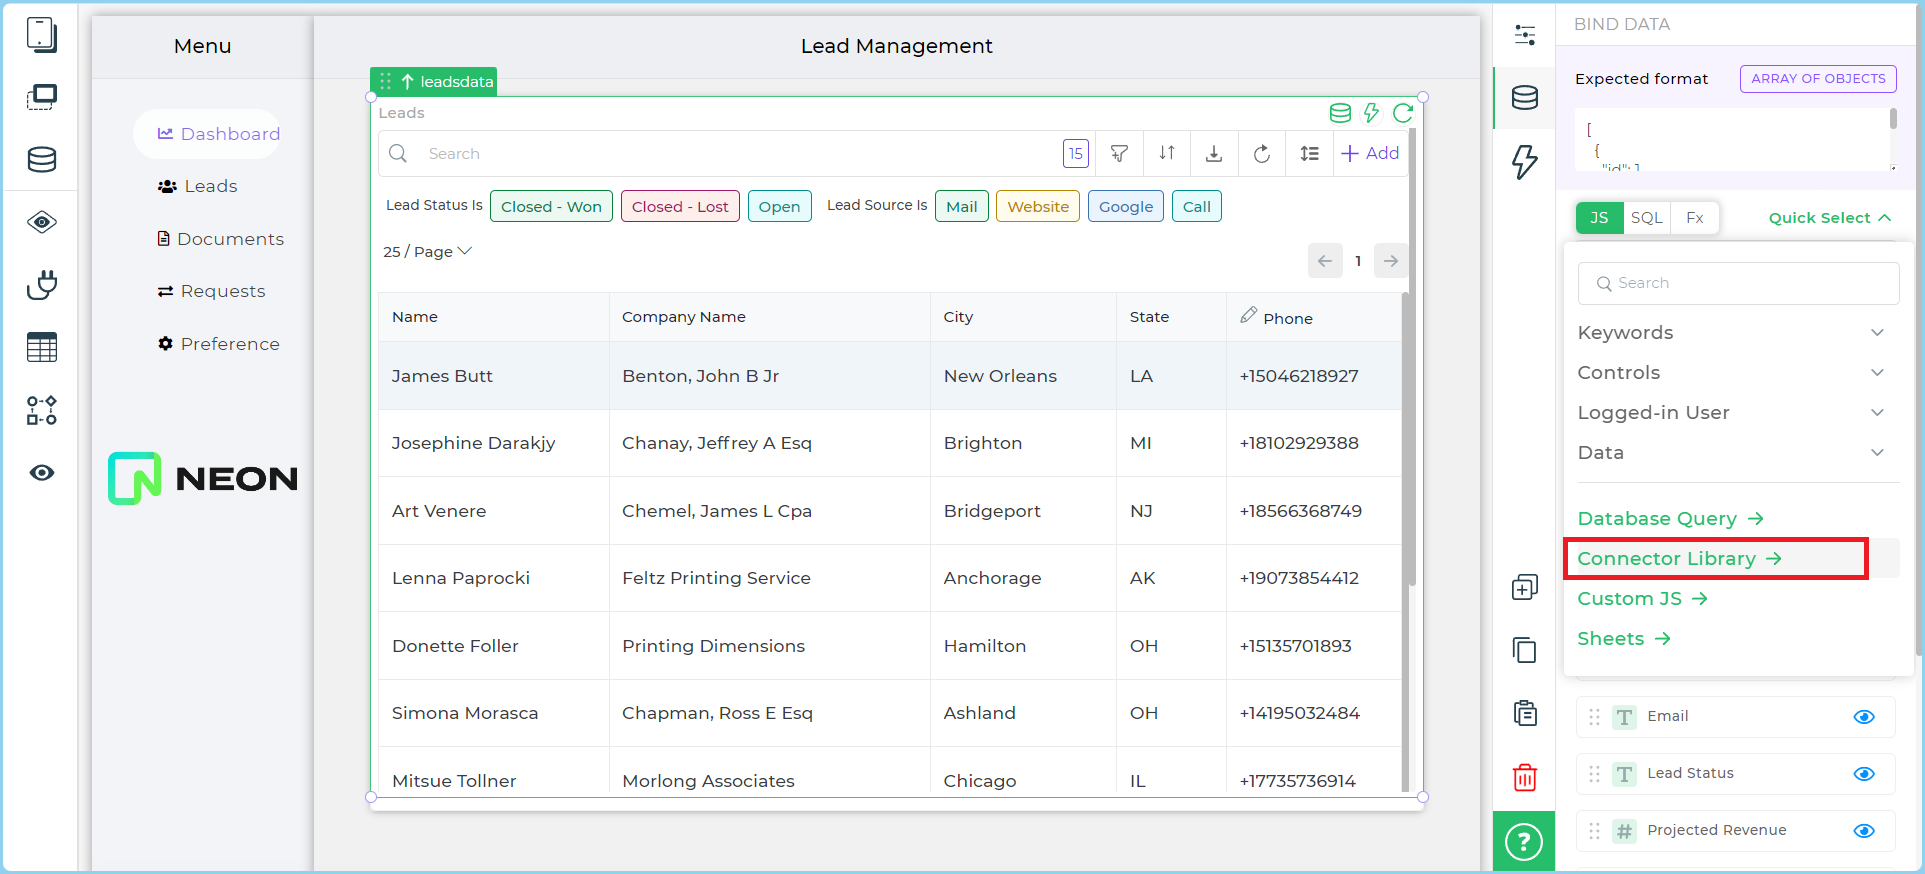
Then a new tray will open from the bottom which you can use to bind your data with the tablegrid. We created a bunch of Data queries to pull our sales lead data from the Neon database.
5. Then you can use the right sidebar section to configure which columns you want to add/hide/remove from your tablegrid control.
Bonus: Format Data for UI beautification and aesthetic. Learn more
6. You can also configure Tablegrid properties to enable search, filter, sort. Options to perform CRUD operations and more, by just turning on the Toggle switch
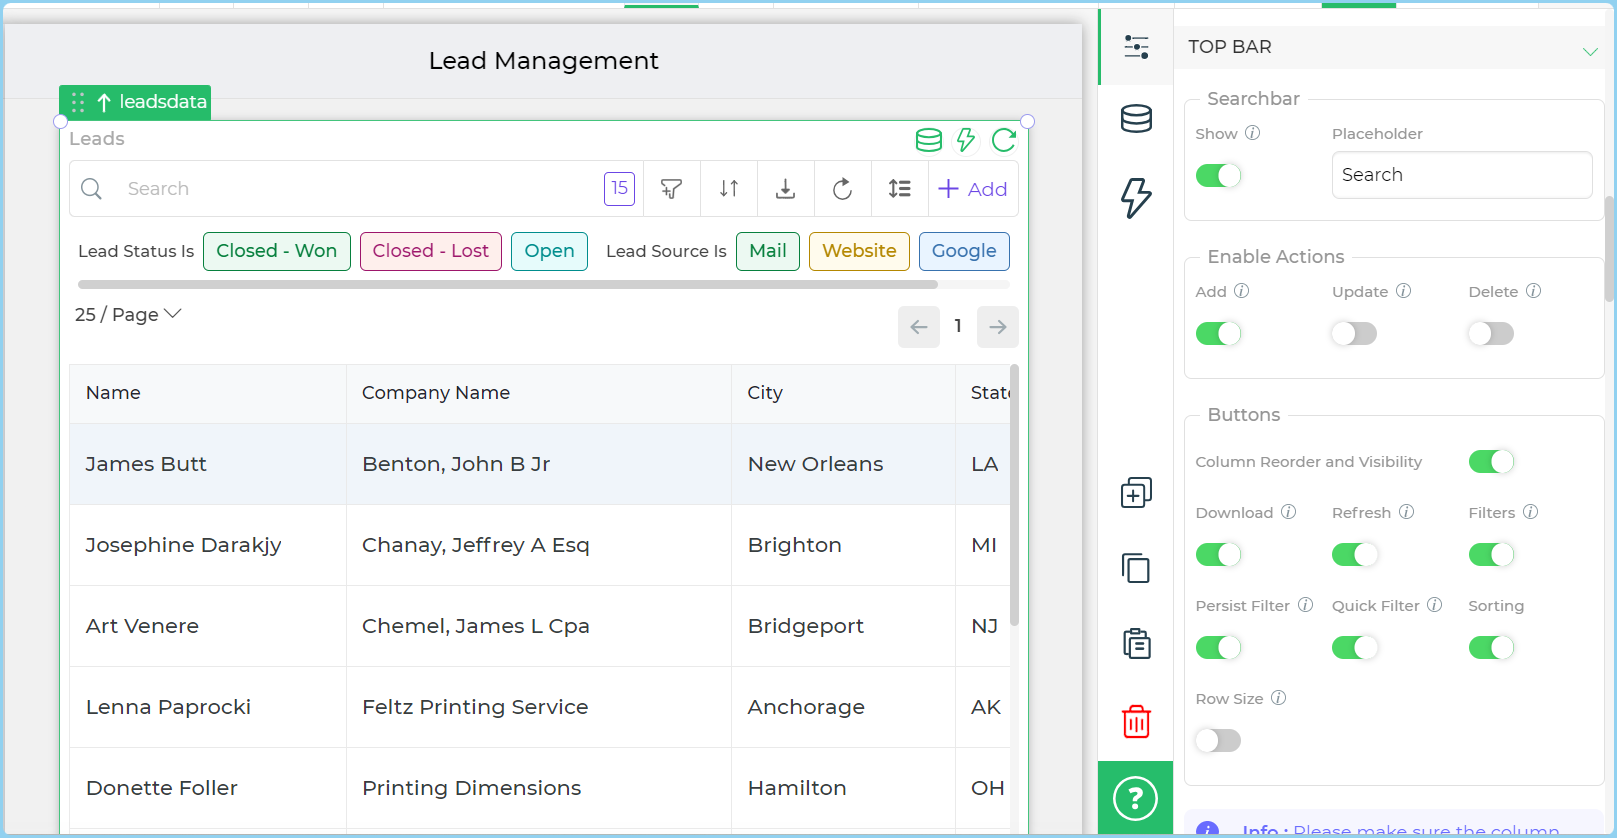
7. We set up some quick filters for easier data interactions
8. We went ahead and created a new screen, dropped some display UI controls like ‘Dashboard’, ‘Plotly-enabled Charts’ and more to create a dashboard view for our sales leads captured. The process to pull data for each of the UI components remains the same as above.
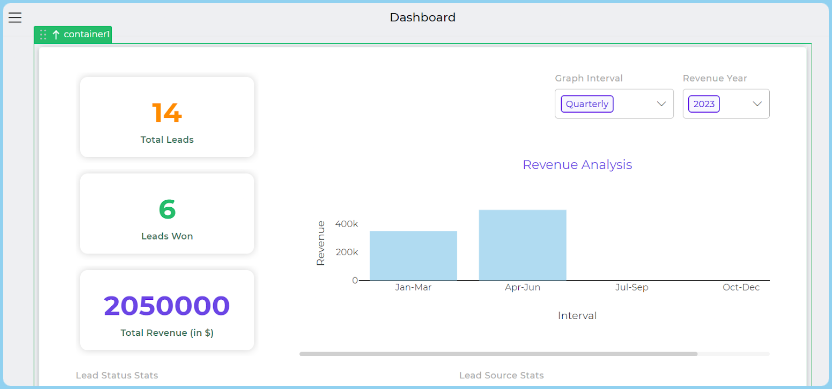
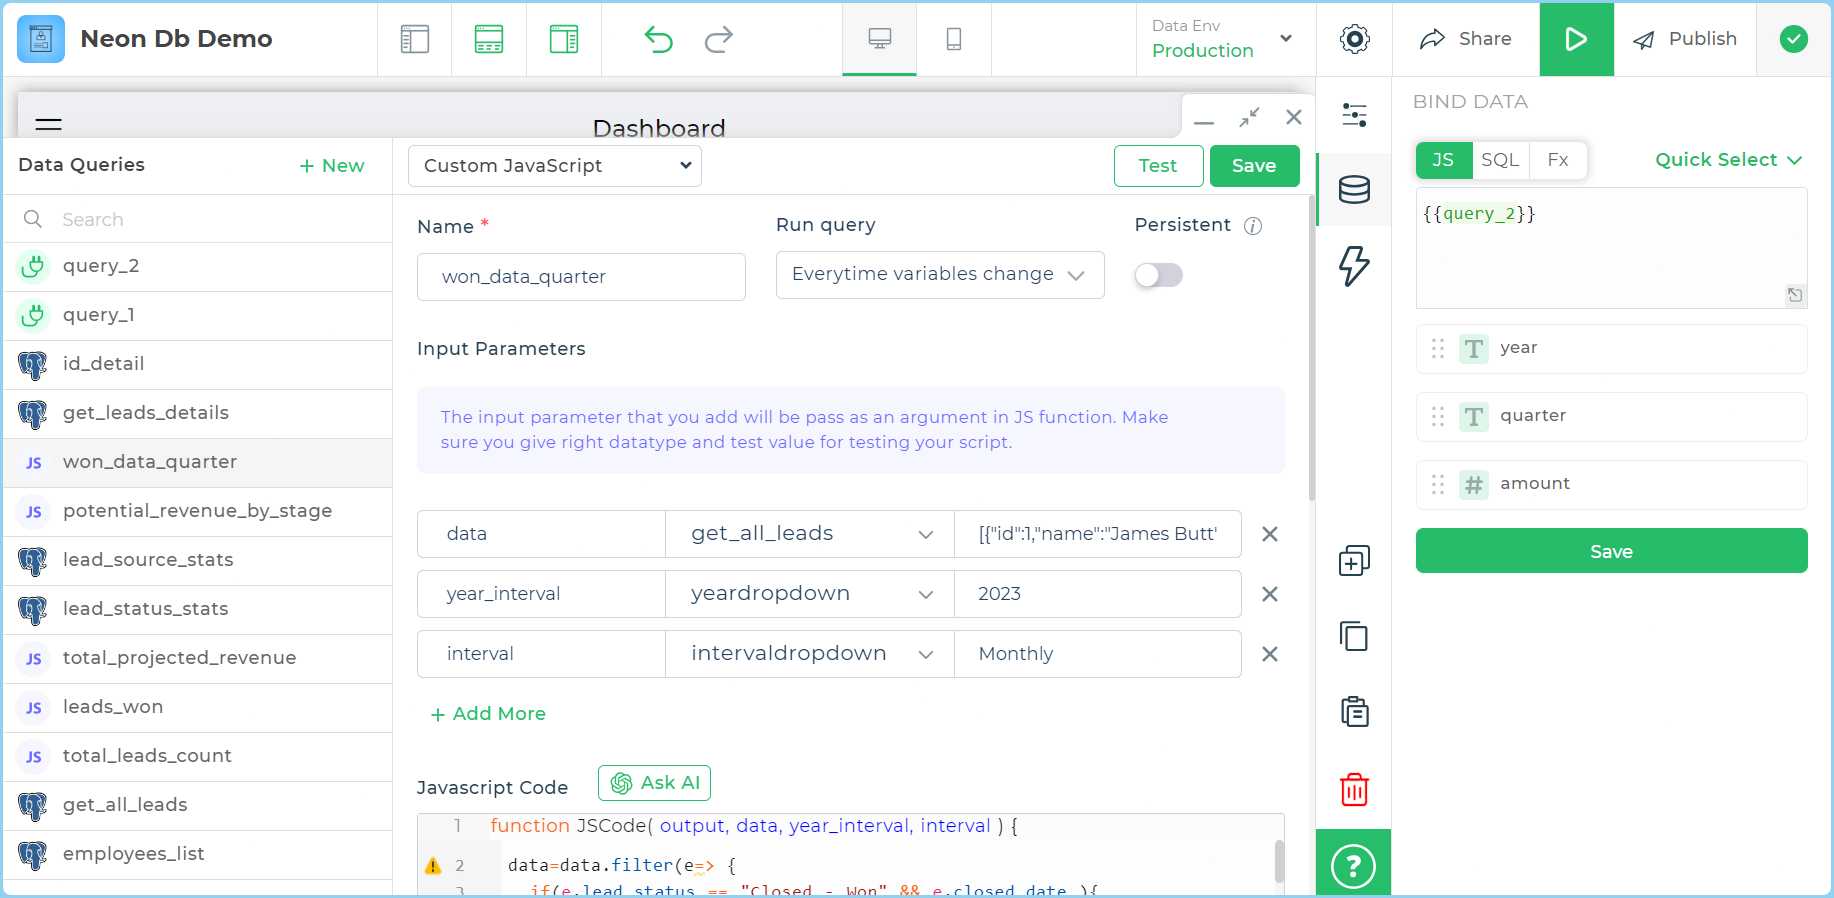
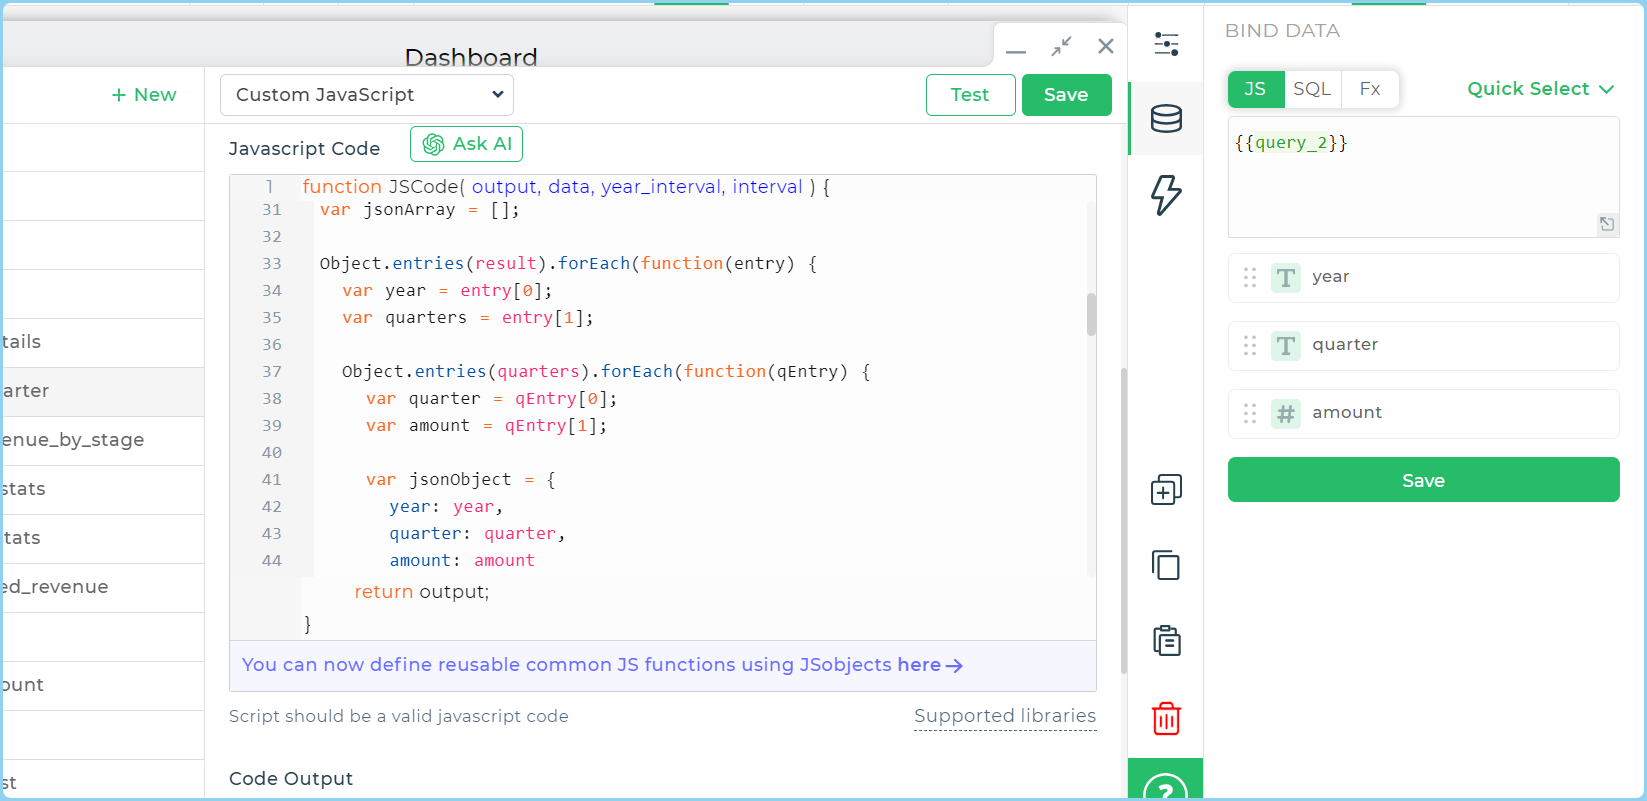
9. You can use JavaScript to transform any data you pull from your Neon database. For the Bar Graph for example, we wrote custom JS to pull leads data for the Interval and Year selected in the drop down menus (as in screenshot above)
Screenshots of the final Admin view and Dashboard view:

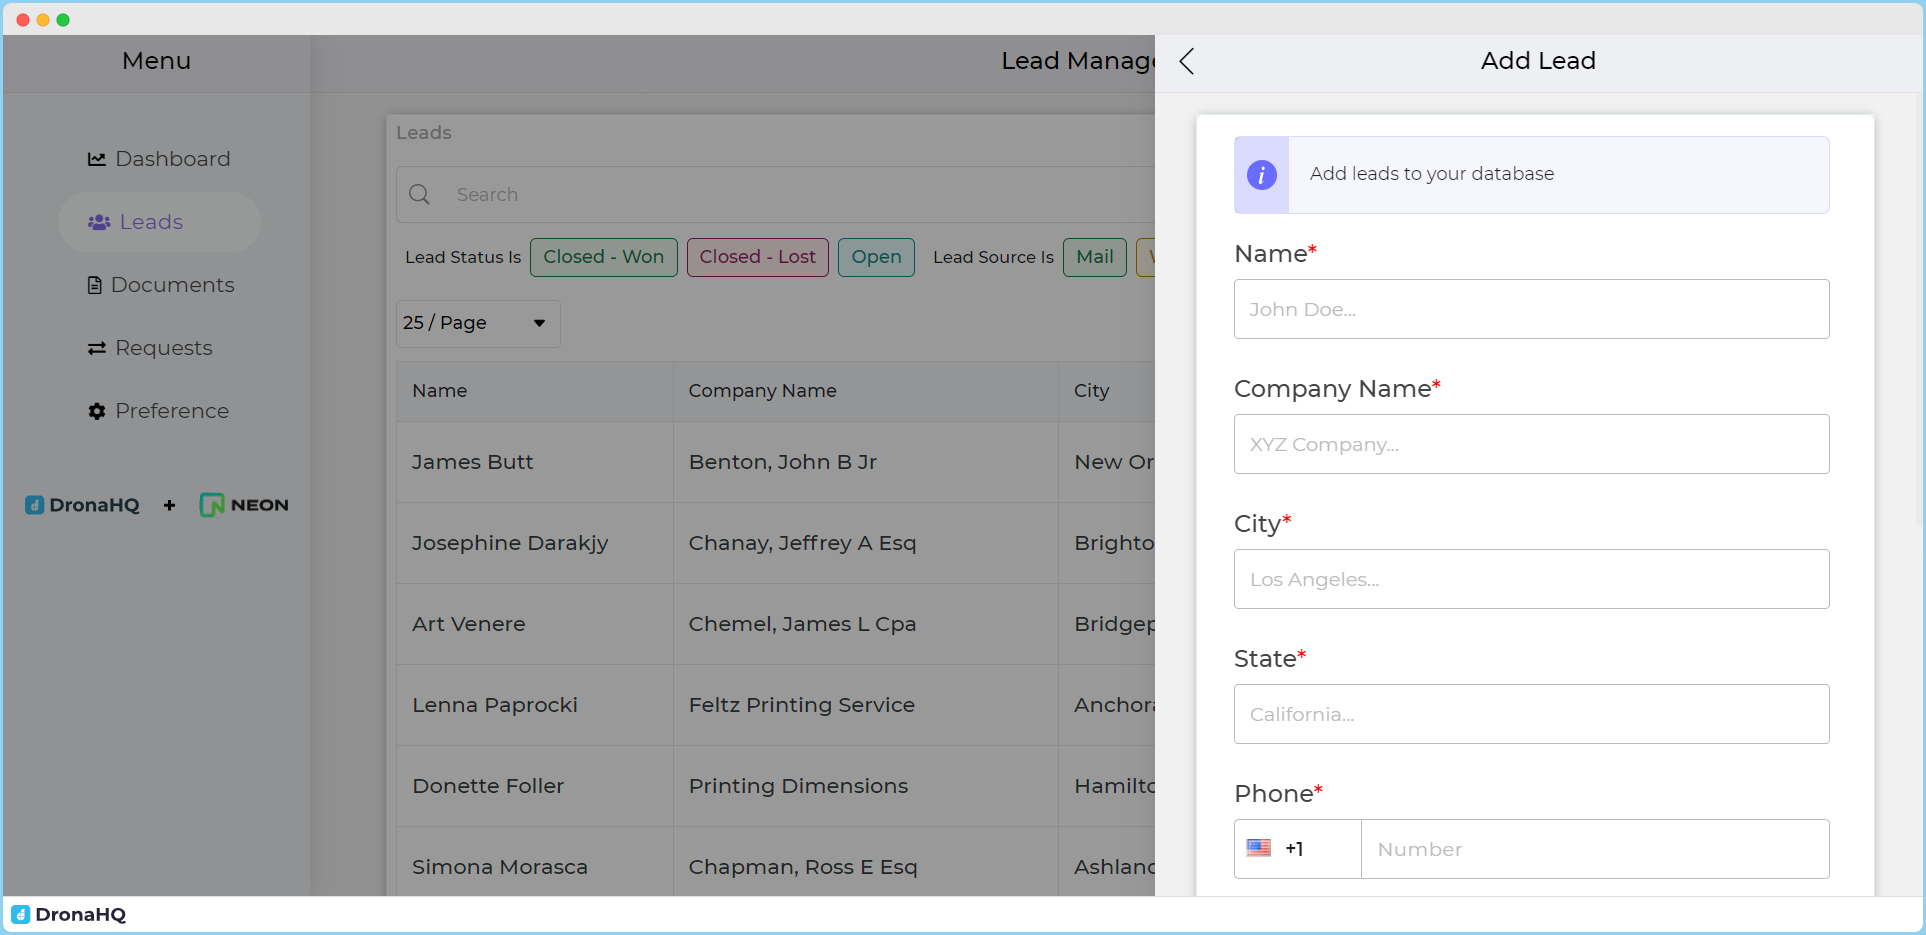
(Enabled by turning on the ‘Add Data’ toggle in the Table grid properties and a simple data collection screen to the app that button click navigates to)
We also added a Menu screen to ease out navigation within the app. Read here how you can create different screen types in DronaHQ > Screens, Layouts and Navigation
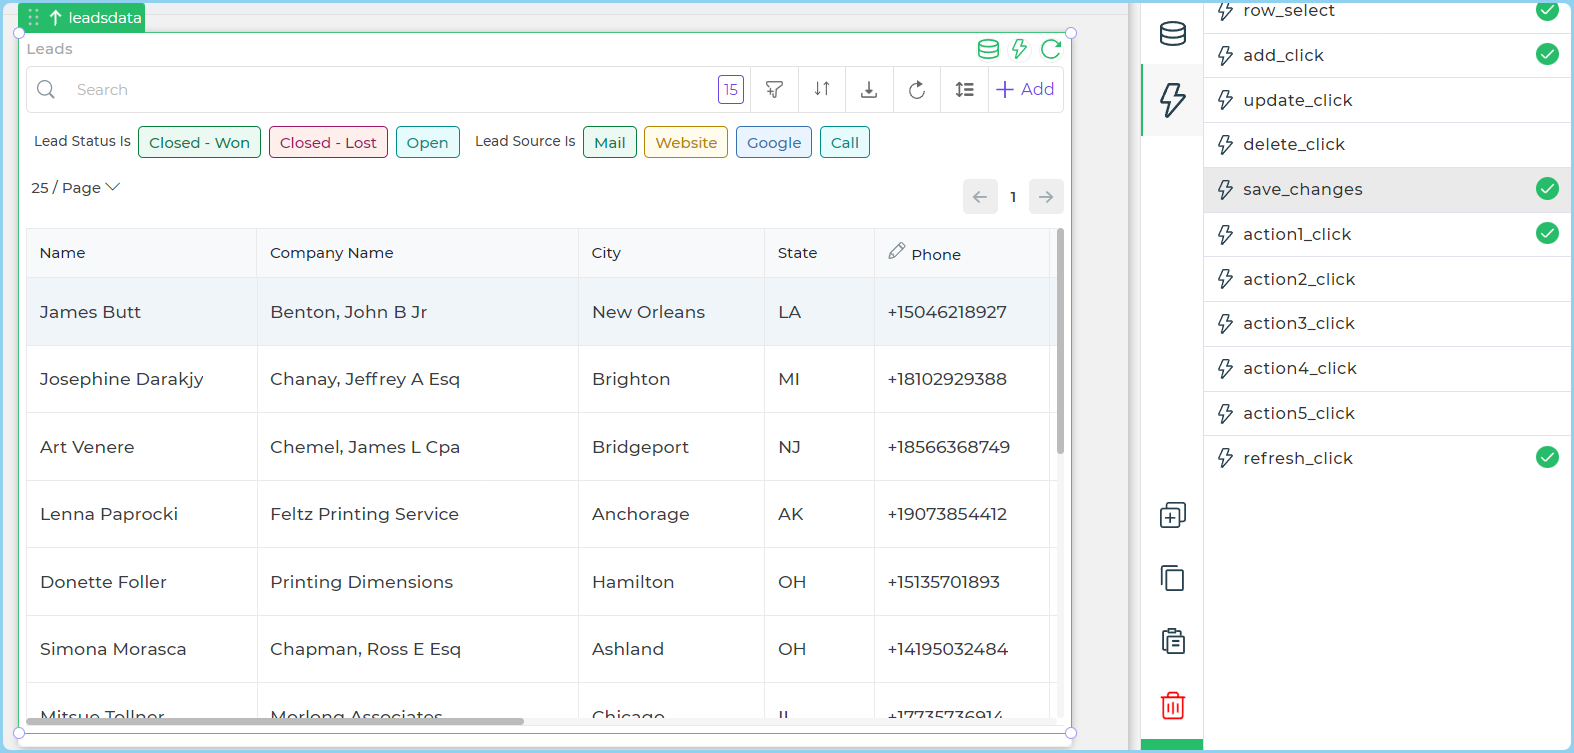
To Edit Rows:
You can use the tablegrid’s inline editing feature to Edit your data from the table itself.
You can add the columns that you want to edit from the table in the Properties section of the tablegrid
Then in the Save changes event of the table grid you can write the logic for the inline editing.

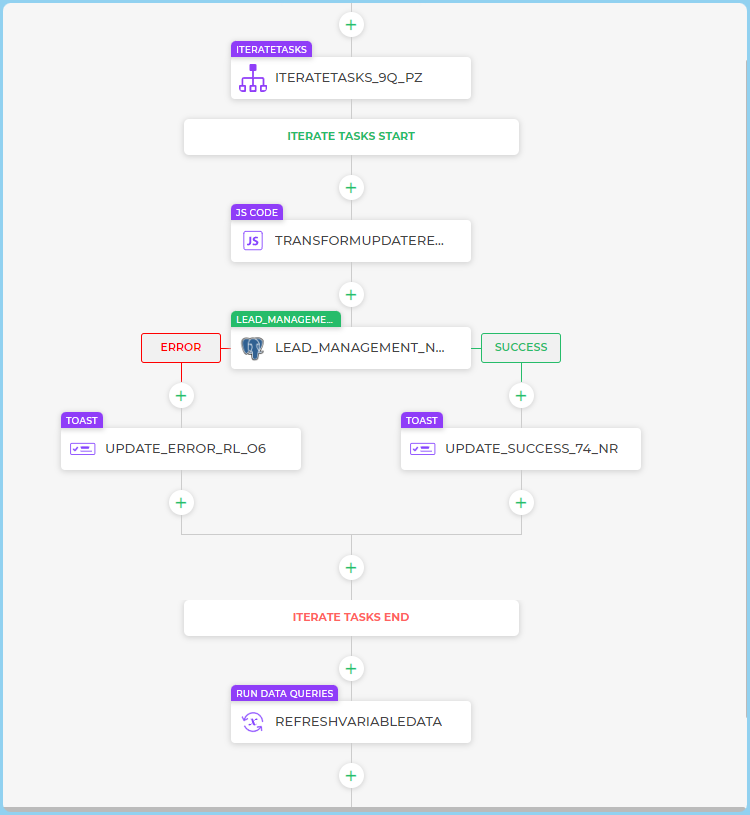
First add a iterate task to edit multiple rows at a time.
The in the JS code add a small JSCode to sanitize the data from the the current instance of the Iterate task.
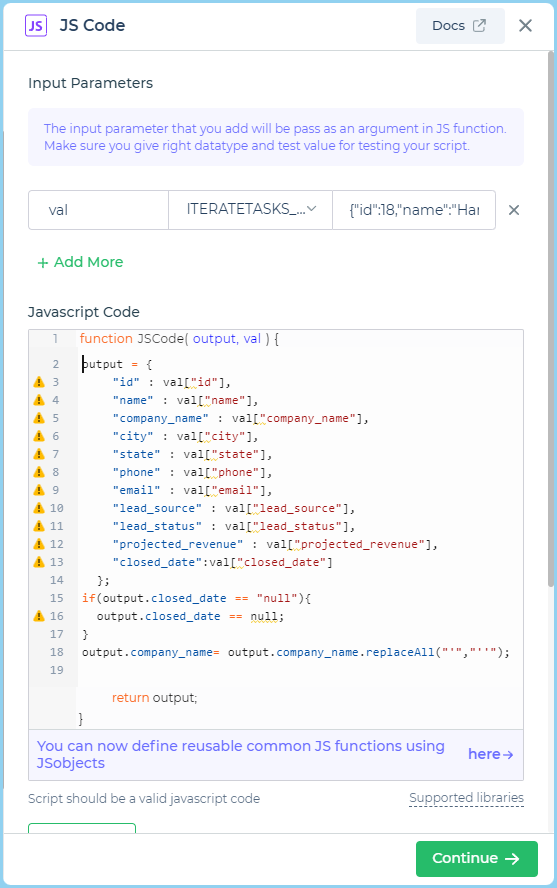
Then take the JS Codes output and store them in a variable to be used in the Postgres query.
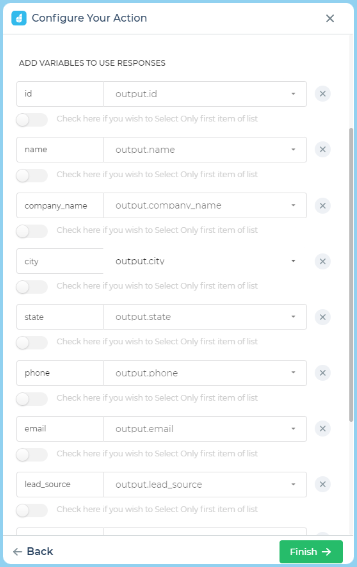
Then add the output of the JSCode to your queries dynamic fields.
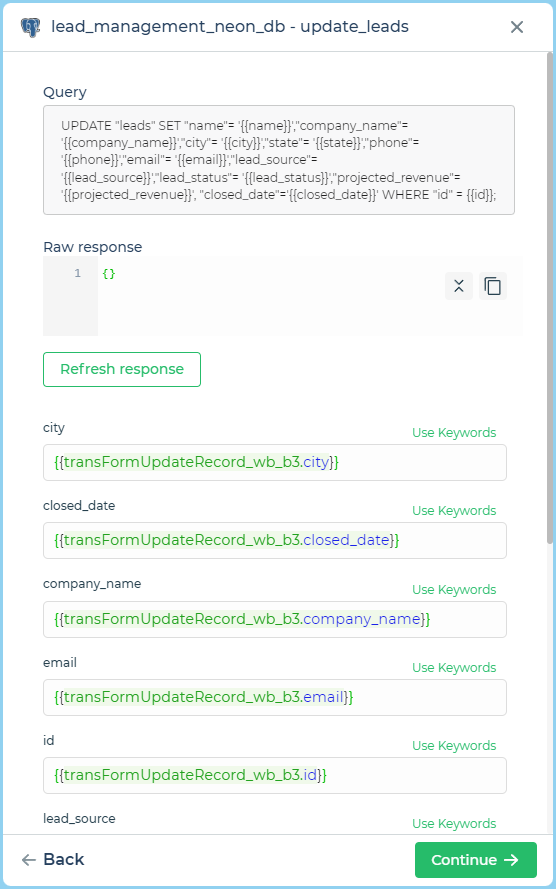
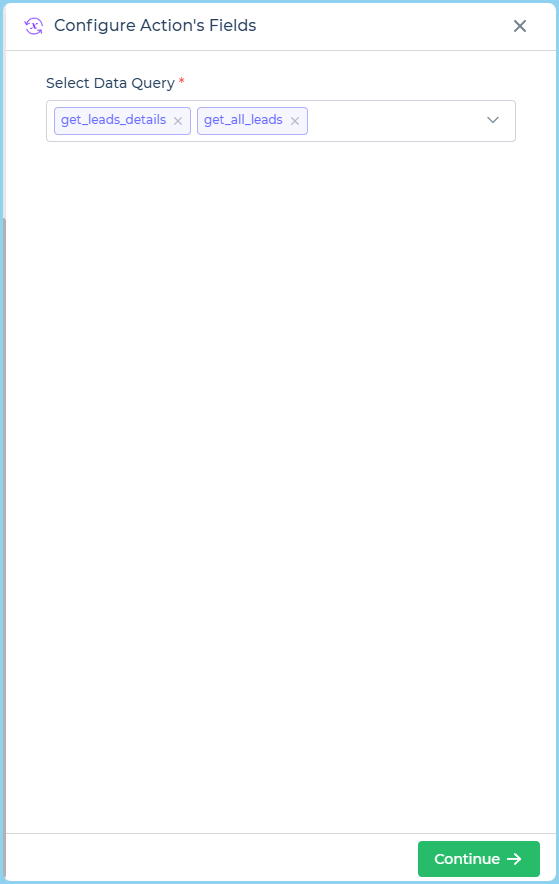
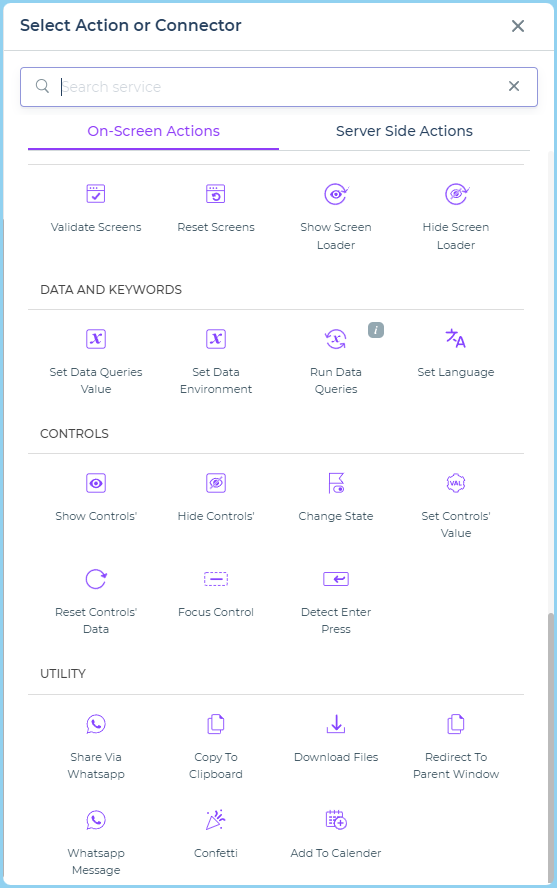
At the end add a “Run Data Queries” to refresh the table and fetch the newly edited data in the table.

DronaHQ has a growing library of native integrations to let you pull in and combine data from different sources, including your databases and APIs. So you can easily design tools that join data from Neon to data from your other repositories.
If you’re interested in using a database that is not listed on our website as an integration, please let us know about it by raising a request on our community and we will do our best to include it at the earliest.
Join our growing community on Discord, and follow us on Youtube and Twitter to stay up to date.
Related Articles