
Building a MongoDB CRUD app using low code
Building an interface for CRUD operations with MongoDB
CRUD apps are important for all internal operations. The CRUD app is elemental for easy access and manipulation of data, be it for managing products and orders, offering discounts, or interacting with your customers.
A simple CRUD app can be turned into something like Twitter (which is basically a CRUD app where users create tweets, read the tweets, like, and retweet them, or delete them) or a customer order management app (to add new order entries, modify existing orders, read through order list).
And building a CRUD interface over a database is a time consuming process where a lot of configurations need to be made. Also, for database management, schemas and queries have to be maintained on a different platform. While the UI client would be needing one more server.
Thankfully, today we have a lot of options for developers to choose from to build advanced CRUD interfaces and admin panels on top of MongoDB or other data sources fairly easily while making maintenance easier. Here, we explore how you can build a CRUD interface on top of MongoDB using low code platform DronaHQ.
With DronaHQ, you have everything under one roof and you can build the CRUD UI in minutes. Let’s see how to connect to MongoDB on DronaHQ. We are going to show you:
- How to connect DronaHQ directly to your database (eliminates the need for an API endpoint)
- How to create UI to perform CRUD operations
- How to securely share your application
- How to deploy your application
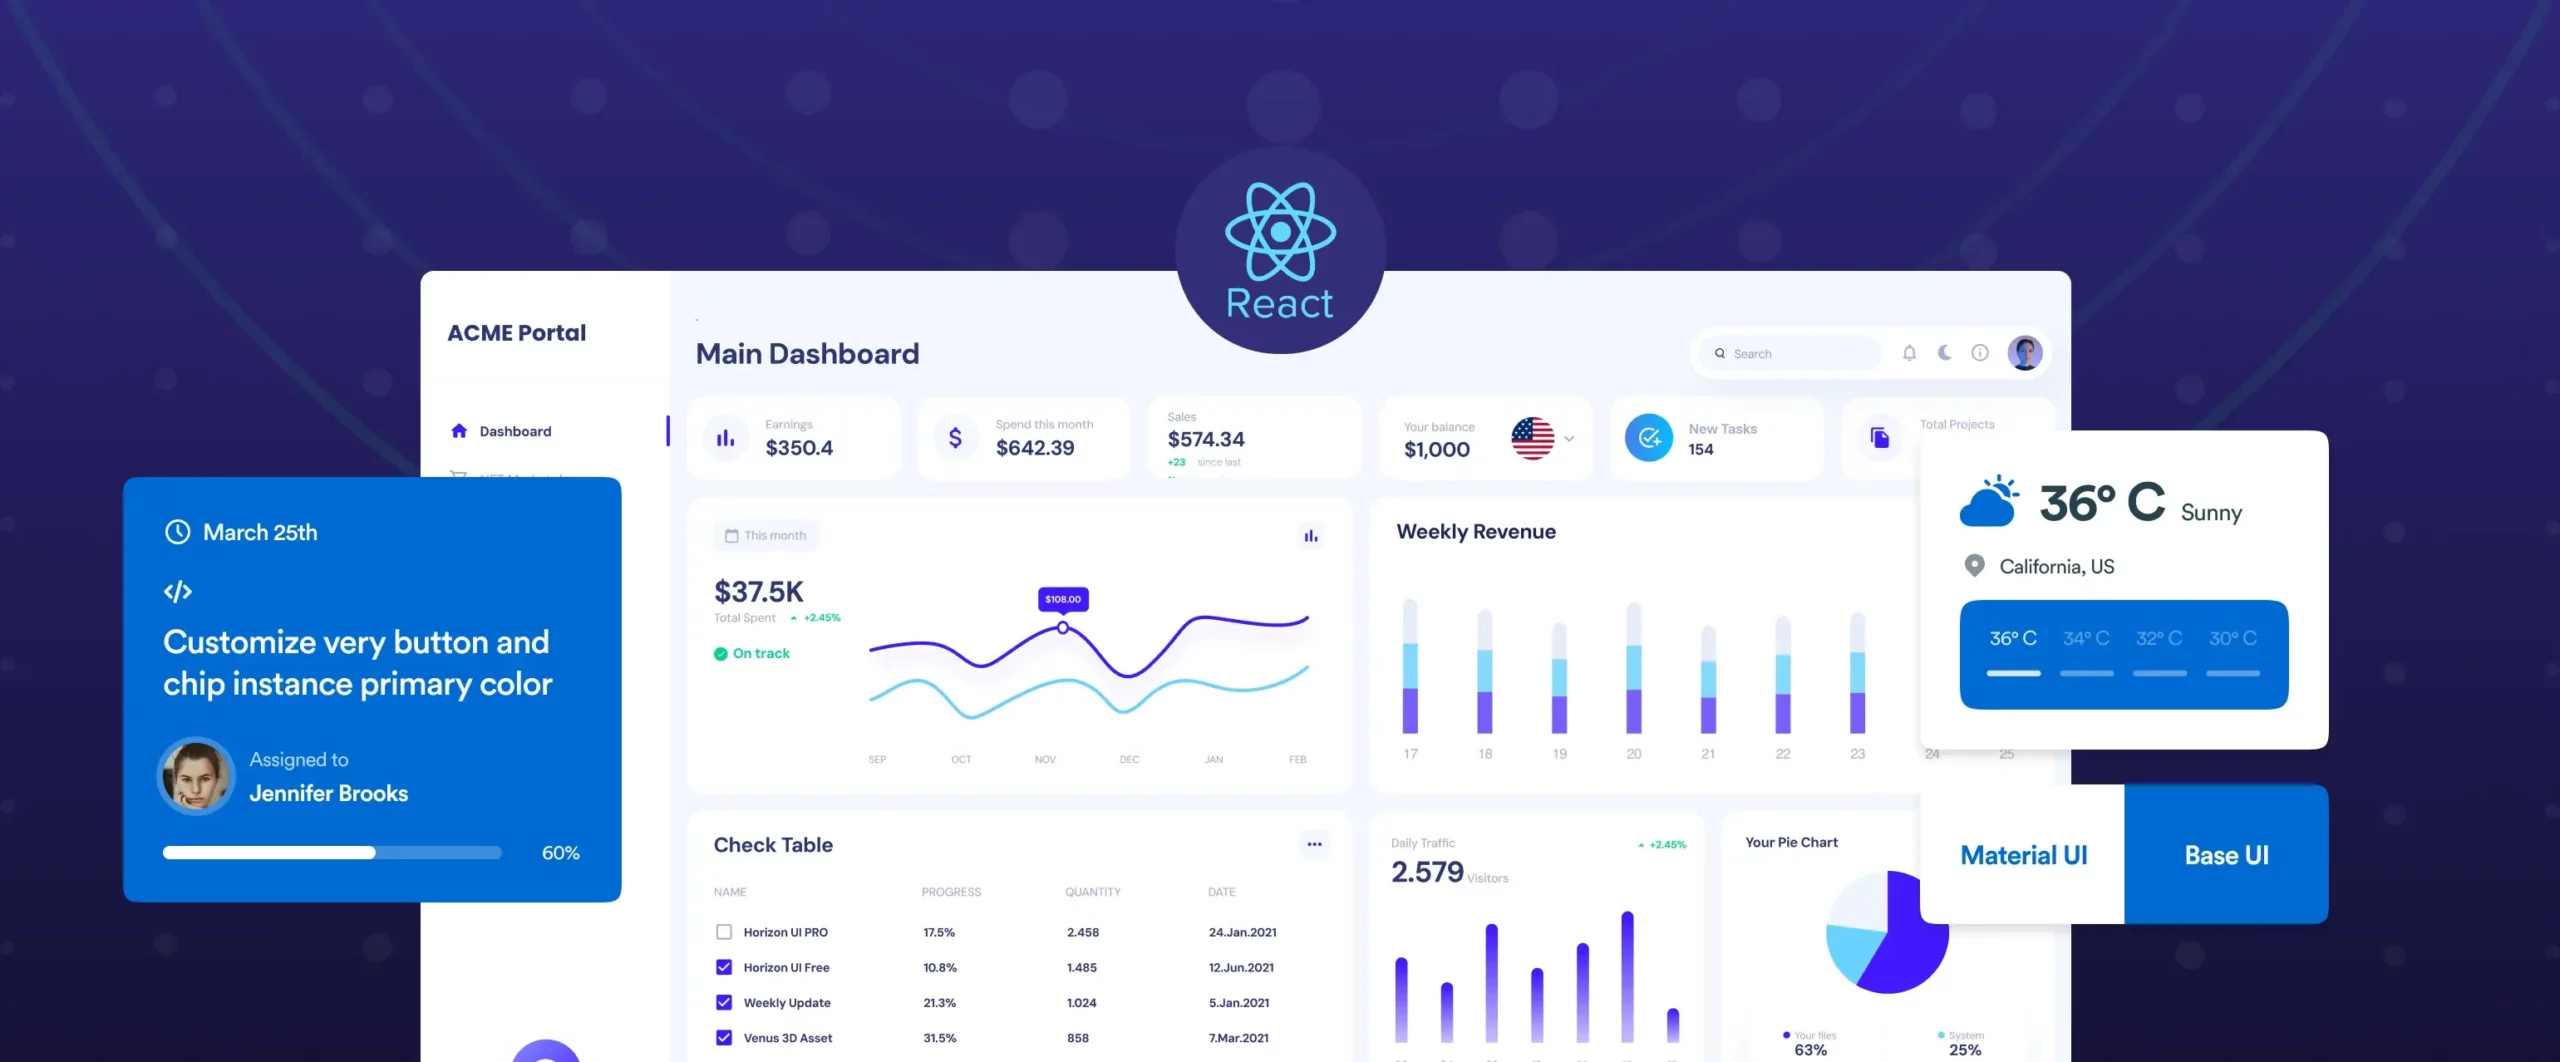
Here is what the final MongoDB CRUD app will look like >
Let’s take an example of a database with customer details that we want to build a CRUD interface for.
1. Connecting the Datasource – MongoDB
Prerequisite, you need to be signed in to your DronaHQ Studio accounts
Click on “ + Connectors” and then select “MongoDB”

Enter a name for the connector that you would like to use. This will be used to refer to the connector while you are building the app.
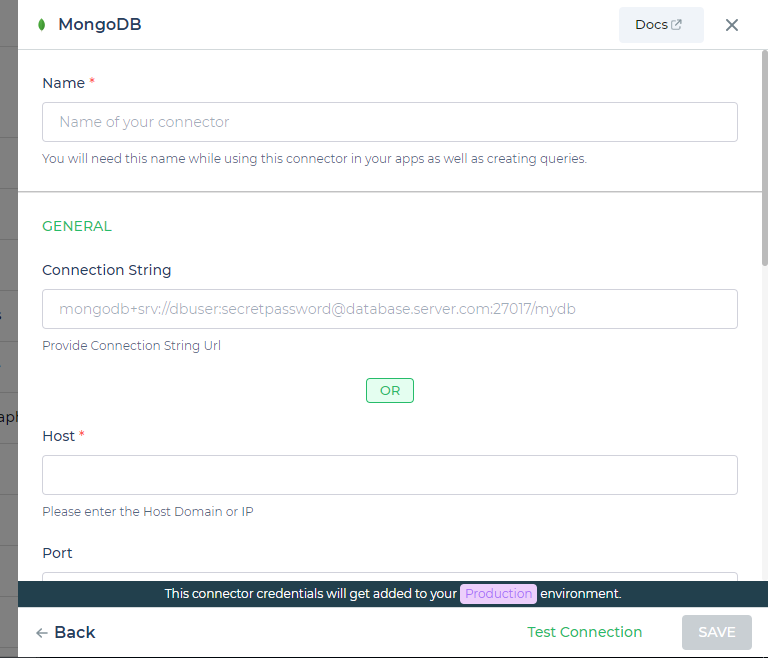
During this stage you will have to define the: Name for the Connector, and Connection String, or Alternatively, the Host, Database Name, Username, and Password.
After you are done adding a name and connection string for the connector, you can test your connection by clicking on “Test Connection” and click on “Save” to proceed with the UI designing.
With a refined integration user interface, DronaHQ cuts down the number of steps you need to take to connect to your data source. Explore integrations in DronaHQ >
Spectacular! We have now connected DronaHQ to the database and can query the database and design a user interface.
We now move on to adding queries for the actions MongoDB supports. For example, if your action is Find, the parameters would be Filter, projection, sort, limit, and skip, and you can use this to read the data. If you choose InsertOne as an action, the parameter will change to Insert as Key: Value string to write to the database. Once you have assigned the necessary values, you can Run the query. The response can be seen as per the parameters given.
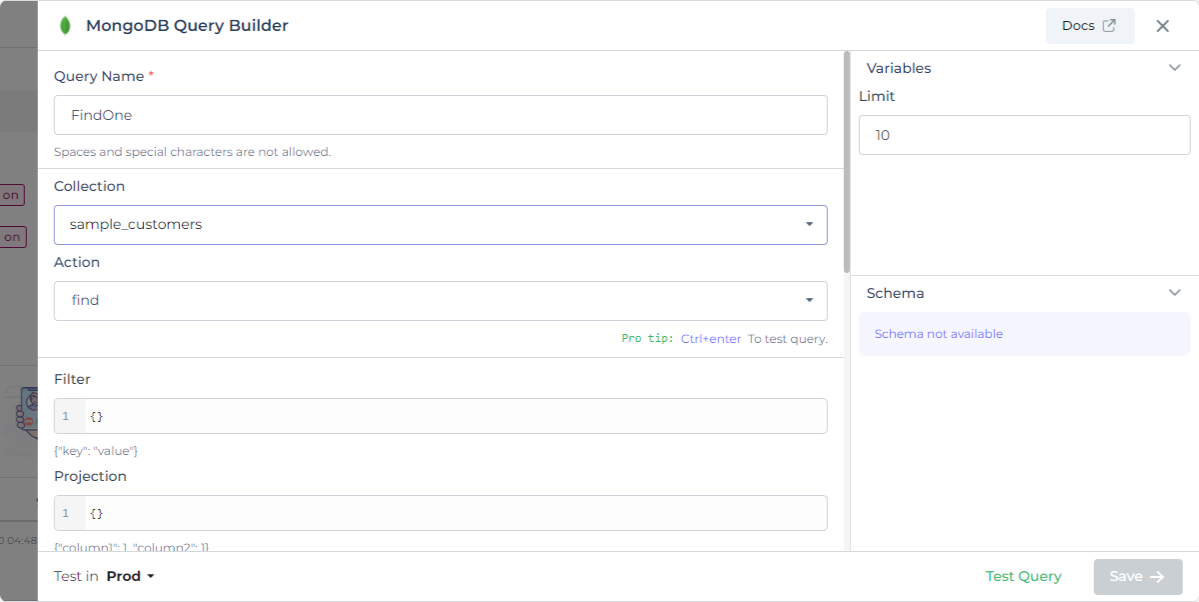
At this stage we will define the: Service name, The collection, and The action
Let’s name it “FindOne.” For our customer portal use case, I will select the “Find” action. Under the Collection dropdown menu, you will be able to see the databases in your cluster. Pick the one you want to use in your app.
Once we have assessed the response, we can “Save” and move to the next stage.
2. How to create data-driven User Interface
Click on “Apps,” and then click on the “ + “ sign to start building your app from scratch. We can also pick up a template at this stage and bind it to the MongoDB connector we configured in previous steps.

This is where we get to be creative.
READ
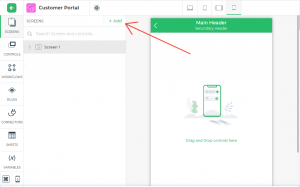
The app will open up in a new tab like in the image below. To make things faster, I will pick a template screen from the Screen Marketplace. To select an app screen, click on the “ + Add.”
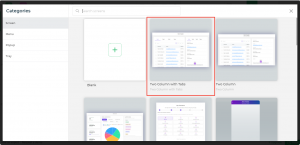
You can browse through a list of Screens, Menus, Pop-ups, Trays. For this app, let’s go with the Two Column with Tabs screen.
You will see the screen is added to your app:
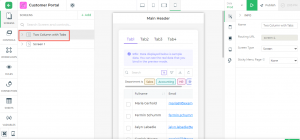
To bind the data to these UI components, let’s begin with the table grid.
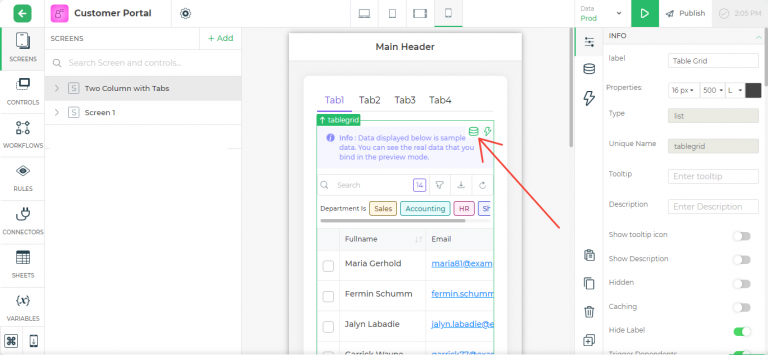
Select the table grid, click on the Database icon and head over to add the Custom Function. Here is what the formula should look like:
BINDAPI([MongoDB.result.rows.Name,MongoDB.result.rows.Email,MongoDB.result.rows.Phone,MongoDB.result.rows.Company,MongoDB.result.rows.Address,MongoDB.result.rows.City,MongoDB.result.rows.ZIP,MongoDB.result.rows.Country])
Repeat the steps for the detail view control. Since we need to display all details of the selected customer, the formula should look like this:
LOOKUP([MongoDB.result.rows.Name,MongoDB.result.rows.Email,MongoDB.result.rows.Phone,MongoDB.result.rows.Company,MongoDB.result.rows.Address,MongoDB.result.rows.City,MongoDB.result.rows.ZIP,MongoDB.result.rows.Country], MongoDB.result.rows.Name = tablegrid.name)
The table grid control is one of the most versatile UI controls DronaHQ offers. To allow more CRUD operations, we can configure action buttons in the table grid to, say, Create/Add new record, Delete a record, or Edit a record.
3. How to securely share your application
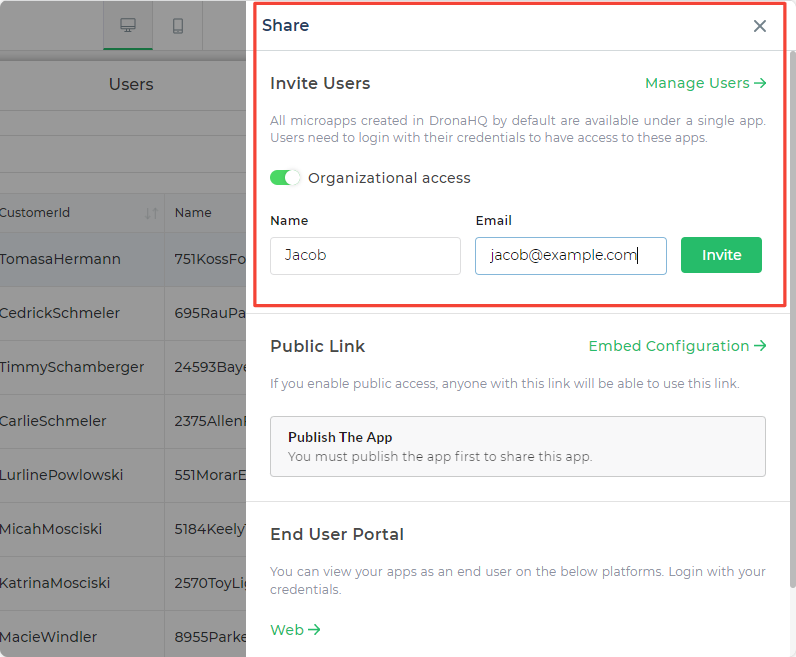
It’s quite easy to share the application to the team that would make use of it i.e customer support. You don’t have to worry about an authentication/authorization flow. Here is a quick step by step on how you can share apps by inviting your team >
There’s a SHARE button on the top right side of the page. You can easily use it to invite users to the application. In your account settings, you can also determine the user permissions – editor, app end user, and so on. Your end users don’t need to create an account on DronaHQ.

DronaHQ also supports login authentication methods that are put in place for different users and user groups. The users can be added and managed using the Manage Users under the Console Menu.
4. How to deploy your application
Clicking on the PUBLISH button to the right of the share button will publish all changes made in the builder in just a click. You can then start using this app on a web browser or an android or iOS device. Isn’t that cool?
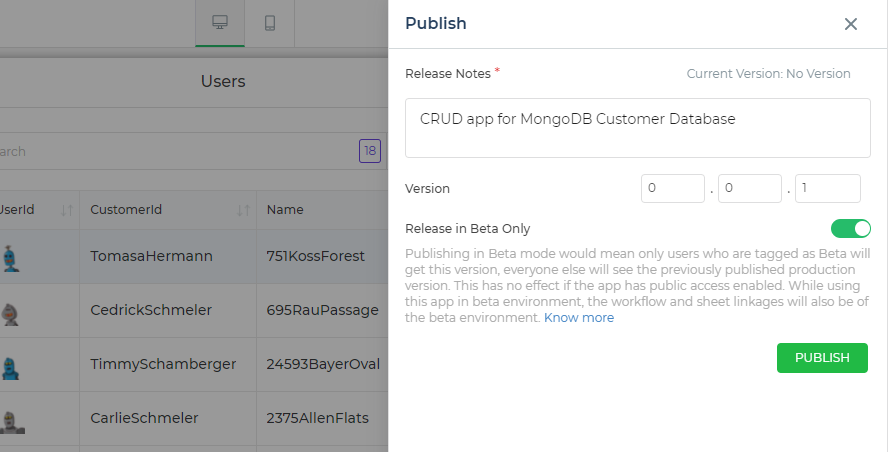
App and Data Environments further enhance the developer experience as it enables users to display and test their apps against a nonsensitive copy of the production data. Developers can work with testing environment data, release apps in beta to a set list of users, iterate upon the apps, add new features, and launch in production in an agile fashion.
Considering the main effort of most CRUD systems is figuring out requirements rather than actually building them. We set out to build a CRUD app and we’ve seen how we can do it very easily using DronaHQ. Going this route will drastically reduce the development time and resources put into maintaining the app.
Related Articles