How to build an Airtable frontend in 4 simple steps
Airtable is a cloud-based project management system that many businesses have come tp rely on. This spreadsheet-database hybrid features no-code capabilities to create and share relational databases. However, as most data sources go, you need a simple user interface to interact with the business data and creating a user-friendly frontend for your Airtable base can sometimes be challenging. In this blog post, we’ll guide you through the process of building an Airtable frontend in just four simple steps using DronaHQ.
What is Airtable?
Airtable is a cloud-based collaborative database tool that combines the simplicity of a spreadsheet with the complexity of a relational database. It allows users to organize and manage information in a structured manner using tables, similar to a traditional spreadsheet, but with the added power of database relationships. With features like flexible data fields, filtering, and collaboration tools, Airtable has become a go-to solution for individuals and businesses looking to streamline their data management processes.
Why build an Airtable Frontend?
While Airtable offers a user-friendly interface for managing data, having a custom frontend enhances the user experience and tailors the database interaction to specific business needs. A custom frontend allows you to create a more intuitive and visually appealing interface, making it easier for users to input, retrieve, and manipulate data. It also enables you to control the presentation of data, ensuring that the information is displayed in a way that aligns with your organization’s branding and workflow requirements.
While users love how they don’t need to learn SQL or how scripting works, there are situations where Airtable is not a complete solution.
- Role-based Views:
While Airtable is highly customizable, it faces limitations in terms of user-based permissions. With only three levels of permission control – Edit, Comment, and View – it may not provide the granularity needed for more complex organizational structures. Furthermore, the inability to hide certain fields from users can lead to challenges in information management. - Manual Creation of Filtered Views:
Airtable’s native setup requires manual creation of filtered views, often leading to the duplication of tables and workspaces to cater to specific user needs. This not only increases the workload but also introduces complexity and potential confusion within the database structure. - API Response Limit:
Another limitation is the restriction on the number of rows that can be retrieved through Airtable APIs – capped at 100 rows. This constraint can hinder integration and automation capabilities, limiting the platform’s scalability for businesses dealing with large datasets or complex workflows.
All this can easily be fixed by integrating the Airtable database with DronaHQ and building a quick frontend application.
Build your custom Airtable frontend tool along with us >
How DronaHQ helps overcome Airtable database challenges:
- Drag and drop admin panel – Visually design admin interface by dragging and dropping pre-built components like table grid, lists, charts, form fields, buttons.
- User Management – Granular permissions allow admins to create levels of access that a user or a group of users can have on an app. You can configure who has full access, edit access, view access, delete access and so on.
- Embed filtered views with browser caching off – Instead of manually adding filters to create user specific views or permission specific views of your table, DronaHQ allows you to embed filtered views dynamically.
- Retrieve more than 100 rows – DronaHQ’s cursor-based pagination support returns offset for the next page content instead of numeric pagination which is supported by the relational databases (like Airtable, MongoDB and so on). This feature uses the Offset value to scroll through various pages based on the previous page’s offset value.
How to build a custom frontend for Airtable data?
For the visual learners out there, we have a short YouTube video explaining the whole process in detail. In the video, we go over:
- How to connect Airtable data to DronaHQ apps
- How to design an Airtable admin panel
- How to access more than 100 rows of data
- How to create a CRUD interface to edit data in Airtable
- How to create user-based views for Airtable frontend
- How to design an Airtable Dashboard
- How to embed Airtable views with user-based filters
- How to use Actionflows to Update or Delete Airtable records
Step 1 – Connect your Airtable account to DronaHQ
- Login or signup with DronaHQ: You have to first log in/sign up with DronaHQ to start creating Airtable dashboards. If you don’t have an account already, click here to sign up for a 30-day Free Trial.
- Head over to connectors tab and select Airtable connector

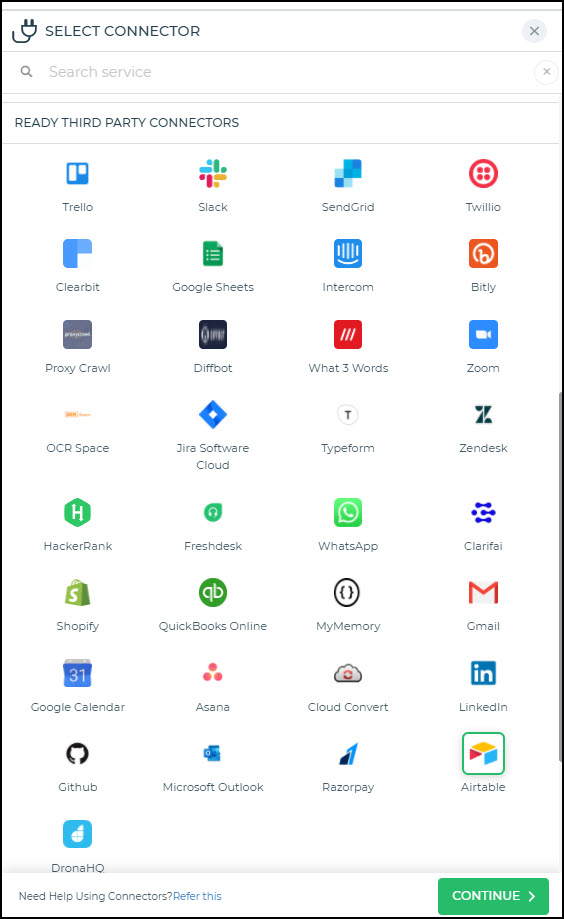
- To add the connector, select Airtable and click Continue.
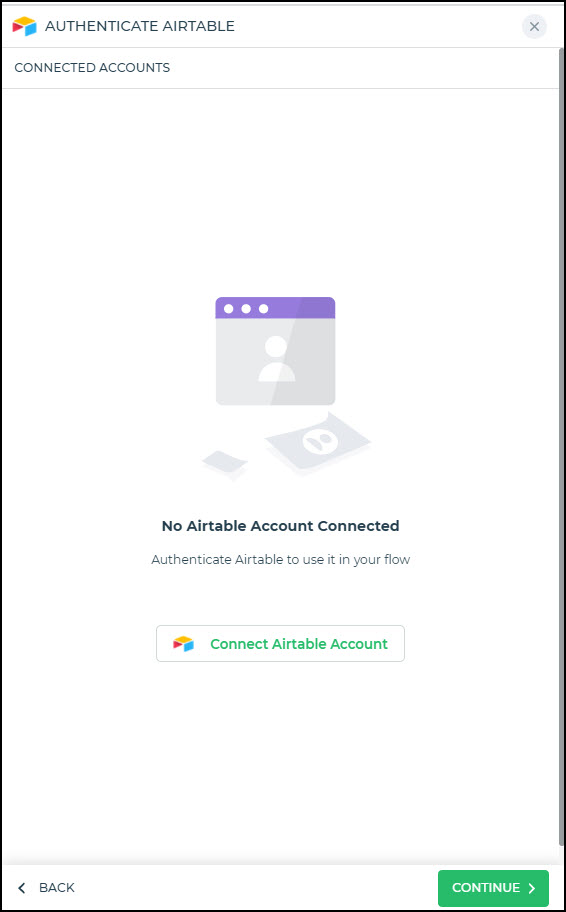
- Now you need to add the Airtable Account to authenticate Airtable. For this, you need to first configure the account and then proceed. To configure the Airtable account, under Authenticate Airtable, click Connect Airtable Account. If you have already configured your account, you simply need to choose it from the list and click Continue.

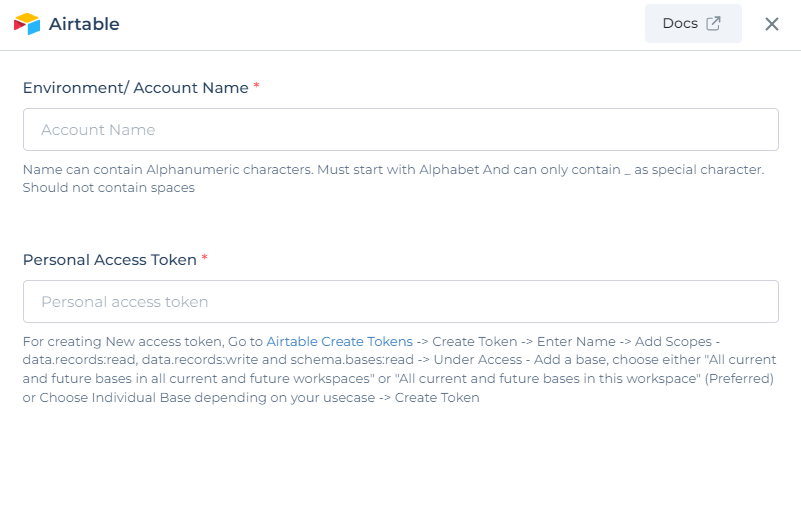
- To Configure connector fields. Add a Connector name. Then add the respective Fields for the connector account.

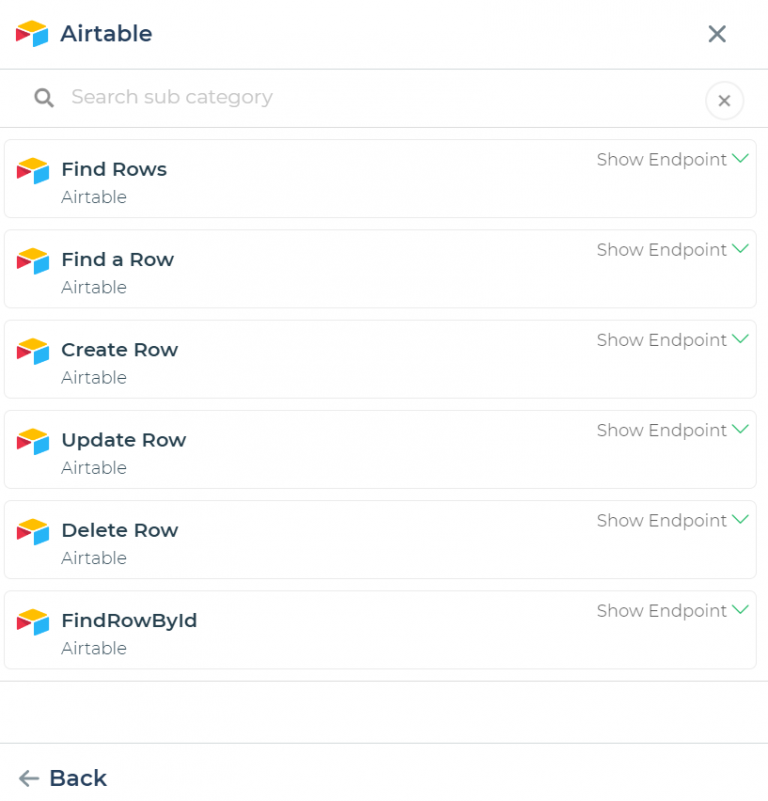
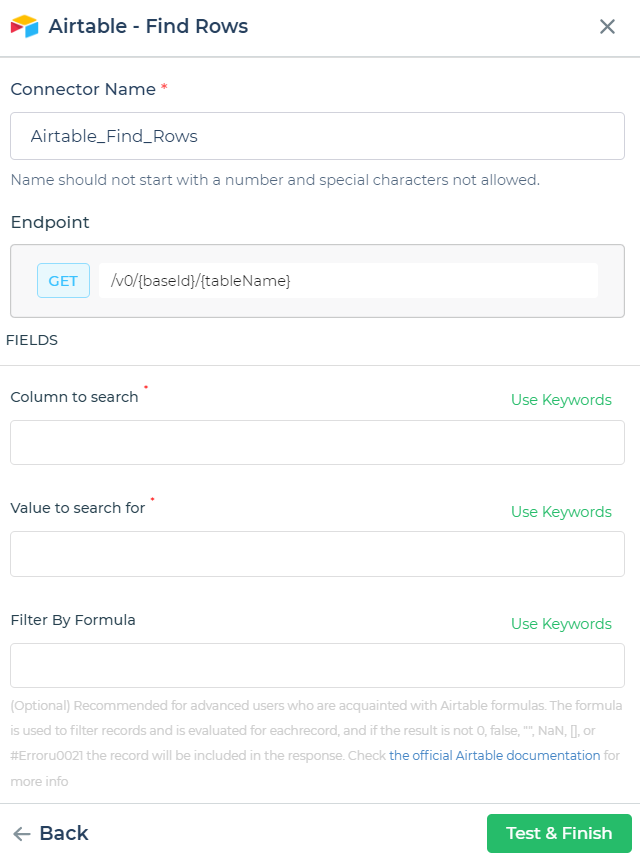
- Once all details are added, proceed selecting the action you want to perform. In this case, we want to fetch data. You can select “Find rows” functionality.

- After selecting the “Find rows” now put the required keywords in the required fields.

- After selecting all the information now you can test and finish. And your data is ready to be pulled into the frontend. Note: At this stage you can use custom formula to fetch filtered information.
Step 2 – Build the UI
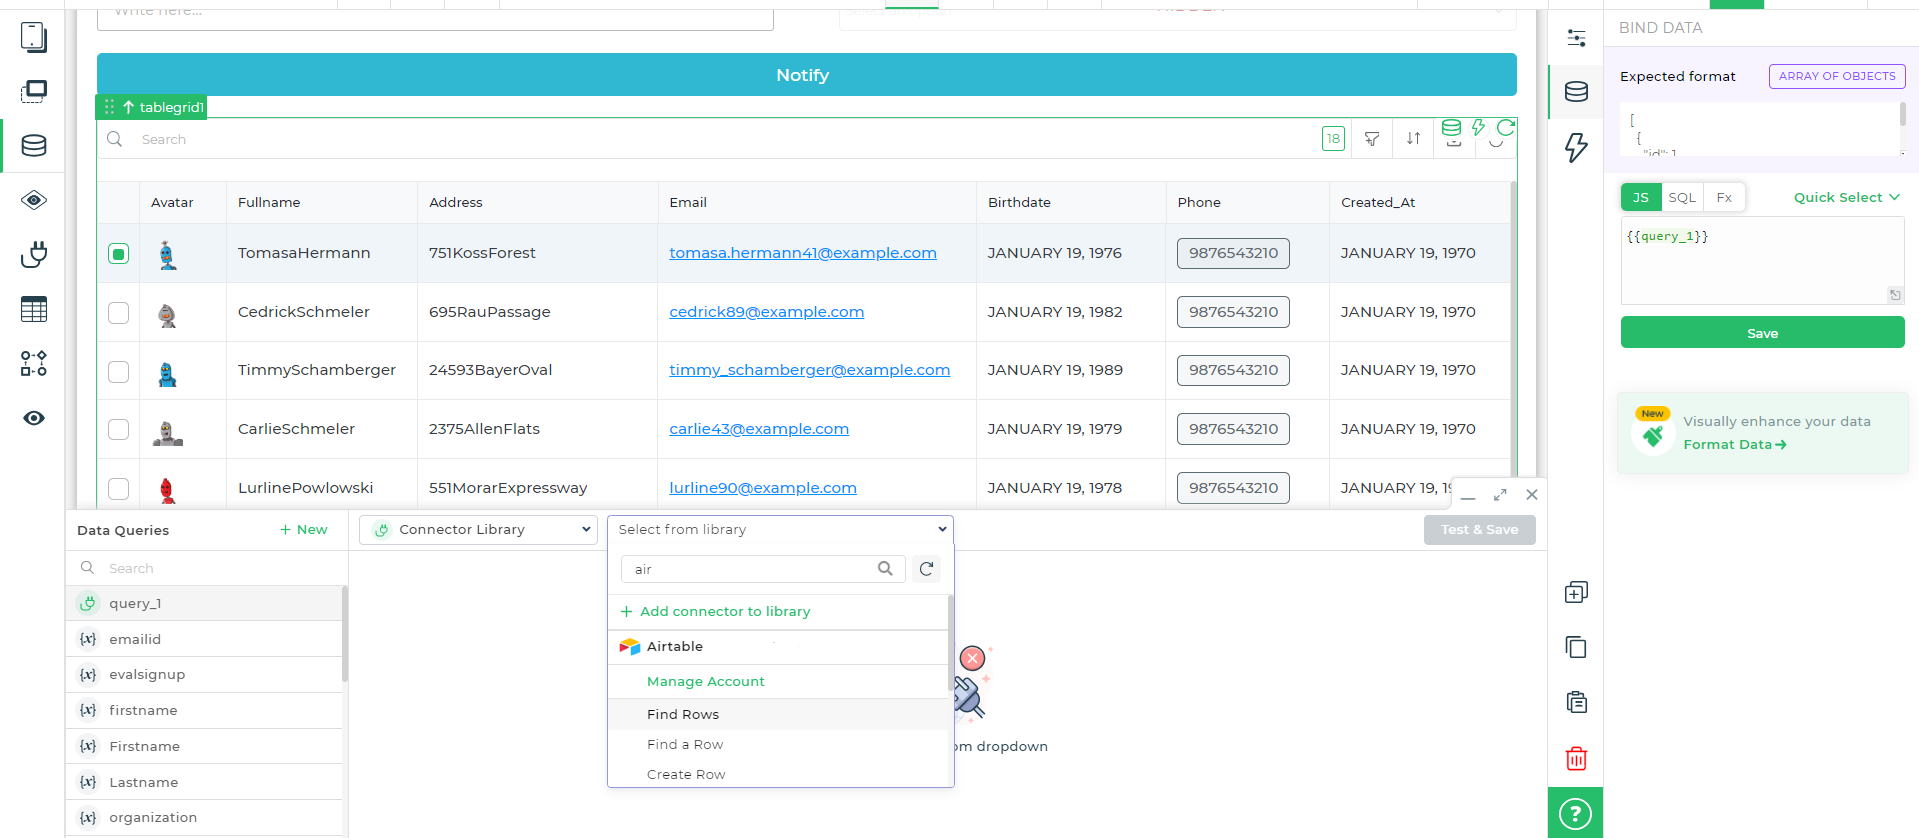
- Head over to the app builder.
- From the controls section, select the control you want to add to display your data.
- Click on the Data Bind icon and head over to data query

Step 3 – Configure the Airtable connector
- Now to pull data from Airtable, select the ‘Find Row’ option.

- Select the connector you added and click on Test and Save.
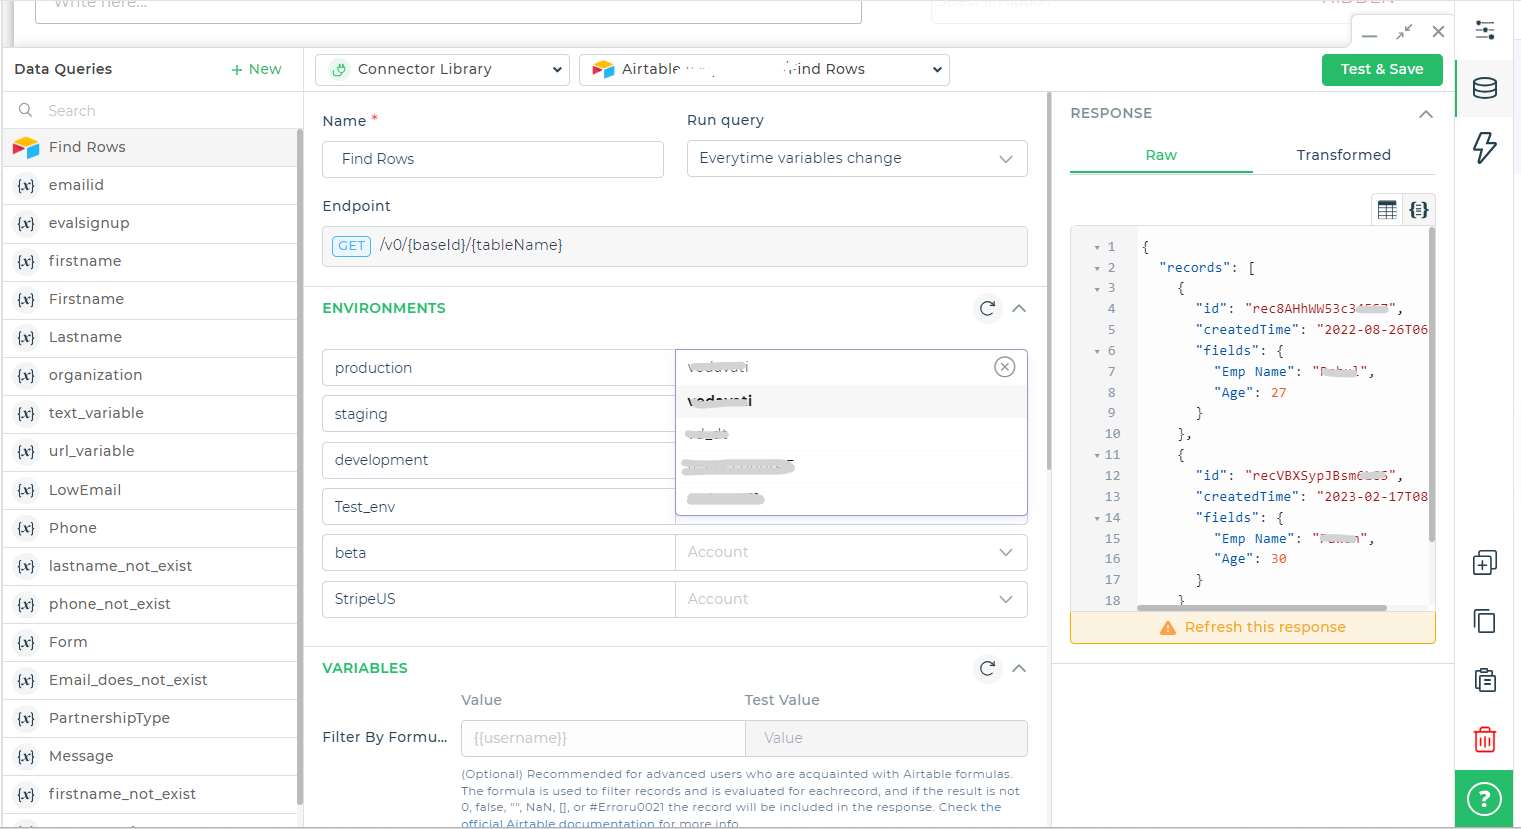
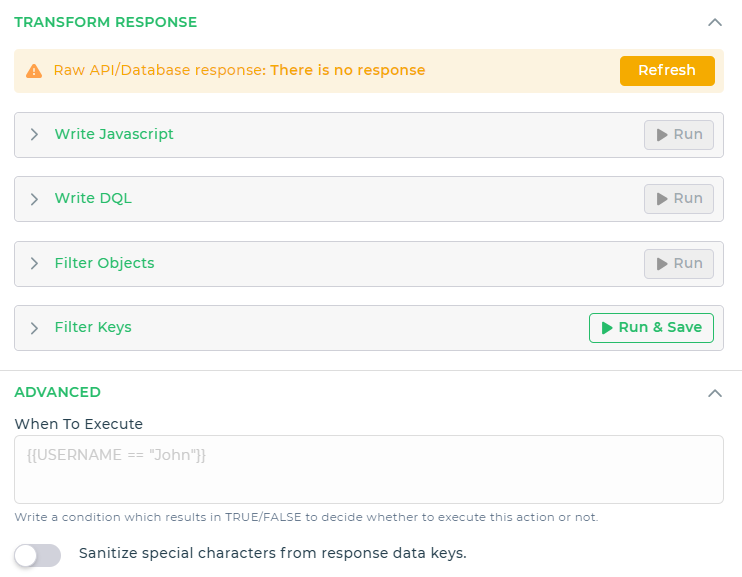
- Often times the data stored in your DB is different from how you wish to present it. In the Data Query builder, you can transform the API response to transfor the data pulled.
- Additionally, you can also configure “When to execute” conditions to control when DB queries and API calls are fired. This way, you can optimize your app’s performance and deliver high speed solution when the amount of data pulled increases.

- Based on the UI control you are using, you can map the API response to the UI control. (Learn more about DronaHQ’s library of 100+ UI controls)
Step 4 – Connect Away!
Once you do this for all controls, your admin panel is now ready! You can preview it to ensure it works and publish it when ready to share it with your organization.
The same sequence can also be used to configure and customise more complex frontend.
Wrapping Up
Follow along and learn how to build a frontend for your Airtable data. See how you easily build a powerful front end for Airtable as a database, learn how to send data to Airtable from an app, and create secure access controlled views for different users. Easily build front-end web apps for Airtable instead of Airtable’s limited Form view
Signup for DronaHQ and build your app in minutes.
AI-powered Airtable frontend with DronaHQ:
DronaHQ empowers users to build AI-powered apps seamlessly. With DronaHQ’s capabilities, you can integrate artificial intelligence functionalities into your custom frontend, opening up possibilities for advanced data analysis, predictive modeling, AI chatbots, and intelligent automation. This addition can significantly enhance your application’s capabilities, providing valuable insights and automation to streamline your workflows.
Related Articles