
Build an app on top of Google Sheets
Owning to its flexibility, high accessibility, and easy-of-use, Google Sheets is the tool of choice for many teams to store, access, and control their data. This spreadsheet software boasts a rich set of features and add-ons that has turned it into a common starting point for internal tools for smaller teams. Building an app on top of Google Sheets is a smart way to add value to the tool.
DronaHQ provides a fast way to build an app on top of Google Sheets to help teams handle business data productively, provide security and good user experience. We built a native integration to quickly connect Google Sheets to DronaHQ to build user interfaces over the structured data storage that is the power of Google Sheets.

Say you are a marketing team lead, you can pull in planned content topics from the Google Sheets and assign it to a team member in the click of a button. Or, to manage order return, you pull in shipping partner detail from your google sheets to schedule the pick up via the shipping partner of a selected region.
This article walks you through the process of connecting your Google Sheets to DronaHQ and building a custom frontend apps on top of it.
Use case: Assign Leads in Google Sheets to Sales Representatives
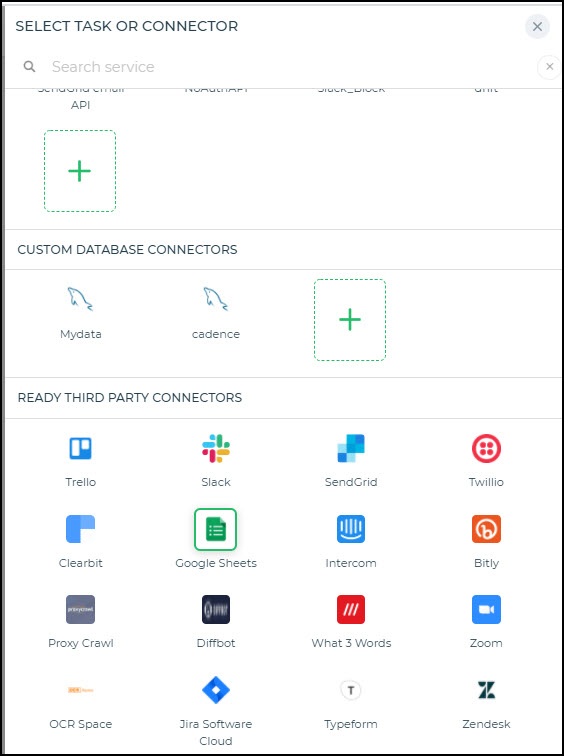
The Google Sheets connector is available under Ready Third-Party Connectors.
- Select Google Sheets and click Continue.

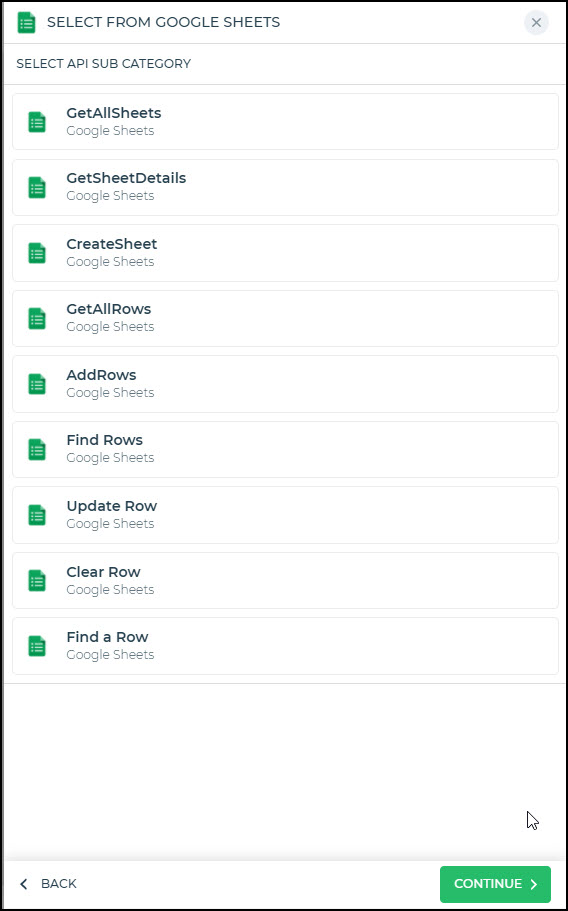
- Select the Action from Select from Google Sheets and click Continue.

- Now you need to add the Connected Account to Authenticate. If you have already configured your account, you simply need to choose it from the list and click Continue.

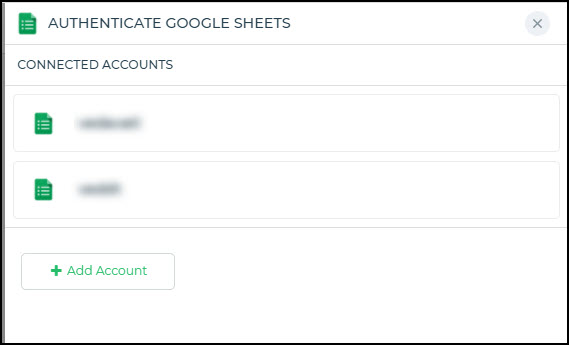
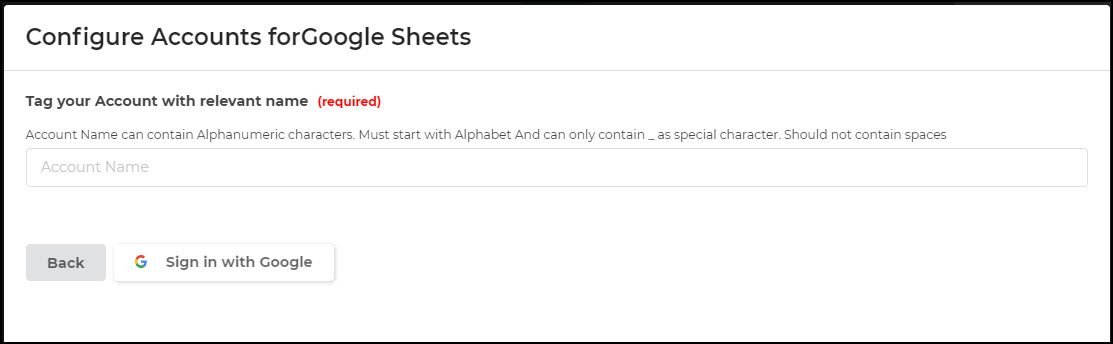
- If you have not configure your Google Sheets account before, follow this step:To configure the account, under Authenticate Google Sheet, click +Add Account. Tag your account with the relevant name and click Sign in with Google. Choose your respective account and authorize access to the sheets and other files and you are done.

- Now Configure connector fields as per the action you want to carry out.
- Add a Connector name and add the respective Fields for the connector account
Once all details are added, click Finish. Your connector configuration is now done.
2. Using the Google Sheets Connector
Get all rows
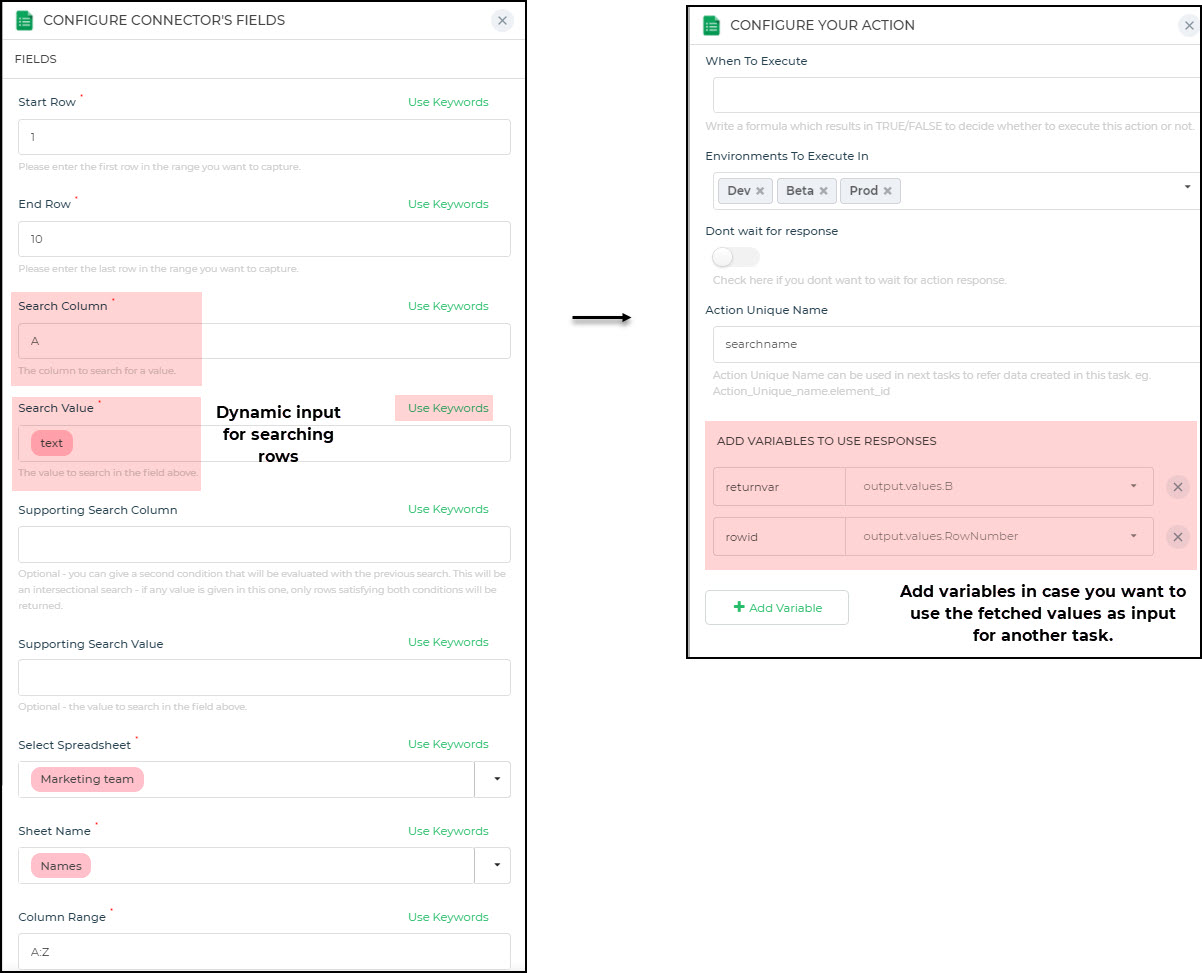
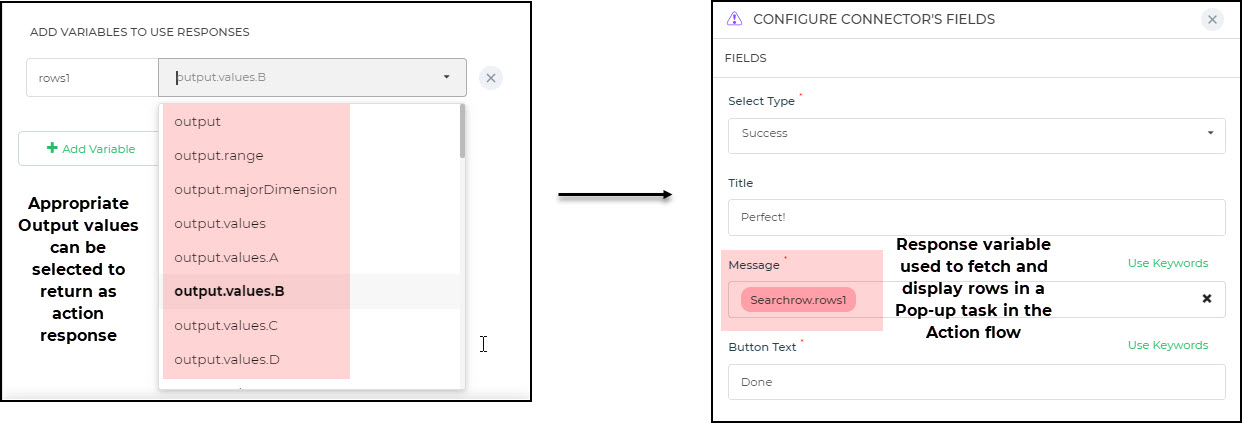
To fetch all rows matching your criteria you can use the GetAllRows connector action. To configure fields provide the dynamic values using the keywords. You can add variables to return a response value to this connector. There are several Output values returned that can be used as required. In this example shown below, we will first fetch all the rows matching the Search Value which is a dynamic value provided using the keywords.
Then we will be using variables to fetch the data from column B for the searched rows. You can see here that we have also used the Row number as well as a return value. These Row number values can be used in other use cases or scenarios like updating rows, deleting rows based on certain conditions, and so on.
Find a Row
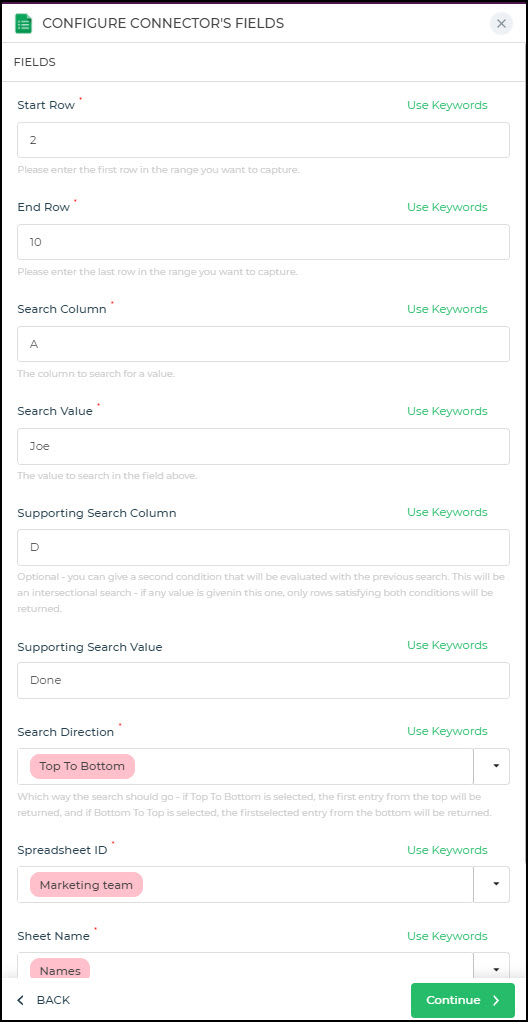
Now you can also find a row based on criteria. In this case, the output is a single row only. So based on what you provide as the criteria the first one that matches the criteria is displayed.
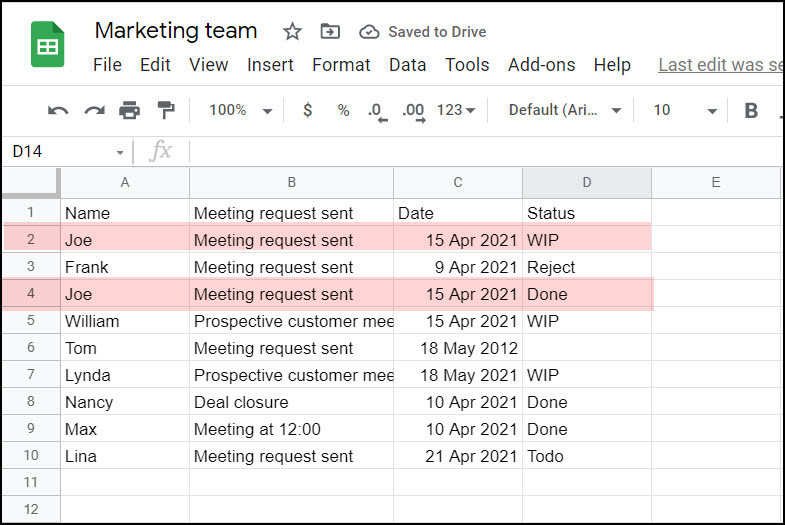
Now if we take an example to find a row from the Marketing Team sheet which contains the name “Joe” you can see in this sheet that there are two rows matching the criteria. However, this action will fetch only the first row that matches the criteria. Add the Search Column and the Search Values. In the example, if we specify that the row to be searched would be searched from top to bottom, then in that case we would get Row number 2 from the sheet as in the example below. You can add a Response variable to return the Output values. You can fetch all values or from a particular column using output.values.A. The first matching row would be returned.
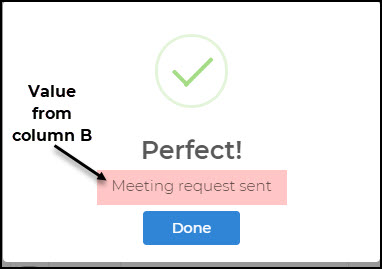
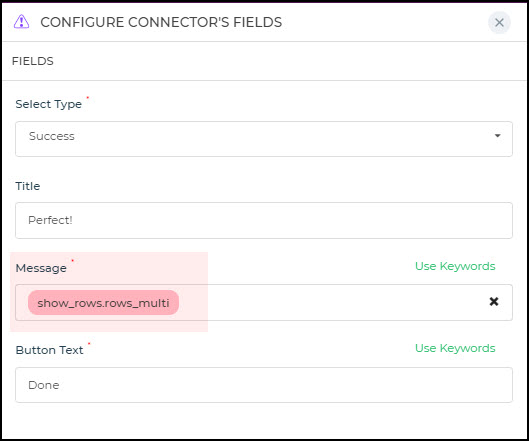
In the next action like say a Popup task, you can use the response variable and then display the values fetched.
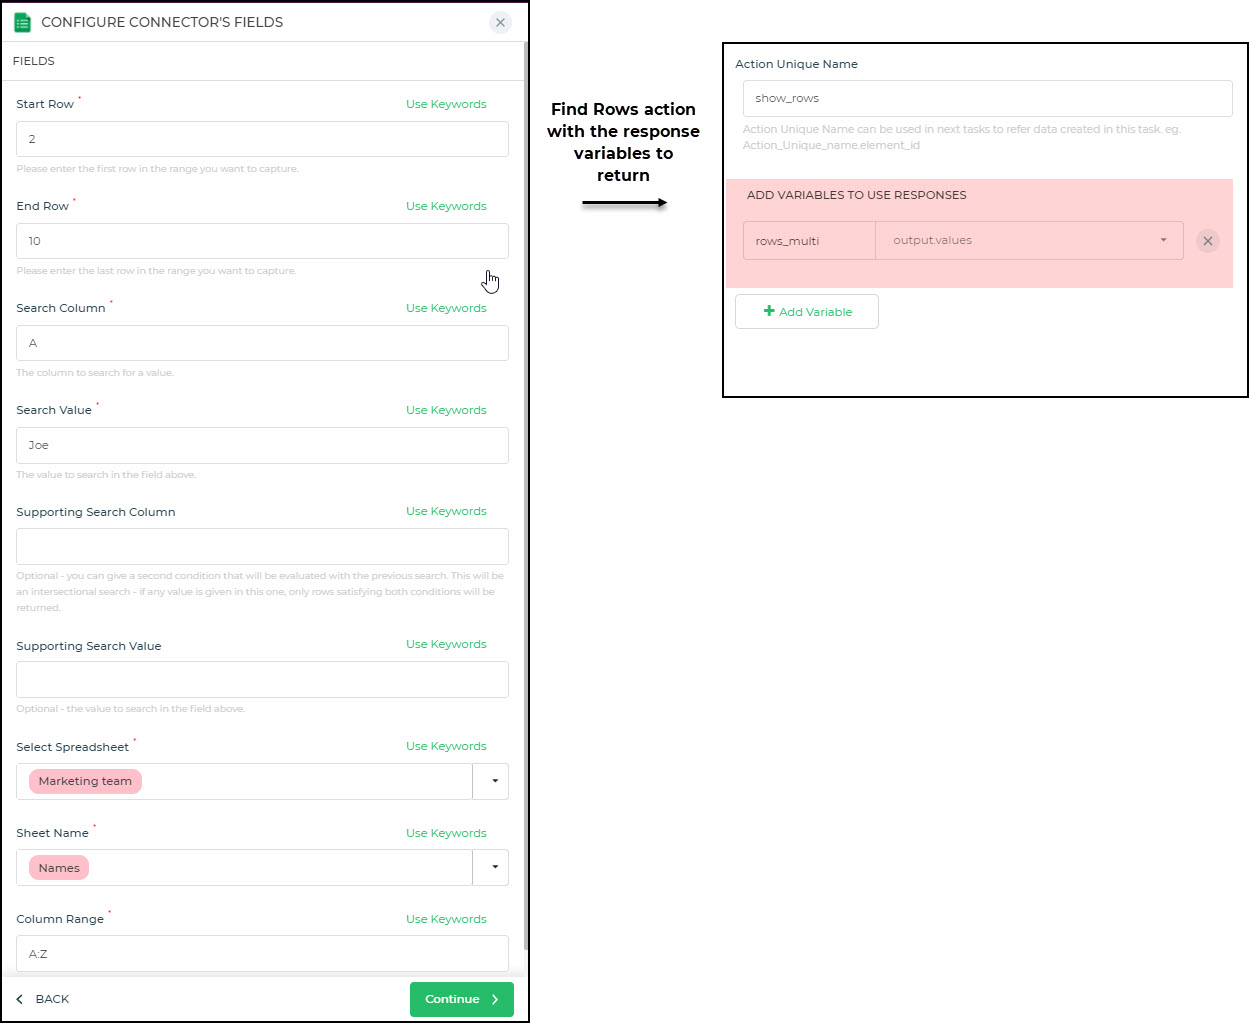
The Find Row action searches and fetches only the first row that matches the criteria. However, if you want to find all that match the criteria, then you can use the Find Rows action from the Connector. So based on what you provide as the criteria all the rows that match the criteria are fetched.
Now if we take an example to find a row from the Marketing Team sheet which contains the name “Joe” you can see in this sheet that there are two rows matching the criteria.
Both the rows will now be fetched. In the example, if we specify that the row to be searched would be searched from bottom to top, then in that case we would get Row number 2 and row number 4 from the sheet in the example below. So it returns an array of matched rows.
Now in this case as well you can make use of the appropriate Response value to return to the next task.
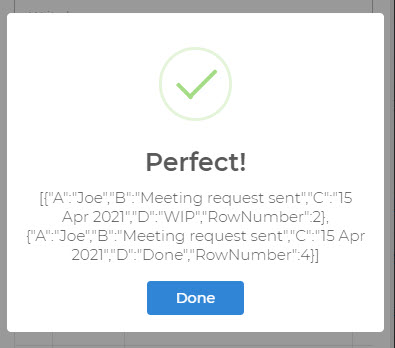
Now, whenever you run this form you would get an array of the rows matching the criteria fetched. You can see the pop-up task taken for this example. Note that all the matching rows are fetched and displayed as an array.
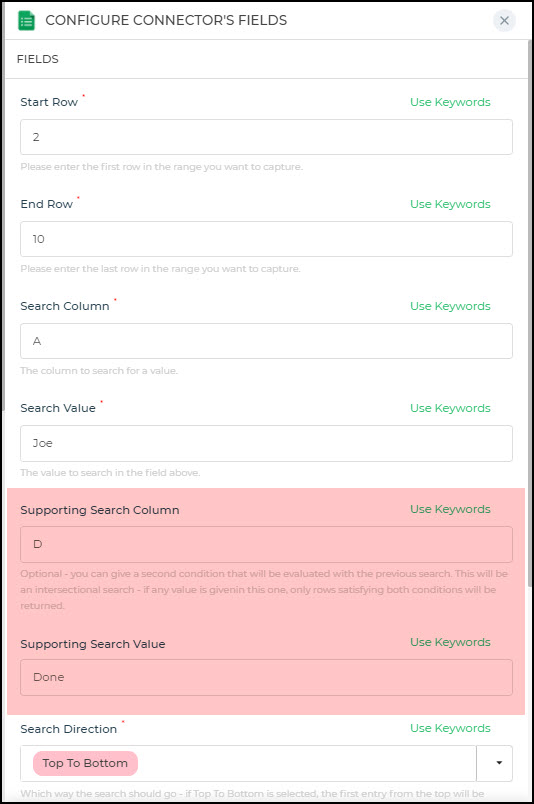
Another feature available in both the actions is to add an additional Supporting Search Column which is an optional criteria. So whenever the condition is specified, only the row/s that match both the criteria will be fetched.
Add a new row
You can also use the integration to add a new row to the google sheet. The Google Sheet connector has an Add Rows action that can be used to add new rows to the sheet.
You can provide dynamic values using the keywords as input to the add new row function.
You simply need to add the SpreadSheet Name, the Sheet name, and Column Range. The fields from your sheet would be listed out. You can then bind them to the respective controls and the row/s would then be inserted into your sheet.
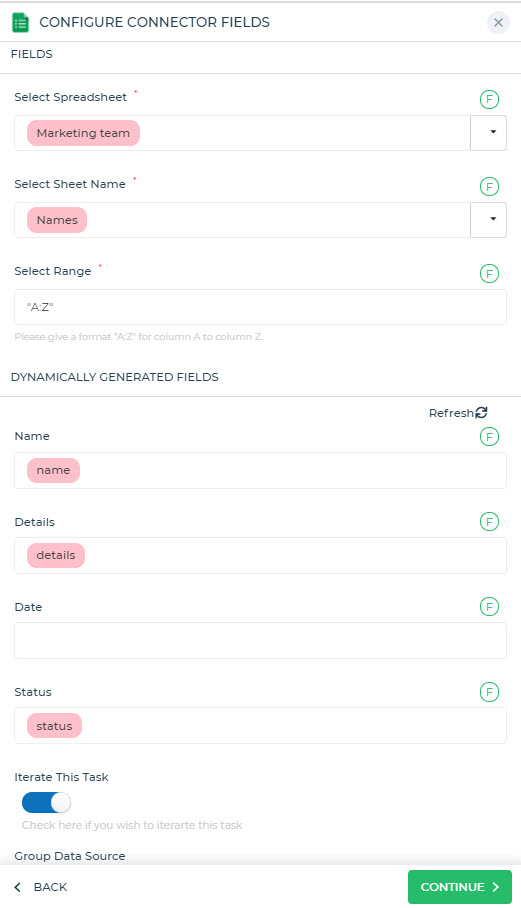
Now, whenever you want to add multiple rows you can enable Iterate the Task so that multiple rows can be added with the multi-repeat controls that you may be using.
Update row
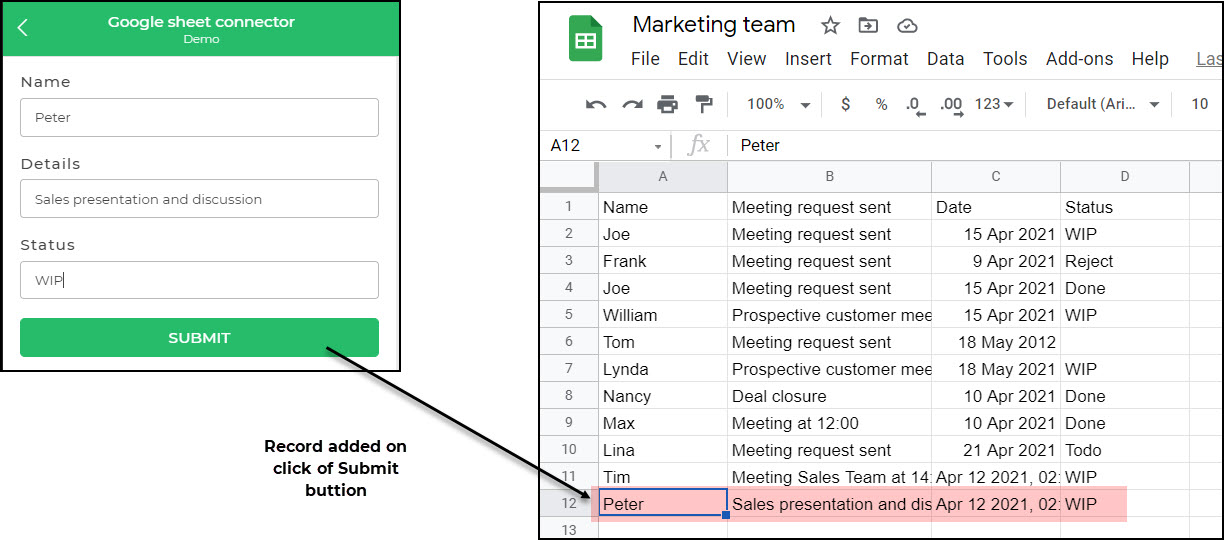
Now in a situation where you want to update the specific rows in a Google sheet with some specific values, you would typically have to search the row, get the row number and then update the specific column with the specific values. In that case, we have seen how we can search a row and get a row number. We can then use this row number to update the record.
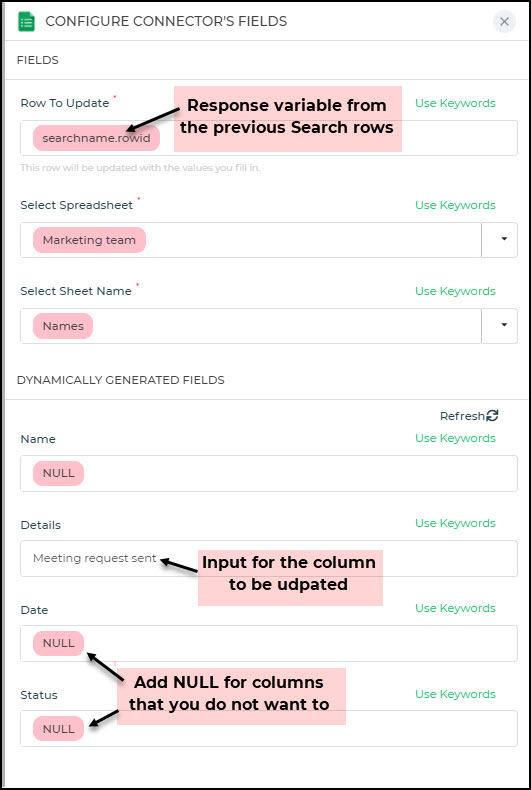
Let us take the same example to search we used earlier in the Search sample. We have fetched rows for the particular Team member’s Name. Now we want to update the Details for the Name. So we will provide the value returned for row id as the Row to Update and then add the details to be updated.
Notes
- It is important to remember that when you are updating any row and you do not want to update some of the columns then in that case you should Use Keywords as NULL. This ensures that the column is not overwritten. The original value is retained. Only the column/s with specified inputs are updated.
A few Google Sheets App use cases
Simple lead manager
Leads from an event, webinar, survey, website – you have got a ton of sources that collect and store leads to your Google Sheets. However, you may not be able to record custom fields or maybe you need to create custom role-based views.
With a custom frontend on top of this leads sheet can help you create interactive experiences to, say, add notes, transform lead data for MQL or SQL activities, create role-based views of the data while at the same time keeping underlying data untouched. A stationery production company streamlined their CRM with custom tools that looks up leads captured in Google sheets from various campaigns and uses the tool to assign those leads to sales rep.
Return order management tool
If you run an online store you have your logistical operations teams heavily reliant on Google Sheets for processes like shipping and delivery partner management, delivery tracking, return order status and so on. Look Up Tool – Choose Location, and returning info from Google Sheet, and then selecting the return vendor
Say you get an order return request so you need to look up the order, choose the location and then find the return vendor to pick up the order from the customer’s location. A manufacturer sped up and refined return order management this process with an admin tool that automatically looks up the return vendor details from the Google Sheets when a order return request gets approved.
Frontend for inventory management
Whether it is to manage your retail store inventory or in-office pantry inventory – you probably have a team of users dependent on Google Sheets to track inventory and plan stock replenishing activities.
With too many sheets being referenced by too many users – you run the risk of your data getting edited or incorrect quantities being entered – that ends up corrupting the source of truth. With a custom admin panel on top of this Google Sheet, DronaHQ can enable you to perform basic CRUD operations so you don’t risk your team accidentally deleting rows or manipulating the wrong cells.
Here is a video tutorial if you want to follow along to build an app on top of your Google Sheet.
Related Articles